Diesel Motorhome Chassis Service
Helpful DIY Tips on How to Service Your Own
Class-A Diesel Motorhome Chassis
Article Date: August, 2009
Article and Photography by Mark Quasius
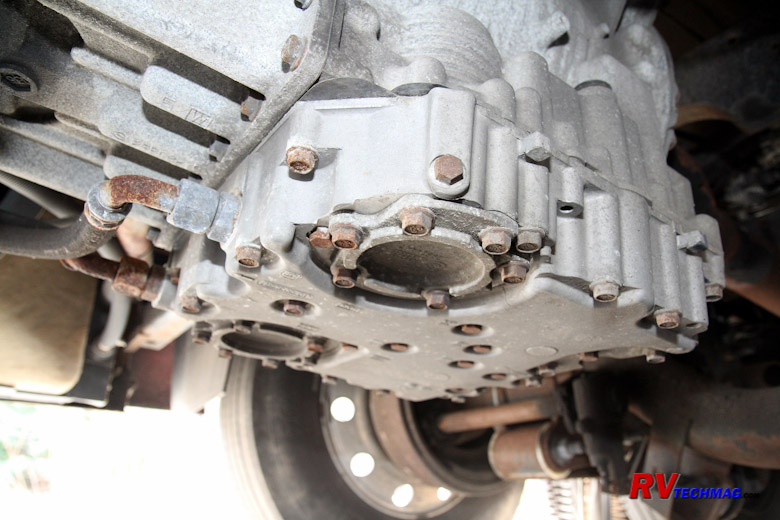
Rear Axle and Driveshaft
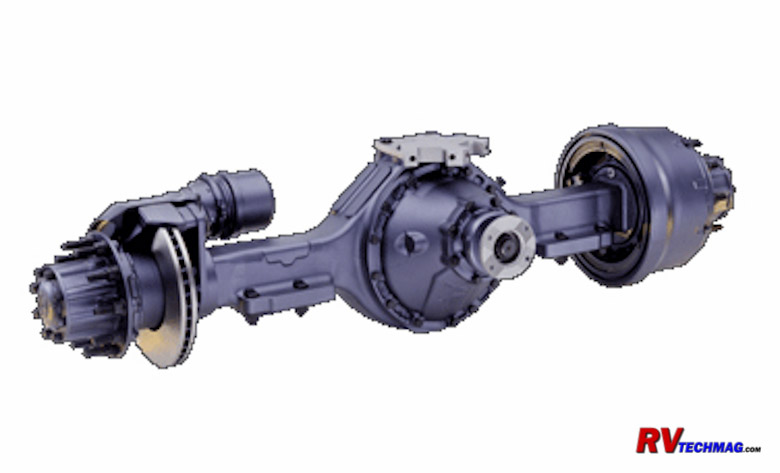
Rockwell Rear Axle
Your rear axle is filled with gear lube to keep the axle gears and bearings all properly lubricated. An access plug is located
in the axle to provide a place to add lubricant as well as check its level. Any gear housing filled with lubricant is typically filled to one third
capacity, but never over half. If the entire housing were filled up there would be no room for expansion and the foaming lube would blow the seals
out. Stick your finger in the "level" hole and you should feel the gear lube come right up to the threads. Refer to your service manual for the exact
location of the plug. Some are on the front by the pinion and some are in the rear cover. To drain the axle fluid a drain plug is probably located at
the base of the housing. Gear lube is fairly thick so it will help if you've just run the RV for a short while to help heat up the gear lube so that
it drains better. Follow the manufacturer's recommendations and add the proper amount and viscosity. When you get close, keep an eye on the sight
hole to prevent overfilling.
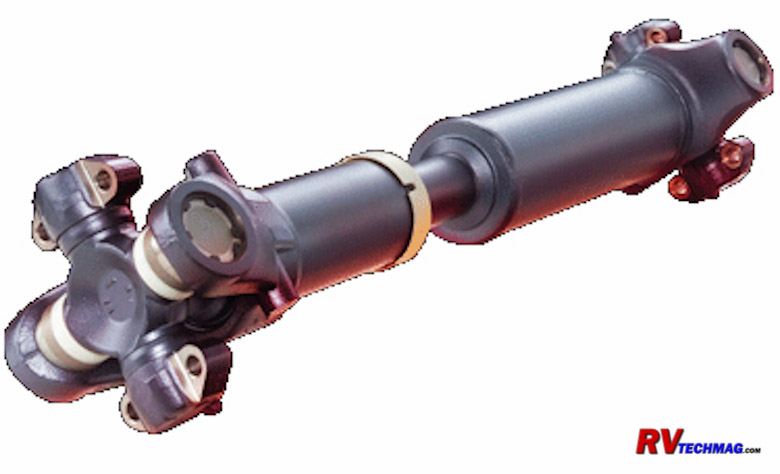
Driveshaft and Universal Joints
The driveshaft on a diesel pusher is fairly short and hard to get to, especially if you have a tag axle. But it is critical that
you grease it regularly just the same. Each universal joint will have two grease fittings, opposite each other. Grease them until you see fresh grease
oozing out of the bearing caps. Be sure to wipe off any excess grease to prevent it from slinging around when the driveshaft rotates, and making a mess
for you to crawl around in next time. There is also a splined slider joint that allows the driveshaft to change length as the suspension moves up and
down. Give this fitting a couple of pumps of grease but that's it. If you keep pumping away you'll have grease all over the place and this joint slides
slowly and isn't as heavily loaded as the needle bearings spinning around in the universal joints.
Hydraulic System
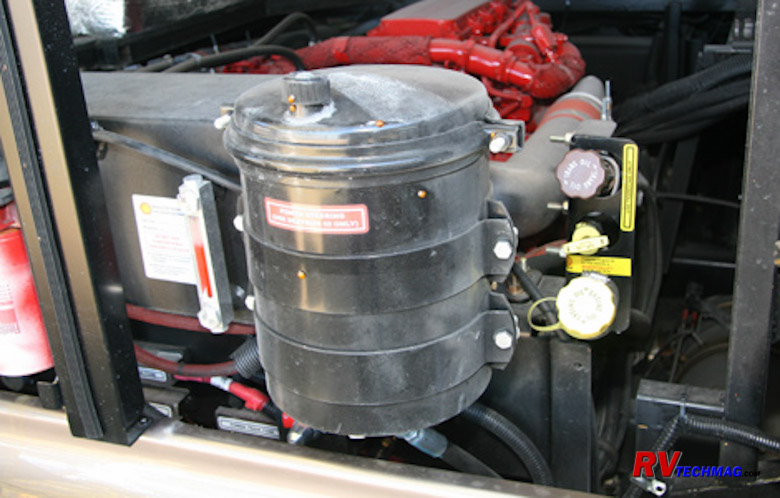
Hydraulic Fluid Reservoir
Your coach relies on hydraulic oil to operate the power steering system. This oil is stored in a reservoir at the back of the
coach and generally looks like the above example. An engine driven gear pump circulates this fluid through an oil cooler and eventually the power
steering gearbox up front. If you have a rear radiator the fan is belt driven and may or may not be controlled by a fan clutch. However, if you have
a side mounted radiator your fan will be remotely located and not very easy to drive with a belt. Some chassis do use a jackshaft and gear reduction
boxes to allow a belt driven fan drive system but the majority of side radiator coaches use a hydraulic fan motor that is driven off the same
hydraulic pump, cooler, and reservoir as the power steering.
Regardless of whether your hydraulic system drives a radiator fan and power steering, or just the power steering, it will need
occasional service. There is a dipstick at the top of the reservoir for checking hydraulic fluid level. Various fluids have been used on various
chassis. Some use a Dexron type automatic transmission fluid, some use 15W-40 engine oil, while some use dedicated hydraulic oil, such as an AW46.
Check your owner's manual for the proper fluid as well as for the service schedule for that system. The reservoir does have a mesh type steel strainer
filter inside that needs to be changed, most likely every other year. In addition, a spin-on hydraulic filter is also provided. This filter typically
is replaced annually. On that filter you will find a filter restriction gauge. If this gauge goes into the red zone while the engine is running your
filter is plugged and should be replaced regardless of whether the service schedule says it's due or not.
|

Hydraulic filter restriction gauge
|
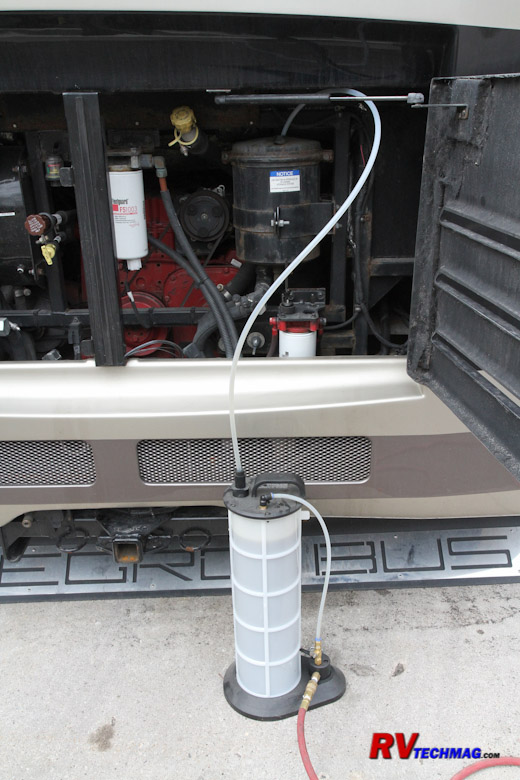
A vacuum drainer helps to empty the hydraulic reservoir
|
Replacing these filters can get messy. There usually are no shutoff valves present so once you spin off the filter, you'll
have oil pouring out of the housing. You need to be quick and then clean up or else you can drain the reservoir first to minimize the mess. If you are
replacing the reservoir strainer you'll need to drain it anyway. In that case it's easier to fill the reservoir up most of the way with the cover
removed until you get close. Then reinstall the cover and use the dipstick to check your oil level as you finish topping off the system. Run the
engine for a bit to purge any air out of the new filter then let it sit and rest while the foam dies down before rechecking the oil level.
Tires
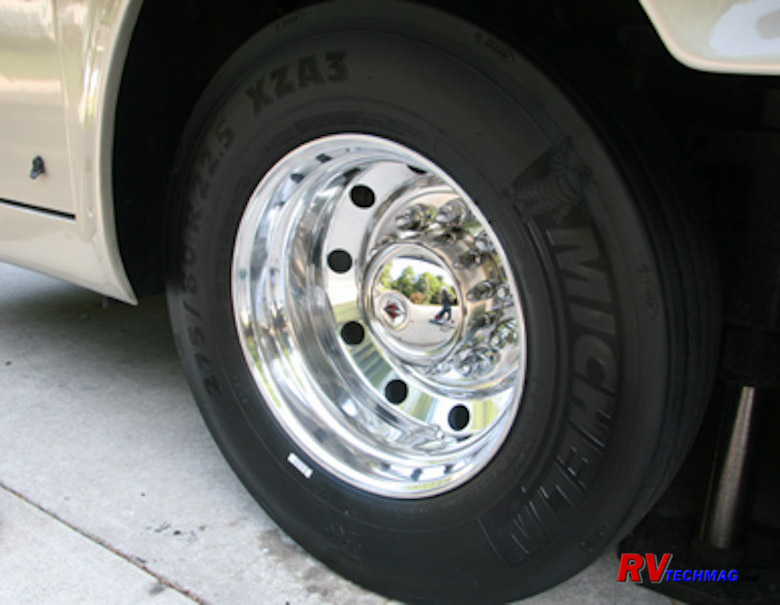
Tires are another important safety consideration. Tires die when they fail to hold air, either because of a puncture or blowout.
Tires need to be properly matched to the load that the RV will place upon them. If the tires are properly matched, and the correct air pressure is
maintained they should last a long time, barring any road hazard damage. Over the road truck tires generally are replaced when their tread is worn to
an unsafe level. But RVers don't put on that many miles in a year so RV tires typically get replaced due to their age. Tires contain lubricants that
keep the rubber in good condition. These lubricants are released as the rubber flexes during normal driving. If the RV is parked for long periods of
time these lubricants don't get released and the rubber dries out. Sunlight also attacks tires and produces ozone, which reduces a tire's life cycle
as well. While the effects of non-rotation and sunlight vary from coach to coach, depending on the environmental conditions, a typical life expectancy
for most RVs is 6-7 years. After that you are running ion borrowed time and the chance for a blowout is increased.
So, how do we maximize our tire life? First of all, driving the coach helps. Sitting in one spot doesn't release those rubber
lubricating compounds found in the tires. When you are parked, try to keep them out of direct sunlight. Parking in a shady area is a plus and tire
covers can also help. There are various tire dressings out there but you need to be careful. Making a tire look good or shiny won't help its life
any but keeping it clean of oxidation and chalking will. Many tire dressings have chemicals, such as petroleum based products, that can actually harm
the tire. Be sure you get a tire that's designed to safely feed the rubber with nutrients rather than attack it. Proper tire "nutrition" can help keep
the rubber (especially the sidewalls) from drying out and causing blowouts. Dry rot is a large cause of blowouts due to sidewall failure. You can read
the DOT date code on your tires to determine their actual age. Check out This Link for a breakdown on
how to read those codes. Furthermore, Michelin Tires has a statement on how long RV tires can be expected to last at
This Link and it's interesting to note that no matter how well they are taken care of, 10 years is
the maximum.
The second major cause is underinflation. Any tire needs to have a given amount of air pressure to carry a given amount of
weight. As the weight loading goes up, so must the air pressure. You could just pump the tires up to maximum inflation pressure but chances are your
tires don't need that much air and it'll ride very hard. To find out what your tire pressures need to be you first need to weigh your coach. A
detailed account of how to do this can be found at This Link.
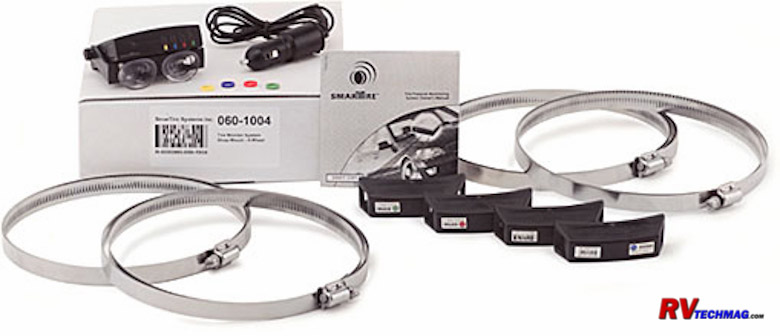
SmarTire Tire Pressure Monitoring System
Once you know what the pressures are you need to check them regularly. This is typically done with a quality tire pressure
gauge, either a mechanical trucker's foot version or a good digital gauge. It's a daily pre-trip task although if you have a Tire Pressure Monitoring
System (TPMS) you can generally skip that because the TPMS will alert you if any tire is low. A TPMS also gives you the benefit of a warning should
your tire get a slow leak while driving. A slow leak may not be noticeable to the driver but the tire will lose its ability to carry that much weight
eand will overheat, which generally lads to a blowout. A TPMS will give you enough advance warning that you can deal with it before it gets to the
critical stage. If you use your coach's on-board air connection to fill your tires but you will need to set the cruise control to fast idle to give
the compressor enough RPM to keep up with the air demand.
Generators
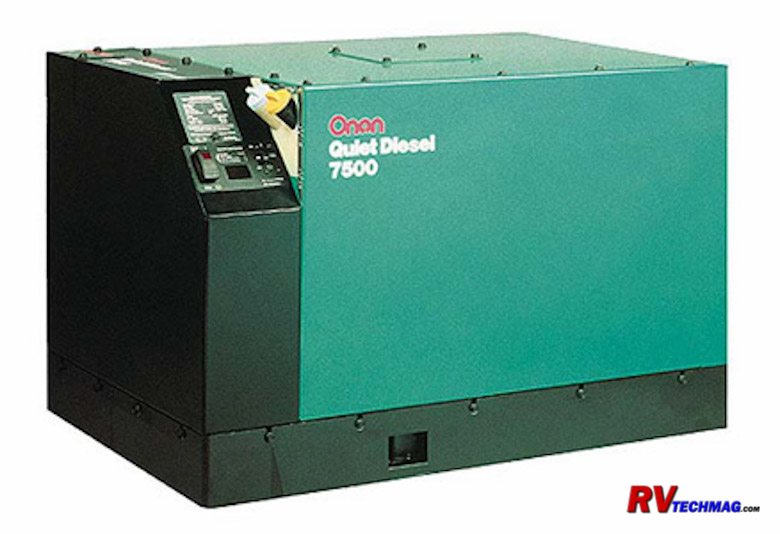
Generator service is similar to your engine maintenance only smaller and with a few extra changes. As always, you need to
check your generator manufacturer's manual to find out filter numbers and oil viscosity and rating and coolant type used. Once you have this info
be sure to change your generator's engine oil regularly. Working inside the confines of a generator enclosure can be challenging at times but the
principles are the same as your RV's engine. You'll probably need to buy that small oil filter wrench to remove the oil filter and Tiffin has been
known to install preliminary fuel filters in the fuel hose just prior to the genset itself. This increases the life of the Onan fuel filter inside
your generator's enclosure but you do need to know that it is there. It's standard automotive filter that's available at any auto parts store and
it's the first thing you should look at if your generator suddenly develops a loss of power. Air filters vary as to ease of access, depending on
which model of generator you have. Check your owner's manual for the exact location. The spark arrestor needs to be occasionally removed and the
soot purged. Soot will build up in this area over time so removing the plug and running the engine for a bit to burp any soot out of the system
will ensure that your exhaust system remains free and breathable. Accessing the radiator cap may require removing a panel for access. Again,
check your manual for specific details.
In addition to the engine, you also need to take care of the generator itself. The generator is belt driven but these
belts aren't a frequent failure so I wouldn't worry about them. If they do break it requires a great deal of work to gain access to replace
them so you may want to pay a Cummins/Onan service center to perform that headache when, and if, that time ever comes. The best thing you can
do for your generator is run it. Sitting idle won't do it any favors. Onan recommends running it under a minimum of half load for 1-2 hours
every month. In fact, on a newer generator that's come in for warranty one of the first things they'll check is the hourmeter to make sure you
have been running it. Running the unit will heat up the generator windings and burn out any condensation that's formed inside the generator,
which is why you need to run it at a decent load for a long enough time. It'll also flex your belt to keep it from drying out and becoming brittle.
The Kubota engine typically used in Onans isn't a wet sleeved engine so it doesn't have the cylinder liner cavitation issues
that your RV's engine has. Therefore it's not as picky about coolant and most heavy duty coolants designed for diesel engines will work. My personal
preference is OAT coolant because OAT coolant doesn't tend to corrode aluminum like non-OAT coolants do. There's lots of aluminum in the generator's
cooling system so it's a good choice. It also means that I have standardized on a single coolant for both the genset and RV engine, which makes
carrying spare coolant simple.
Servicing your own RV isn't all that demanding as long as you don't mind a little dirt, have some time on your hands, and
have a bit of mechanical aptitude. You can save some serious money, perform a better inspection, gain a better knowledge of how your RV works, and
gain the satisfaction of a job well done. The cost savings can buy some diesel fuel to help you enjoy your RV the way it was meant to be, by driving
to your favorite getaway place.
Return to Home Page
If you enjoyed this article be sure to recommend RVtechMag.com to your friends, like us on Facebook or Twitter
or subscribe to our RSS feed.


|


