Diesel Motorhome Chassis Service
Helpful DIY Tips on How to Service Your Own
Class-A Diesel Motorhome Chassis
Article Date: August, 2009
Article and Photography by Mark Quasius
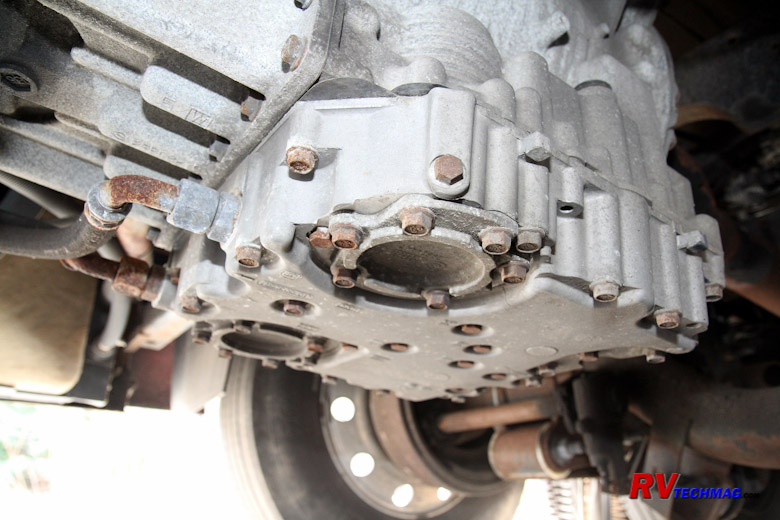
Introduction
Class A motorhomes require scheduled maintenance, just like your passenger car, SUV, or pickup truck. The difference is
that they are much larger and more complex so they require a few extra (and bigger) steps to accomplish this. However, it's really not rocket
science and if you are the kind of person who enjoys hands on work, has a basic mechanical aptitude, and don't mind getting a bit dirty there's
no reason why you can't do most of your own maintenance. If you don't want to deal with this stuff, then this tutorial probably isn't for you
and you'll be taking your RV to a service center to have those tasks done.
Doing your own maintenance has several advantages. First of all, if you do want to have others service your RV, you'll
need to take it to a facility that is large enough to handle it, which typically means truck service centers. You'll also want to find one with
a good reputation amongst fellow RVers. Some truck service centers aren't overly concerned about cleanliness and you have to ask yourself if you
would feel comfortable allowing a "grease monkey" access to the inside of your RV. Still others, such as the Cummins Coach Care facilities are
specifically geared to RVers and get good reviews by your fellow RVers. Any facility that you choose will have a higher labor rate than your
local auto repair shop. Their overhead is higher and this will be reflected in their labor charges to you. That's not bad when it's a serious
problem and you are paying for their technical skills, experience, and shop overhead but it can get pricey for simple maintenance tasks that
you could do yourself.
Secondly, there's a certain satisfaction in doing this task yourself. Face it, you are the one who cares the most about
your RV. Service is more than just changing some fluids, spinning on some filters, and slapping some grease on a few fittings. It's time for an
inspection of your coach's "hidden areas". You need to look for anything out of place - a hose rubbing here, cracked belts or hoses starting to
dry out there, loose bolts, broken brackets, etc. This takes a careful eye and the willingness to take the time to carefully look things over.
A service tech works under time constraints whereas you don't have them so you are more apt to catch things. You'll also become very familiar
with your coach over time and be more knowledgeable if you ever have a problem later on.
Performing your own maintenance isn't that hard. In the following paragraphs I'll attempt to give you some helpful tips
on how to perform your own basic maintenance work. Granted, not every RV is alike so your details will vary from these details but it will give
you an idea of what you need to do. When specifics are mentioned they will refer to my 2007 Allegro Bus 42QRP on a Spartan tag axle chassis with
a 400 HP Cummins ISL. The various RVs aren't all that much different so the basic tips should apply to most everyone.
Getting Started
Before we even pick up a tool we need to know what we are doing. Not every RV is the same. Different engines and chassis
have different service schedules and they can vary from year to year as well. It's important that you obtain all of the service manuals that you'll
need before you get started. Many owner's manuals are written to cover a wide selection of engines or chassis. You will need to read through them
and determine which schedule applies to your particular RV. This is critical so that everything gets done at the proper time. When it comes time
to service your RV you won't want to be digging through these manuals trying to find these pages, especially with dirty hands. It's best to put
together your own checklist that you can follow. Ideally it's in a computerized format so that you can use to keep
records of what was done. At the same time you can print it out and use it as a checklist when servicing your coach. Be sure to check each task
off once it's been done so that you don't miss anything. Afterwards, transfer your hand written notes, mileage, and date over to your computer. I
prefer to use a spreadsheet program such as Microsoft Excel to handle this. I've made available a sample service schedule for you to look at.
There's an Acrobat "PDF" format copy that anyone can read as well as an Excel spreadsheet that you can save to your computer as a template and
modify it to fit your needs as you wish. Remember to use this information as a guideline. Replace it with your specific service requirements.
Following are the links to these documents:
Assuming that we now have our service schedules in hand and we are ready to go we will now need some tools and spare parts,
such as filters and belts. Even if we don't want to service our own RV, carrying a certain amount of tools and spare parts can be either handy or
a life saver, depending on what the problem is. If your engine dies and a road tech finds that your fuel filter is plugged you can be quickly on
your way if you produce the filter for him to install. If you blow a V-belt your coach is dead until it can be replaced. If the nearest service
center doesn't have that belt are you willing to wait a day or two until the right belt arrives or would it be handy to simply hand them the belt
from your storage area? If a fuse or light bulb burns out it's a simple task to replace it yourself while screwdrivers and basic hand tools are
always handy to remount whatever just fell off. You may not want to get into heavy diagnostics so voltmeters, etc may not be your cup of tea but
at least a simple test light can determine which fuse is blown or if there is power at any given point.
If you are now performing maintenance work on your vehicles, chances are you have many of the tools that you'll already need.
You will need to add a few more though. You'll need some large sized tools as well as a few tools that wouldn't be needed on your passenger vehicles.
In addition, your RV is a house on wheels so there's some "home" type tools you'll want to carry as well. We'll split the maintenance tasks up into
various sections and cover the tools as well as tasks needed in each particular section.
Basic Engine Maintenance
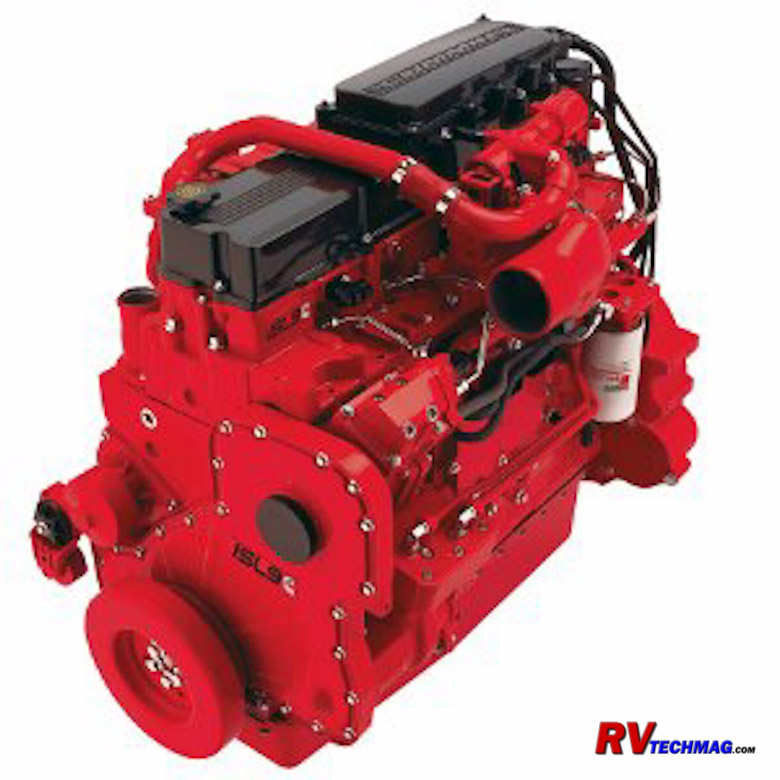
Engine Oil and Filters
The most common service task mentioned is an engine oil change. In order to keep your engine properly lubricated you need to
change the old dirty oil and replace it with new clean oil. You also need to put the proper API classification, viscosity, and quantity into the engine.
It's imperative that you carefully read your engine owner's manual. It will advise you of the proper API classification, viscosity, and quantity of oil
needed for your particular application as well as the frequency of oil changes.
Diesel engines generally run longer between oil changes than gasoline powered engines. They also hold more oil, which is part
of the reason for the extended interval. Oil changes are based on both mileage and time. The figure to use is whichever one happens first. In my case
I need to change my oil every 15,000 miles or 12 months. Most RVers don't put on that much mileage so the odds are good that you'll be changing it
based on the calendar rather than your odometer.
When you do change the oil it's best to have the engine warmed up prior to draining the old oil out. Sediments and sludge can
settle in the engine and won't come out when the oil is cold and has been setting. By warming the engine up you'll be stirring these sediments up and
suspending them in the oil so that they can be carried out of the system when the drain plug is removed. Just running your engine at idle for a few
minutes isn't enough. The best oil changes are done after the coach has seen some higher RPMs after a short drive. Warmer oil also drains faster and
you won't have to wait around as long for the oil to finally stop flowing.
Most diesel engines hold quite a bit of oil. In my case that's 28 quarts - which is equal to 7 gallons and won't fit into a
single 5 gallon bucket. I bought a few 5 gallon pails with screw-on lids. I can drain my 7 gallons into these pails and drop the old oil filter in
as well. Then I can spin the leak poof lids on and transport the used oil to a collection site without making a mess. Naturally I need to switch
buckets sometime in the middle of the draining so that the first bucket doesn't overflow. That used to require screwing the drain plug back in
quickly but that got messy and I went through lots of rags or shop towels cleaning up my hands and oil spatter from the driveway. I've since replaced
the drain plug with a Fumoto Drain Valve. This is a simple petcock that is rugged and foolproof that allows me to stop the oil flow at any time. It
also allows me to change my engine oil without needing any wrench for the drain plug. It's a handy device and you can order them direct
at Fumoto Drain Valve.
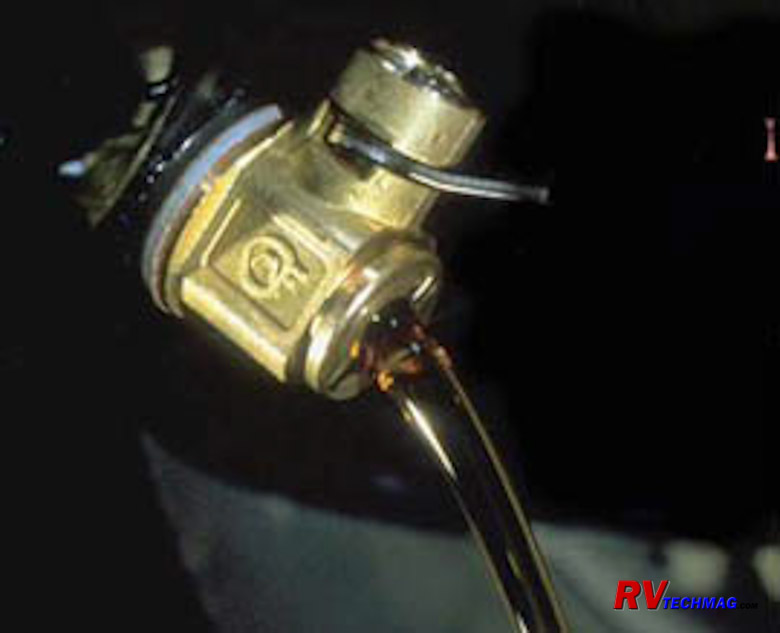
Fumoto Oil Drain Valve
To change the oil filter you'll need a larger oil filter wrench. Chances are that your oil filter is a larger diameter
than the automotive filters so you'll need a larger filter wrench to remove it. You'll still need the standard size for the fuel filters and also
an even smaller size for your generator set's oil filter so plan on having a set of three filter wrenches. Be sure to prefill your oil filter
with fresh oil and wipe the rubber sealing gasket with a bit of it to prevent binding when installing the filter. It's very important to prefill
the oil filter. If you don't your engine will be running for a while without oil pressure until the filter can fill up with oil and purge the air
out. This is not a good situation so always prefill your oil filter before installing it to ensure adequate lubrication during the initial startup.
It generally takes a fair amount of torque to tighten these larger filters so don't be afraid to use some elbow grease. Finally, wipe the filter
off with a clean rag or shop towel so that you can detect any oil leaks later on.
Most diesel pushers have their oil filler tube routed via a long hose to the back of the coach. Odds are good that it'll
be sticking out horizontally, which is fine for a heavy duty service center with pneumatic lubrication pumps but not so fine for the do it yourselfer.
You'll need to figure out a way to get oil to flow from your gallon jug into the filler opening without spilling it all. Typically some sort of
funnel setup with a flexible hose on the end allows you to do this.
Dipsticks are another issue. On a DP they are quite long to reach to the bottom of the oil pan. The head end is clamped at
an accessible location at the rear of the coach. Because of the long tube length these dipsticks are not always accurate so the first time you
change your oil you should calibrate your dipstick. After thoroughly draining the engine and replacing the oil filter, refill with the correct
amount of oil as specified in your engine owner's manual. Be sure to deduct for any oil you added to the filter because that counts as well.
Once you have poured the specified amount of oil into the engine replace the oil filler cap and run the engine for a while to purge any air out
of the lines. During this time you should check for any leaks, especially around the oil filter. After a few minutes shut down the engine and wait.
Be patient because it takes a while for all of the oil to drain down into the pan and settle in at the proper height. Go do something else for 15
minutes and leave the engine rest. Then remove the dipstick and wipe it clean. Insert it into the dipstick tube and check the oil level. Do this
a number of times, wiping the dipstick before each testing. If the oil level is not exactly at the dipstick's "full" level you can adjust the
length of the dipstick tube by loosening a few clamps and moving it a bit. Once the dipstick reads as it should tighten all the clamps and you can
now trust the dipstick readings.
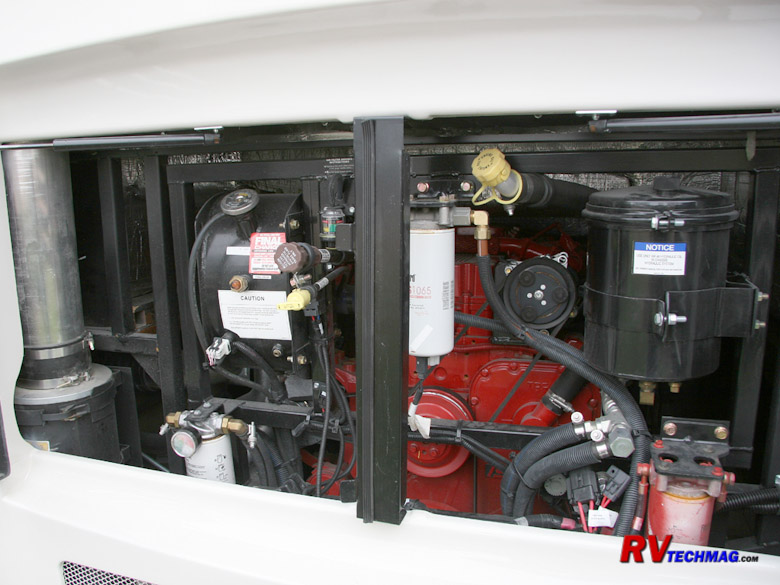
Engine Bay on 2008 Allegro Bus
Be sure to pay close attention to the API suffix on your oil. Prior to the 2008 model year most engines were happy with
API-CI series oil. In the 2008 model year new emission regulations came into effect that required the use of Diesel Particulate Filters (DPF) to
reduce emissions. The DPF is much like an overgrown catalytic converter with electronics and sensors added to recirculate exhaust gas and do a
number of other things. The DPF is supplied by the engine manufacturer, not the chassis builder, and as such is considered an integral part of
the engine's emissions system. The DPF is very expensive and it requires Ultra Low Sulphur Diesel fuel (ULSD) to function. In addition it requires
the use of API-CJ oil in the engine. Engine oil can get consumed during normal diesel engine operation. The ash content of API-CI series oil will
foul the DPF, resulting in reduced life and an early expense. For this reason API-CJ oil is required for all engines with DPFs. This oil features
a lower ash content to prevent this from happening. Both the API-CJ oil and ULSD fuel can be used without any problems in earlier engines that do
not have the newer emissions equipment.
Fuel System Maintenance
Diesel engines operate differently than gasoline engines. Whereas gasoline powered engines utilize a fuel with a higher
vapor point and a spark based ignition to fire it, diesel fuel is much heavier and uses increased compression ratios and accurate injection timing
to provide combustion. Diesel fuel has more BTU per gallon than gasoline therefore diesel engines produce more power per equal engine size than a
gasoline engine. All of this torque and combustion pressure requires heavier built engines so everything is much heavier on a diesel engine. Diesel
fuel systems are more picky than a gasoline engine's systems are. Specs of dirt or sediment can render a fuel injector inoperative. Any water in
the fuel can quickly destroy the fine tolerances in a fuel injection pump. For this reason it is critical to provide a steady supply of clean, dry
fuel to the engine.
This begins at the fuel tank. Buying fuel from a well known truck stop that sells lots of fuel helps to ensure that you are
getting fresh clean fuel. An older, less used fuel stop is more prone to having older stale fuel and a greater potential for water in their tank.
Once you get this stuff into your fuel tank the problems begin. If your filters plug up your engine will starve and you won't have very much power
available. You'll be spending quite a bit of time replacing fuel filters over and over again, or in severe cases, actually having the fuel tank
pumped out and cleaned.
Most (but not all) diesel fuel systems have two fuel filters in them. The first filter that the fuel passes through is
called the Primary Fuel Filter, and is sometimes referred to as the water separator. This filter is a coarser micron rating than the secondary
filter and is the first line of defense against anything entering your fuel system. Many of these filters incorporate a sensor unit in the bottom
that detects water. If you accumulate any amount of water in the filter the sensor will trigger a "Water in Fuel" warning light on the dash to
inform the operator. Most of these filters also feature a petcock or drain valve at the bottom so that any water can be drained out. The next fuel
filter is called the Secondary Fuel Filter and has a finer micron rating. If any minute particles of sediment pass through the primary filter,
this filter will prevent them from entering the fuel injection pump or fuel injectors and damaging those items.
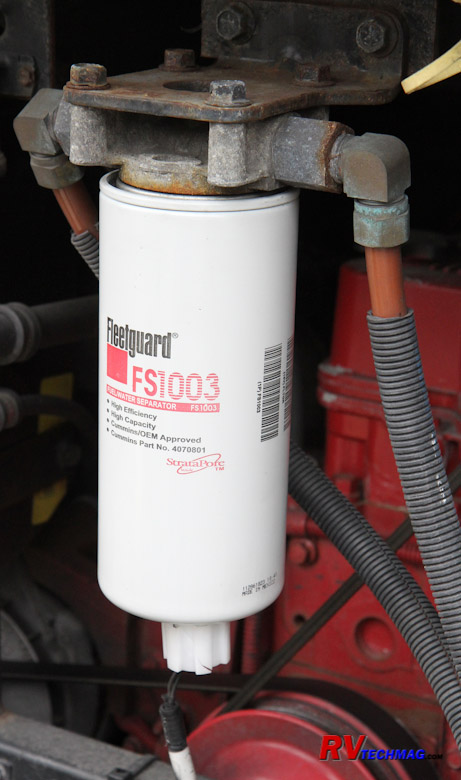
Fleetguard Primary Fuel Filter
These filters will need to be replaced according to your service schedule. Generally the secondary filter isn't replaced as
often as the primary filter but your specific service schedule should be your ultimate guide. To do this you'll need your filter wrench. When a
diesel engine gets air in the fuel system, it won't run. You will need to purge the air from the system, commonly referred to as "bleeding the
fuel system". This will vary from one engine to the next. Some engines use a hand primer level on a mechanical lift pump to accomplish this while
others may use an electric lift pump that requires some sequencing of the ignition key switch to purge the air from the system. Laboratory
engineers write the specs and procedures and don't approve of pre-filling the fuel filters. Their reasoning behind this is that a spec of dirt might
enter the fuel system and cause damage to the fuel injection system. While this is indeed a possibility, practical reasoning says that pre-filling
is a good idea to minimize the stress caused by cranking an engine with an air-bound fuel system in an attempt to get it to fire. My personal
preference is to prefill the filters but be careful to use clean fuel and clean techniques when handling it. First of all, if you do induce any
foreign matter into the primary filter, the secondary filter will catch it and prevent it from entering the fuel injection system. Being very
careful on the secondary filter has always worked for me, even in years of service as a diesel mechanic at a truck service center. The second
point is to change one filter at a time. Purge the system and run it after the primary filter was changed. Then proceed to the secondary filter.
By doing this you'll only have half as much air in the system as if you removed them both at the same time and your purges will finish up
much faster.
Diesel Engine Cooling Systems
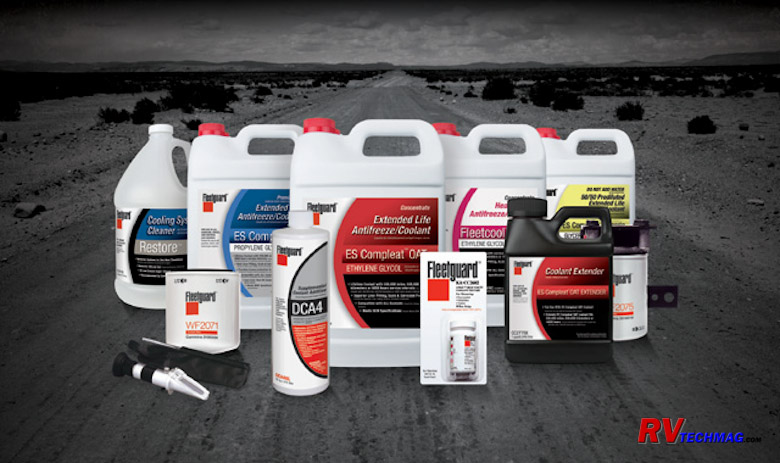
Diesel engines have different coolant requirements than gasoline engines. Many, but not all, of these engines have wet
cylinder sleeves. Wet sleeves mean that the cylinder liner is pressed into the engine block and the coolant contacts the actual cylinder liner
itself. Dry sleeves are pressed into the engine block but go into another casting so that the coolant doesn't contact the actual liner itself.
Wet sleeves have the advantage of better cooling because the heat can transfer directly from the cylinder to the coolant. They also require
special coolants that eliminate pinholes resulting from cavitation. Rather than go into detail, feel free to check out my article explaining
all of this at HD Diesel Engine Coolants for RVs. If you have a non-OAT Coolant you'll need to check your SCA
levels according to your maintenance schedule, which is typically every 6 months. Fortunately, most RVs are now being shipped with OAT coolant
and you won't have to worry about servicing it for 3 years. I would carry some extra coolant along though so that you have the correct stuff in
the event of a cooling system leak repair.
Belts are normally good for a few years. But, it never hurts to have a spare set. If one does fail you may not be able to
find a replacement easily and you might be sidelined for a while. In addition to having the spare belt, think about what tools you'll need to
replace it. Many of these belts are now serpentine and utilize an automatic tensioner to provide continuous tension as the belt stretches. You
may need a large breaker bar of some sort to be able to rotate the spring loaded tensioner so that you can replace the belt. It's best to test
this out in the driveway at home rather than find out how to do it on the side of the road some day.
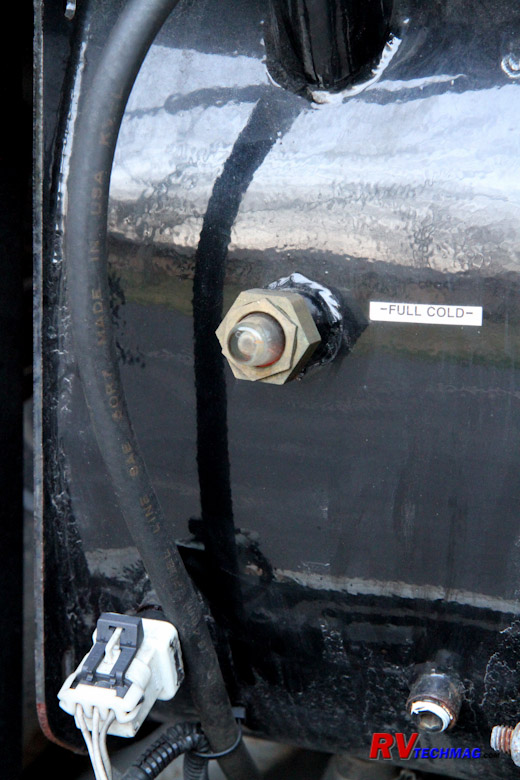
Coolant Surge Tank Sight Glass
Radiators are another service area. They need to be kept clean in order for them to efficiently remove any heat from the
coolant and transfer it into the air. Side mounted radiators aren't the worse but rear radiators require a bit more care. Rear radiators are
located at the very rear of the coach. As the coach drives down the road a vacuum is formed behind the coach. This vacuum tends to suck up all
of the road dirt and pass it through the radiator. Some engines in the past have had breather issues where the "slobber tube" passes oily
crankcase fumes out the breather pipe. Some of these pipes did not extend down very far and the oily mist would pass through the rear mounted
radiator, coating it's fins as it did so. When the road dust rose up and passed through the radiator it would stick to the oily film and begin
to restrict air flow. Between the breather tube fumes and road dust this became a vicious cycle and eventually the radiators began to plug up
and overheat. Cleaning the radiators required spraying them with a mixture of degreaser, such as Simple Green, and hot water. Unfortunately,
this wasn't the easiest place to get to so it was a very time consuming and messy job. The workaround was to extend the slobber tube so that
its end was lower than the radiator. Most of the current engines use a captive breather system so that's isn't as big of a concern as it once
was. However, any oil leakage can still get into the radiator so it's important to keep both your engine and it's radiator clean. Regular
inspection should be on your checklist for each scheduled service.
Engine Air Filters
Your engine's air filter is another area that is critical to your engine's health. Today's engines are very efficient
and built to tight tolerances. It is commonly stated that one tablespoon of dirt is enough to ruin an engine. Typical air filters on class A
diesel pushers consist of a sealed unit, such as the Racor EC series. These units consist of a paper air filter element surrounded by a large
steel encasement. There are fins situated around the filter and inside the case to use cyclonic action to spin heavier particles away from the
filter and into the bottom of the housing, increasing the filter's longevity. These are non serviceable elements and you simply replace them
when it's time. Loosening two large worm drive hose clamps and releasing two cam-over retaining latches allows the filter assembly to be
removed. A bit of silicone spray inside the rubber attaching hoses makes for easier installation of the new filter.
Your owner's manual will be the definitive guide as to when to replace your air filter but it's based upon an average
set of circumstances. Once you understand what makes a filter wear out you'll be better able to determine when it's time for you to change
your particular filter. The main reason to replace the filter is that they eventually plug up and won't pass enough air through. All of the
dirt that's in the air will accumulate in the filter material over time and cause gradual decrease in airflow. Your air filter undoubtedly
has an air filter restriction indicator mounted next to it. This is a small plastic sight vial with a yellow plunger in inside that will move
according to how much vacuum the intake pipe has. It will latch in the highest position so that you don't have to run behind your coach when
driving to see what it reads. Pushing the reset button on the bottom returns it to zero and it now will record the next highest reading.
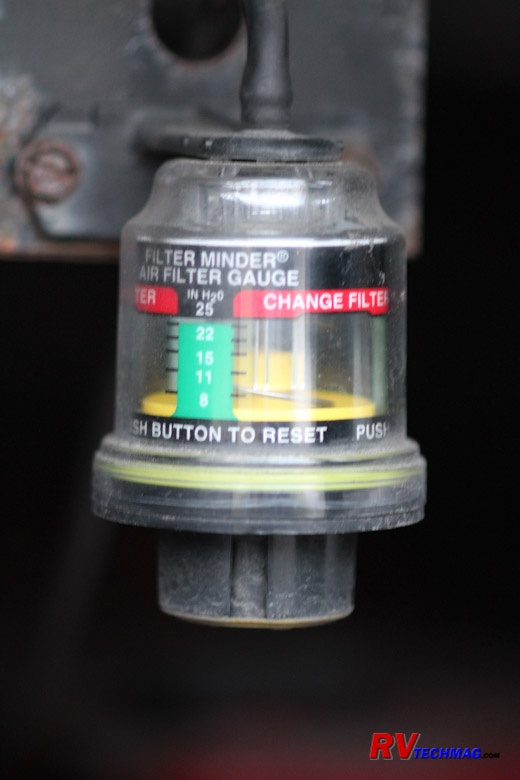
Air Filter Restriction Gauge
Most air filters are designed to be replaced when there is 15" of vacuum present. The higher the vacuum, the more
restriction is in the air filter. This value is just the amount of "increase" in the vacuum level over the value of a fresh filter. Now not
every RV's intake system is identical. Some RVs have smaller piping than others, engine displacements vary, etc so there is no single setting
that everyone can use. What you need to do is check your vacuum reading after you have installed a fresh filter and run the engine at high
RPM for a while. Then make a note of that reading. Add that value to 15 and that will tell you when you need to change your filter. For
instance - my base reading on a fresh filter is 6" of vacuum. 6 plus 15 = 21 so my particular air filter needs to be replaced at 21" of vacuum.
Remember that this is a gradual degradation of its ability to pass air through. If your filter is approaching that number you will not have the
full efficiency of your engine, so you may not be getting full power or fuel economy. If you have a long trip planned it would be to your
advantage to change it earlier.
The second criteria is age. Three years is the longest I would go on an air filter and many manufacturers recommend 2
years in their service schedules. Paper eventually wears out. Pass enough humidity and water vapor through any kind of paper and eventually
you'll wind up with a useless glob of pulp. You don't want to let your filter get that far or else the paper will rupture and it'll fail to
filter dirt particles out. Once you get that legendary tablespoon of dirt, you'll be visiting your engine rebuild shop. Naturally this will
happen sooner if you operate your coach in a wet, humid environment whereas a coach operated in southern Arizona will get much longer life.
But it always pays to err on the side of caution when this much is at stake.
Transmissions
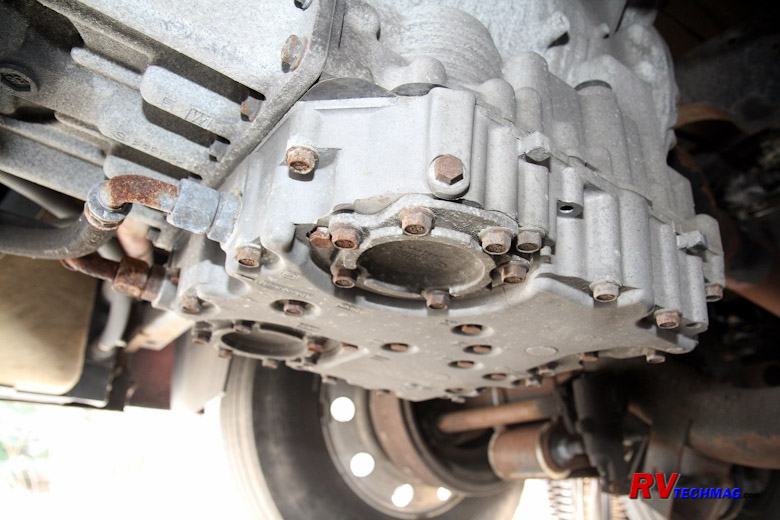
Allison 3000 Transmission Filter Locations
It's a pretty safe bet that your diesel pusher has an Allison transmission in it. With the exception of smaller gasoline
powered RVs the Allison is pretty much the choice of every RV chassis builder. Various sizes on Allison transmissions are made. The smallest use
spin-on filters, very similar to your car's engine oil filter. The larger transmissions use a pair of cartridge style filters that insert through
the bottom of the transmission's oil pan. These are not all that hard to change. A ratcheting socket set will easily remove them and not that much
fluid will drain so it's a manageable job for most everyone. It's important to verify the service schedule with your Allison manual. If in doubt,
a quick phone call to them with your build date will get you the correct information. Some transmissions require a single filter (the primary filter)
to be changed after a few thousand miles while others do not. So, be sure to read your manual or make that phone call to verify your particular
requirements. Allison filters can be purchased in two packs, which will save you quite a bit of money over a single filter purchase.
Transmission fluid come in two versions - regular or synthetic. For the most part your Allison transmission is probably
filled with synthetic transmission fluid if it was manufactured in 2005 or later. It's possible that your chassis builder may have finished it
off with non-synthetic fluid so be sure to verify that with your chassis builder. If you have synthetic fluid the service intervals are longer
than with dino based fluid. Allison sells a brand of synthetic fluid called Transynd which is specially formulated for them by Castrol. They
also recommend Mobil Delvac Synthetic ATF. The
Allison website lists the various fluids available that meet the TES 295 specifications. Always verify any fluid compatibility and your exact
service schedule on the Allison site to be sure that you are in compliance and that your warranty is not jeopardized.
|
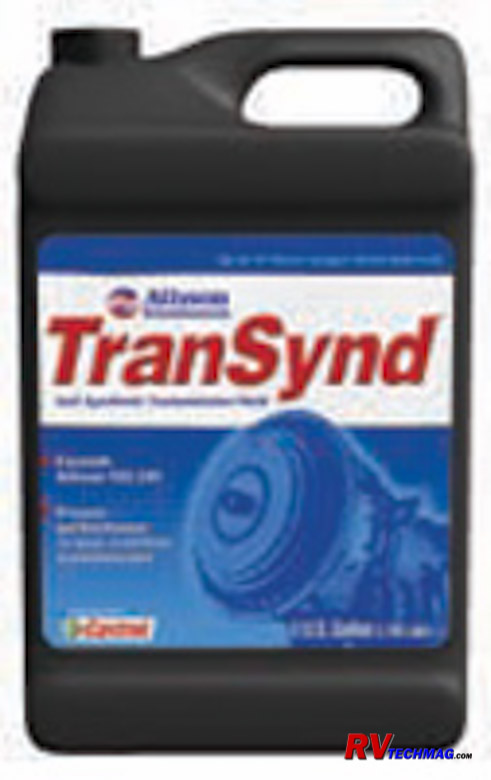
Transynd ATF
|
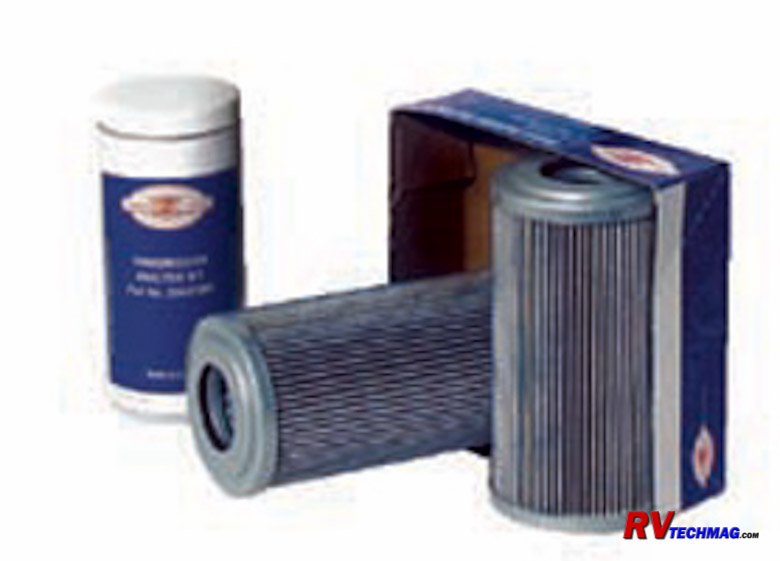
Allison Filters
|
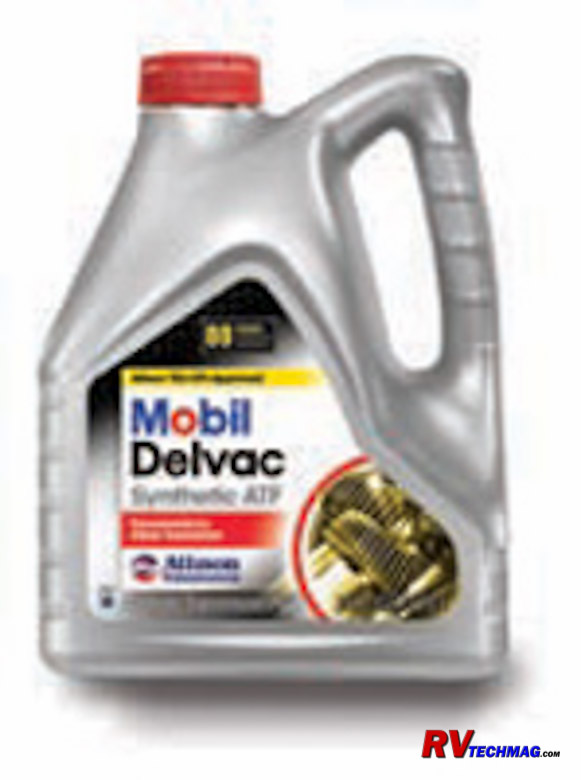
Mobil Delvac ATF
|
Chassis Maintenance
Brakes
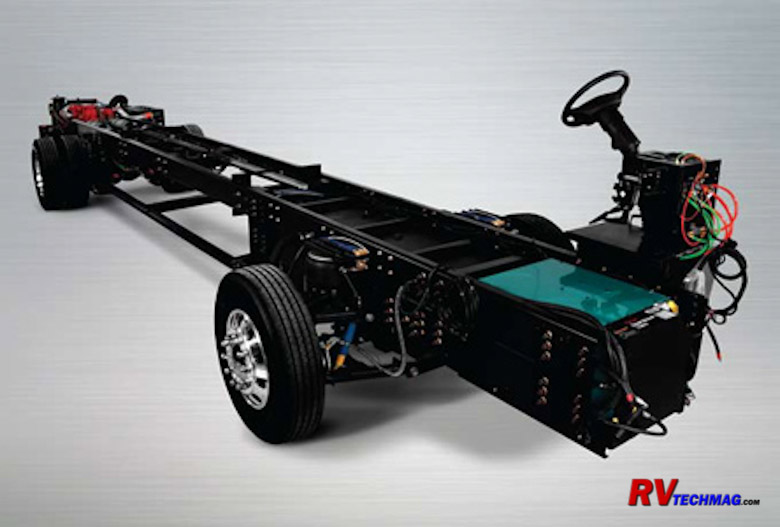
Needless to say, brakes are one of the most important components of an RV chassis. The safety of your passengers relies
upon the proper performance and maintenance of this critical system. Brakes that get overheated can glaze. There are procedures to help restore
brake pads that are lightly glazed but if they are seriously glazed they just won't stop as the should and the shoes will need to be replaced
or relined. Freightliner publishes a procedure for burnishing lightly glazed brakes and I've posted a copy of that procedure at
This Link.
In addition, the brakes need to be kept in adjustment. Air brakes operate by applying air to a diaphragm, which then
pushes a rod to a link that rotates a shaft. There is a set of curved cams at the end that expand the brake shoes. As long as this mechanism
is properly lubricated, it will continue to apply the brakes. Be sure to follow your chassis owner's manual for exact locations of the grease
fittings that lubricate your brake components. The linkage that connects the air brake push rod to the braking cam shaft is called a
"slack adjuster". This arm is adjustable and is the only real adjustment you'll ever need to make to your brakes. In the old days, you'd block
the wheels and release the air brakes (if a spring loaded parking brake), then tug on the slack adjuster to pull the rod out of the brake
diaphragm. You'd tighten the slack adjuster and then back it off one full turn, which would give you an inch or less of free play when you
tugged on the arm. Naturally, all of the wheels needed to be the same or else you would have brakes pulling to one side instead of consistent,
even braking.
Today's air brakes use self-adjusting slack adjusters. If everything is working fine, they should self-adjust automatically
as you apply the brakes and shouldn't need any adjustments. However, you never know if they are working or not so it's still best to test them to
verify that the slack pull is equal on all unit. The rear drive axle uses spring loaded park brakes. If there is no air pressure these brakes
will lock up and won't release until air pressure builds up and you release the park brake knob. In order to test this axle you'll need to block
the coach, use the jacks, or whatever to keep it from rolling. Then release the brakes to check that axle. The front axle and any tag axle brakes
are not spring loaded so they can be checked or adjusted with the parking brake applied.
Air Compressors, Tanks and Dryers
Air Dryer
In order to operate your air brakes and air-ride suspension system you will need to supply it with some air. An air
compressor is mounted to your diesel engine to provide plenty of air to operate your brakes and suspension. This compressor sends air out to air
tanks that act as reservoirs so that there is an adequate supply during every condition, such as repeated heavy brake applications. But, this
air needs to be clean. If there is moisture in the air lines in can freeze up in cold weather. The compressor is a mechanical pump so it is
possible that it can consume oil during its normal operation. Don't worry, it's fed by your diesel engine's oil supply so you won't have to
worry about having to check your compressor's oil level or change it. But, small amounts of that oil can get passed into its air discharge and
wind up in the braking system where it can damage the rubber diaphragms and components. In the old days truckers would always drain their air
tanks just before a trip to remove any emulsified oil and water sludge from the tank. This was a daily task and necessary to keep the air brakes
in proper working order.
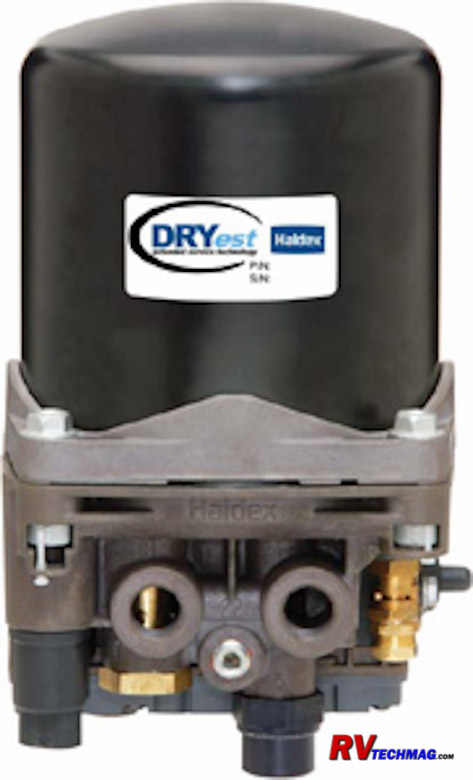
Fortunately, heavy duty vehicles now are equipped with air dryers. The air dryer is located near the rear of your coach.
It is connected so that all of the air compressors output passes through the air dryer prior to reaching any air tanks. The air dryer will use
centrifugal force to spin the heavy contaminants down into a sediment bowl. A coalescing filter will prevent any water or oil from passing
through the dryer. This moisture and sludge will also settle in the bowl. To prevent the bowl from filling up an automatic dump valve is
incorporated that will dump the contents every time your air compressor reaches its governed air pressure. This quick burst will expel the
contents out through the port on the bottom. An electric heating element is also used to prevent the bowl or its contents from freezing in
cold weather.
Eventually the air dryer will fail to do its job once the coalescing filter is all used up. Some air driers have a
service schedule of 18 months while others have a 3 year cycle. You will need to verify your manual to see which one you have to see when
you need to service your dryer and replace the filter element in it. Note that this service schedule is based upon expected life expectancy.
If you operate your RV in dry climates you may get longer life out of your filter but if you operate in warm humid climates you may not reach
the average cycle time. That's why it's still important to drain your air tanks. You don't have to do this every day but it still needs to
be done. Except, this time you really are not draining the contents of the tanks as much as you are testing them. Normally, when you pull
the tank drain lanyards you'll hear the spit of dry air exiting the tanks. But, one day you'll notice that there's a fair amount of moisture
coming out. When this happens you'll now know that your air drier filter is no longer doing its job and it's time for service. So be sure to
make this tank drain procedure a regular part of your weekly or monthly inspection rather than wait until the published service life is reached.
Once the sludge gets into your brake diaphragms and valves you will have problems begin to develop so you want to prevent that from happening.
After the air leaves the air drier it then goes to your air tanks. Air tank layouts can vary from chassis to chassis but
the basics remain the same. All of the air goes first to the primary tank, also called the wet tank. Any moisture still in the air will expand
and condense, settling in this tank. Hopefully no moisture or sludge will pass beyond this point. After it leaves the primary tank it goes to
the secondary tanks. Generally there are two secondary tanks. One is for the front brakes while the other is for the rear brakes and air suspension.
They are separated by check valves so that a failure in one system won't impact the other system. After that there may be a ping tank or whatever
to help support the air bags at the rear of the coach. There are many variations to this layout but you get the general idea. Compressor first,
dryer second, primary tank third, and secondary tanks, etc later. Most coaches have three drain valves, one for the primary tank and one each for
the secondary tanks. Generally they are operated via cable lanyards that can be found in the front wheel wells. It's best to fill the air bags to
raise the coach when looking for these. Always use the awning hook to pull these lanyard rather than reach into the wheel well with your arm. If
the coach were to drop you could lose your arm.
Air Ride Suspension
Neway IFS Suspension
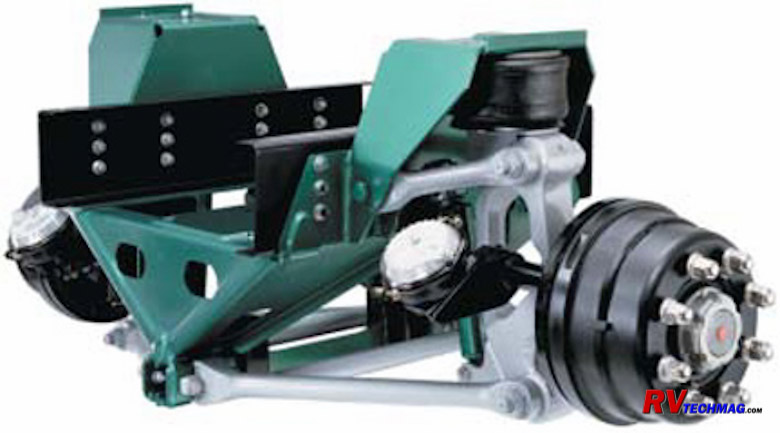
There's two components to your front suspension - the air bag portion that actually suspends your coach and the mechanical
steering linkage that controls the front wheels. Your air bags are controlled by a series of valves. There's a dump/fill valve that either provides
air to all of the air bags to fill them up or dumps them all to allow the coach to drop down and settle. This valve is generally controlled by the
hydraulic leveling jacks control panel so that it automatically dumps the air from the suspension when the jacks are deployed and fills them back
up when the jacks are raised for travel. After that there is a series of height control valves, generally three but sometimes four, that control
how much air pressure is sent to the bags so that they achieve the correct ride height. If a heavier load is applied to the coach in any given are
it will settle and depress the arms on the appropriate height control valve, opening it up to allow more air into the bag. Once the bag has lifted
the coach to its proper height the arm will close off the valve to keep that amount of air in the bag. If the coach were to rise up in response to
a reduction of load, the height control valve would move in the opposite direction and bleed some of the air out of the bag. Once the coach settled
in at it's correct height the valve would then stop bleeding air and seal off the air pressure in the bag once again.
If the height proportioning valve is not properly adjusted your coach may wobble and wander all over the road. If you have
a handling issue the first thing to check (after your tire pressures of course) is the adjustment of these valves. Do this prior to any front end
alignment. This check should also be part of an annual service procedure. Refer to your chassis owner's manual for specifics on how to check this.
Outside of your air suspension system, there's lots of mechanical parts that will also need attention. The most important
item is a good grease job to prevent all of the moving parts that control the suspension and steering from wearing out or seizing up. For this
you'll need a good grease gun that you can operate with one hand. Be sure it has a flexible hose so that you can navigate around to the top of
those hard to get at grease fittings. You'll need one hand to guide the end of the hose and the other to pump the gun. Use a good quality grease.
Going cheap in this department is going to cost you later. I prefer a good moly based grease. The moly additive really helps keep the grease from
squishing out under load. However, there is one place on your RV that you do want to use a cheaper non-moly grease and that is your self-adjusting
slack adjusters. They need a certain amount of friction or else they won't self adjust so you may find it handy to have two grease guns and load
one up with each kind of grease. There's only a couple of these fittings so you don't need a real costly grease gun for them.
Be sure to read your chassis service manual carefully and then make a note of where all of these fitting are. Put them on
your checklist so that you can check them off as you do them. You don't want to miss any because it only takes one worn out part to sideline your
RV. If you have a solid front axle be sure to jack it up to remove weight from the tires when greasing the kingpin bushings. If you leave the
coach weight on the axle you won't get any grease around the thrust washer bearing and only half of the vertical kingpin will get greased.
Actually, whenever possible it's best to have someone sit in the cab and turn the wheel as you grease. That way the grease totally surrounds
everything and there are no bare spots. This helps for IFS ball joints as well as solid axle kingpins.
Front Wheel Hubs
Stemco Front Hub Cover
Your wheel bearings are lubricated in one of two methods. The drive axle is lubricated via the gear lube from the rear axle.
While initially filled during assembly it tends to keep its own level due to the internal movement of the rear axle gear lube. It is sealed off on
the outside by a gasketed rear axle flange and on the inside by a typical wheel seal. The front wheel hubs don't have any extra source of gear lube
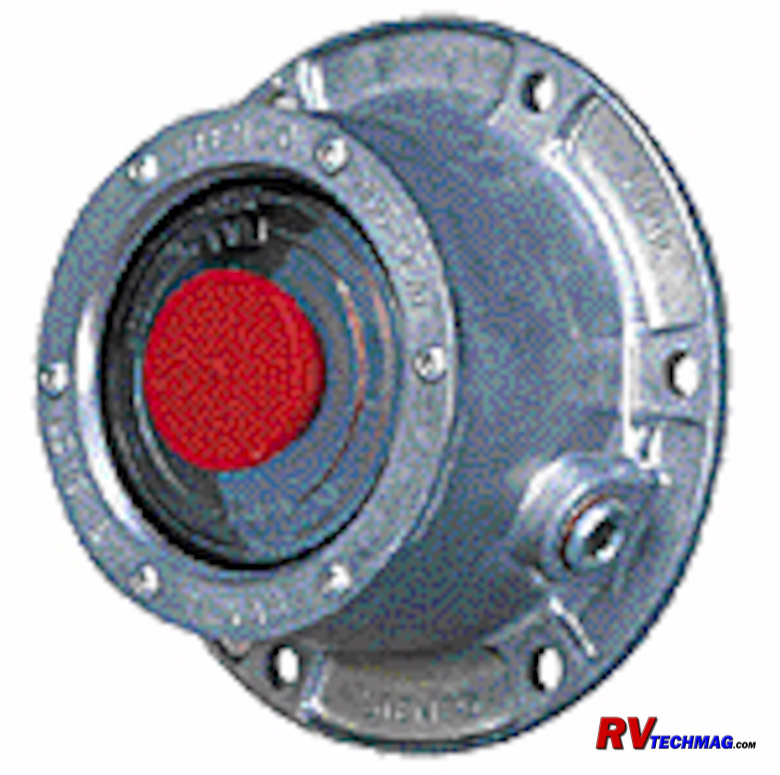
so they need to be properly filled and maintained. The front wheel hubs will have a hub cover, very similar to the one in the above image. The rubber
plug in the center is easily removed with a screwdriver. It is also vented so be sure that the small pinhole in the center isn't plugged or else
the pressure can build and push gear lube out past the wheel seal. You'll see a clear plastic window in the end of the cap with circular lines molded
into the window. This represents the full and add levels of the gear lube in the hub. Think of it as a rotating dipstick. If the oil level is between
the two lines you are fine. If it's too low, remove the rubber center plug and add some gear lube with a quart squirt bottle. Allow it to settle a
bit and recheck again. One it's all set, replace the rubber plug. Be sure to refer to your chassis manual for the proper weight gear lube to use for
your particular chassis. Note that tag axle wheel hubs are setup in the same manner.
Normally You have two potential places for any wheel hub to leak gear lube. Once it does leak it tends to sling the stuff
everywhere and pick up dirt so it's very hard to tell exactly where the leak is coming from. In that case it's beneficial to clean the area and do
a short drive and then inspect the area carefully. If your leak is coming from the wheel seal it'll sling out of the backside of the hub and you'll
see it on the rear of the tire. If you see an oily mess inside your hubcap and wheel rim, it's not the rear wheel seal. In this case it's most likely
a gasket. A drive axle can have a leaky flange gasket or a steer or tag axle can have a bad gasket on the aluminum hub cover casting. Once these leak
it's pretty much impossible to stop the leak by just tightening it. You'll need to replace the gasket. I prefer to add a good gasket sealant to the
gasket as well because the thin gaskets can use the help in that area. If you have one of these leaks it's also important to check the aluminum
retaining ring that holds the plastic inspection window in place. It's held in with a ring of 6 small Torx head screws. There is a small white elastic
gasket that probably cannot be salvaged once the screws work loose. In this situation I've removed the retaining ring and applied clear silicone as a
gasket and reassembled with good success.
Your manual probably gives you a schedule when the gear lube needs to be changed. To do this you'll properly need to remove
the hub cover, then suck the gear lube out of the hub cavity, replace the gasket, and reassemble. If you rotate the hub cover so that the hex head
plug faces down you won't be able to drain all of the gear lube from the cavity. If you do it this way be aware that you are only changing half of
the gear lube.
Rear Axle and Driveshaft
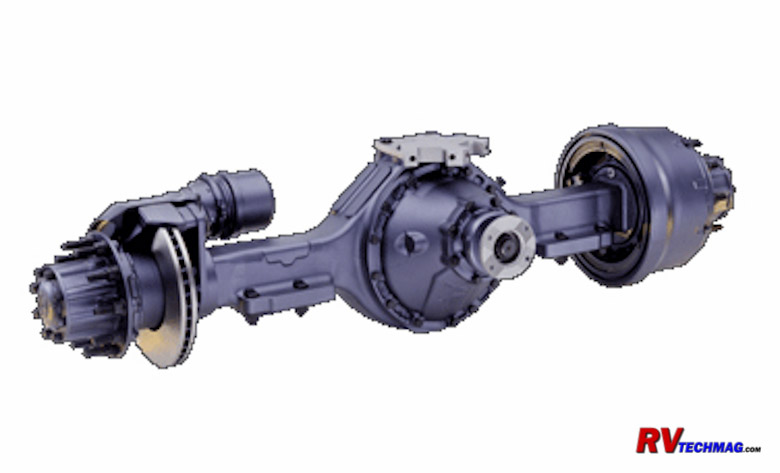
Rockwell Rear Axle
Your rear axle is filled with gear lube to keep the axle gears and bearings all properly lubricated. An access plug is located
in the axle to provide a place to add lubricant as well as check its level. Any gear housing filled with lubricant is typically filled to one third
capacity, but never over half. If the entire housing were filled up there would be no room for expansion and the foaming lube would blow the seals
out. Stick your finger in the "level" hole and you should feel the gear lube come right up to the threads. Refer to your service manual for the exact
location of the plug. Some are on the front by the pinion and some are in the rear cover. To drain the axle fluid a drain plug is probably located at
the base of the housing. Gear lube is fairly thick so it will help if you've just run the RV for a short while to help heat up the gear lube so that
it drains better. Follow the manufacturer's recommendations and add the proper amount and viscosity. When you get close, keep an eye on the sight
hole to prevent overfilling.
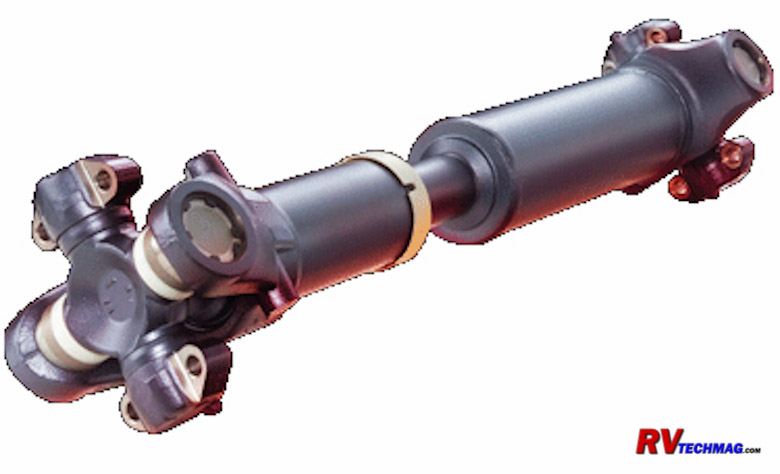
Driveshaft and Universal Joints
The driveshaft on a diesel pusher is fairly short and hard to get to, especially if you have a tag axle. But it is critical that
you grease it regularly just the same. Each universal joint will have two grease fittings, opposite each other. Grease them until you see fresh grease
oozing out of the bearing caps. Be sure to wipe off any excess grease to prevent it from slinging around when the driveshaft rotates, and making a mess
for you to crawl around in next time. There is also a splined slider joint that allows the driveshaft to change length as the suspension moves up and
down. Give this fitting a couple of pumps of grease but that's it. If you keep pumping away you'll have grease all over the place and this joint slides
slowly and isn't as heavily loaded as the needle bearings spinning around in the universal joints.
Hydraulic System
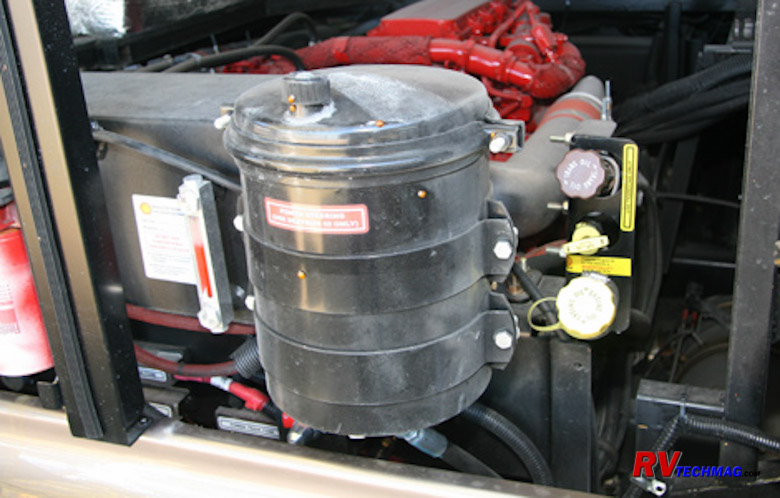
Hydraulic Fluid Reservoir
Your coach relies on hydraulic oil to operate the power steering system. This oil is stored in a reservoir at the back of the
coach and generally looks like the above example. An engine driven gear pump circulates this fluid through an oil cooler and eventually the power
steering gearbox up front. If you have a rear radiator the fan is belt driven and may or may not be controlled by a fan clutch. However, if you have
a side mounted radiator your fan will be remotely located and not very easy to drive with a belt. Some chassis do use a jackshaft and gear reduction
boxes to allow a belt driven fan drive system but the majority of side radiator coaches use a hydraulic fan motor that is driven off the same
hydraulic pump, cooler, and reservoir as the power steering.
Regardless of whether your hydraulic system drives a radiator fan and power steering, or just the power steering, it will need
occasional service. There is a dipstick at the top of the reservoir for checking hydraulic fluid level. Various fluids have been used on various
chassis. Some use a Dexron type automatic transmission fluid, some use 15W-40 engine oil, while some use dedicated hydraulic oil, such as an AW46.
Check your owner's manual for the proper fluid as well as for the service schedule for that system. The reservoir does have a mesh type steel strainer
filter inside that needs to be changed, most likely every other year. In addition, a spin-on hydraulic filter is also provided. This filter typically
is replaced annually. On that filter you will find a filter restriction gauge. If this gauge goes into the red zone while the engine is running your
filter is plugged and should be replaced regardless of whether the service schedule says it's due or not.
|

Hydraulic filter restriction gauge
|
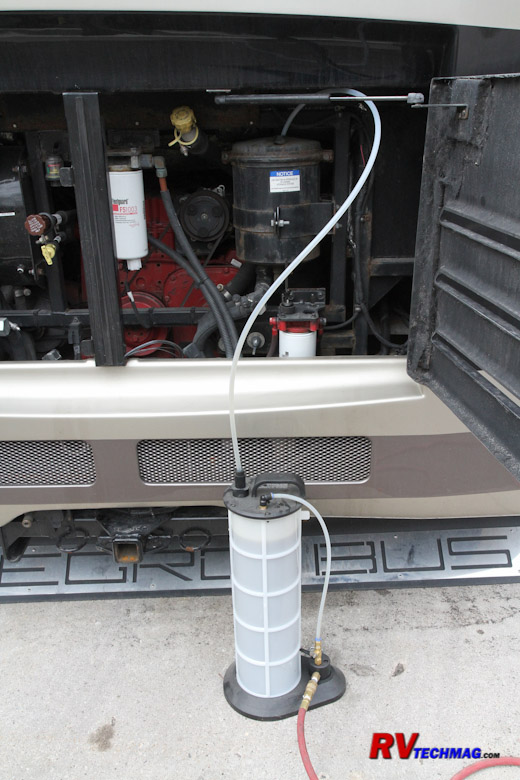
A vacuum drainer helps to empty the hydraulic reservoir
|
Replacing these filters can get messy. There usually are no shutoff valves present so once you spin off the filter, you'll
have oil pouring out of the housing. You need to be quick and then clean up or else you can drain the reservoir first to minimize the mess. If you are
replacing the reservoir strainer you'll need to drain it anyway. In that case it's easier to fill the reservoir up most of the way with the cover
removed until you get close. Then reinstall the cover and use the dipstick to check your oil level as you finish topping off the system. Run the
engine for a bit to purge any air out of the new filter then let it sit and rest while the foam dies down before rechecking the oil level.
Tires
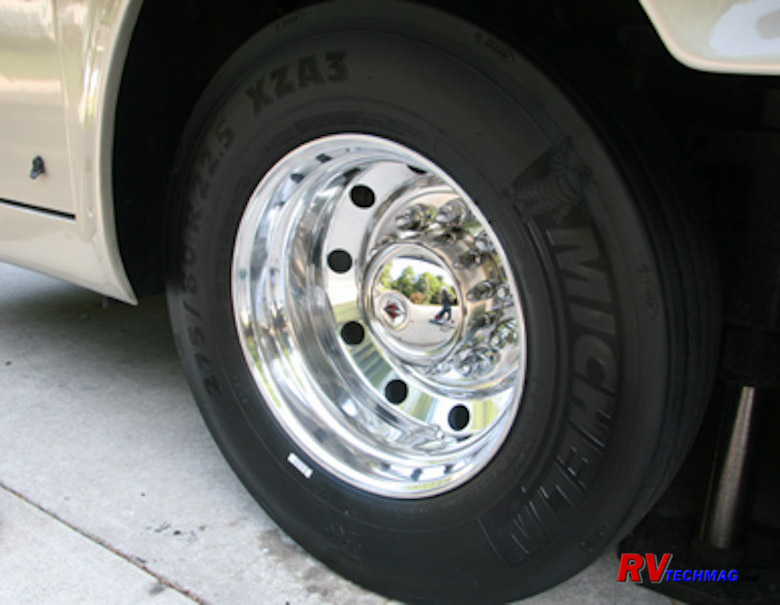
Tires are another important safety consideration. Tires die when they fail to hold air, either because of a puncture or blowout.
Tires need to be properly matched to the load that the RV will place upon them. If the tires are properly matched, and the correct air pressure is
maintained they should last a long time, barring any road hazard damage. Over the road truck tires generally are replaced when their tread is worn to
an unsafe level. But RVers don't put on that many miles in a year so RV tires typically get replaced due to their age. Tires contain lubricants that
keep the rubber in good condition. These lubricants are released as the rubber flexes during normal driving. If the RV is parked for long periods of
time these lubricants don't get released and the rubber dries out. Sunlight also attacks tires and produces ozone, which reduces a tire's life cycle
as well. While the effects of non-rotation and sunlight vary from coach to coach, depending on the environmental conditions, a typical life expectancy
for most RVs is 6-7 years. After that you are running ion borrowed time and the chance for a blowout is increased.
So, how do we maximize our tire life? First of all, driving the coach helps. Sitting in one spot doesn't release those rubber
lubricating compounds found in the tires. When you are parked, try to keep them out of direct sunlight. Parking in a shady area is a plus and tire
covers can also help. There are various tire dressings out there but you need to be careful. Making a tire look good or shiny won't help its life
any but keeping it clean of oxidation and chalking will. Many tire dressings have chemicals, such as petroleum based products, that can actually harm
the tire. Be sure you get a tire that's designed to safely feed the rubber with nutrients rather than attack it. Proper tire "nutrition" can help keep
the rubber (especially the sidewalls) from drying out and causing blowouts. Dry rot is a large cause of blowouts due to sidewall failure. You can read
the DOT date code on your tires to determine their actual age. Check out This Link for a breakdown on
how to read those codes. Furthermore, Michelin Tires has a statement on how long RV tires can be expected to last at
This Link and it's interesting to note that no matter how well they are taken care of, 10 years is
the maximum.
The second major cause is underinflation. Any tire needs to have a given amount of air pressure to carry a given amount of
weight. As the weight loading goes up, so must the air pressure. You could just pump the tires up to maximum inflation pressure but chances are your
tires don't need that much air and it'll ride very hard. To find out what your tire pressures need to be you first need to weigh your coach. A
detailed account of how to do this can be found at This Link.
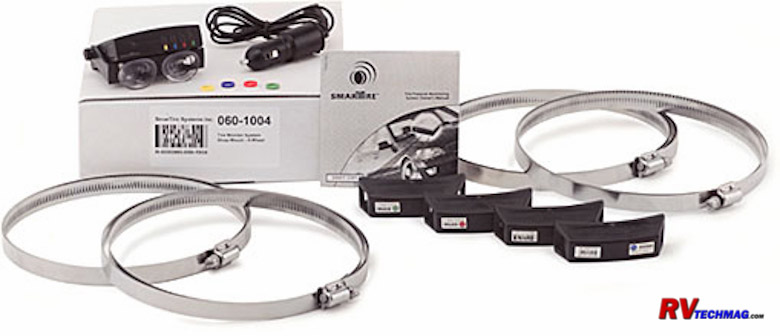
SmarTire Tire Pressure Monitoring System
Once you know what the pressures are you need to check them regularly. This is typically done with a quality tire pressure
gauge, either a mechanical trucker's foot version or a good digital gauge. It's a daily pre-trip task although if you have a Tire Pressure Monitoring
System (TPMS) you can generally skip that because the TPMS will alert you if any tire is low. A TPMS also gives you the benefit of a warning should
your tire get a slow leak while driving. A slow leak may not be noticeable to the driver but the tire will lose its ability to carry that much weight
eand will overheat, which generally lads to a blowout. A TPMS will give you enough advance warning that you can deal with it before it gets to the
critical stage. If you use your coach's on-board air connection to fill your tires but you will need to set the cruise control to fast idle to give
the compressor enough RPM to keep up with the air demand.
Generators
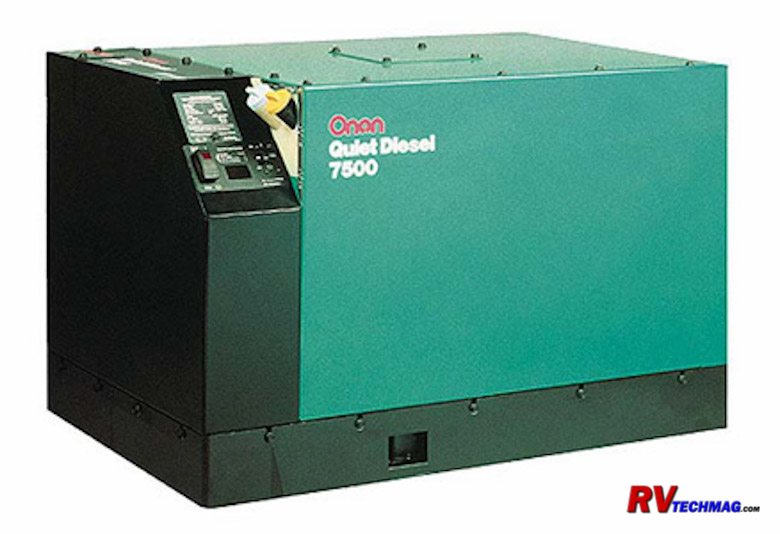
Generator service is similar to your engine maintenance only smaller and with a few extra changes. As always, you need to
check your generator manufacturer's manual to find out filter numbers and oil viscosity and rating and coolant type used. Once you have this info
be sure to change your generator's engine oil regularly. Working inside the confines of a generator enclosure can be challenging at times but the
principles are the same as your RV's engine. You'll probably need to buy that small oil filter wrench to remove the oil filter and Tiffin has been
known to install preliminary fuel filters in the fuel hose just prior to the genset itself. This increases the life of the Onan fuel filter inside
your generator's enclosure but you do need to know that it is there. It's standard automotive filter that's available at any auto parts store and
it's the first thing you should look at if your generator suddenly develops a loss of power. Air filters vary as to ease of access, depending on
which model of generator you have. Check your owner's manual for the exact location. The spark arrestor needs to be occasionally removed and the
soot purged. Soot will build up in this area over time so removing the plug and running the engine for a bit to burp any soot out of the system
will ensure that your exhaust system remains free and breathable. Accessing the radiator cap may require removing a panel for access. Again,
check your manual for specific details.
In addition to the engine, you also need to take care of the generator itself. The generator is belt driven but these
belts aren't a frequent failure so I wouldn't worry about them. If they do break it requires a great deal of work to gain access to replace
them so you may want to pay a Cummins/Onan service center to perform that headache when, and if, that time ever comes. The best thing you can
do for your generator is run it. Sitting idle won't do it any favors. Onan recommends running it under a minimum of half load for 1-2 hours
every month. In fact, on a newer generator that's come in for warranty one of the first things they'll check is the hourmeter to make sure you
have been running it. Running the unit will heat up the generator windings and burn out any condensation that's formed inside the generator,
which is why you need to run it at a decent load for a long enough time. It'll also flex your belt to keep it from drying out and becoming brittle.
The Kubota engine typically used in Onans isn't a wet sleeved engine so it doesn't have the cylinder liner cavitation issues
that your RV's engine has. Therefore it's not as picky about coolant and most heavy duty coolants designed for diesel engines will work. My personal
preference is OAT coolant because OAT coolant doesn't tend to corrode aluminum like non-OAT coolants do. There's lots of aluminum in the generator's
cooling system so it's a good choice. It also means that I have standardized on a single coolant for both the genset and RV engine, which makes
carrying spare coolant simple.
Servicing your own RV isn't all that demanding as long as you don't mind a little dirt, have some time on your hands, and
have a bit of mechanical aptitude. You can save some serious money, perform a better inspection, gain a better knowledge of how your RV works, and
gain the satisfaction of a job well done. The cost savings can buy some diesel fuel to help you enjoy your RV the way it was meant to be, by driving
to your favorite getaway place.
Return to Home Page
If you enjoyed this article be sure to recommend RVtechMag.com to your friends, like us on Facebook or Twitter
or subscribe to our RSS feed.


|


