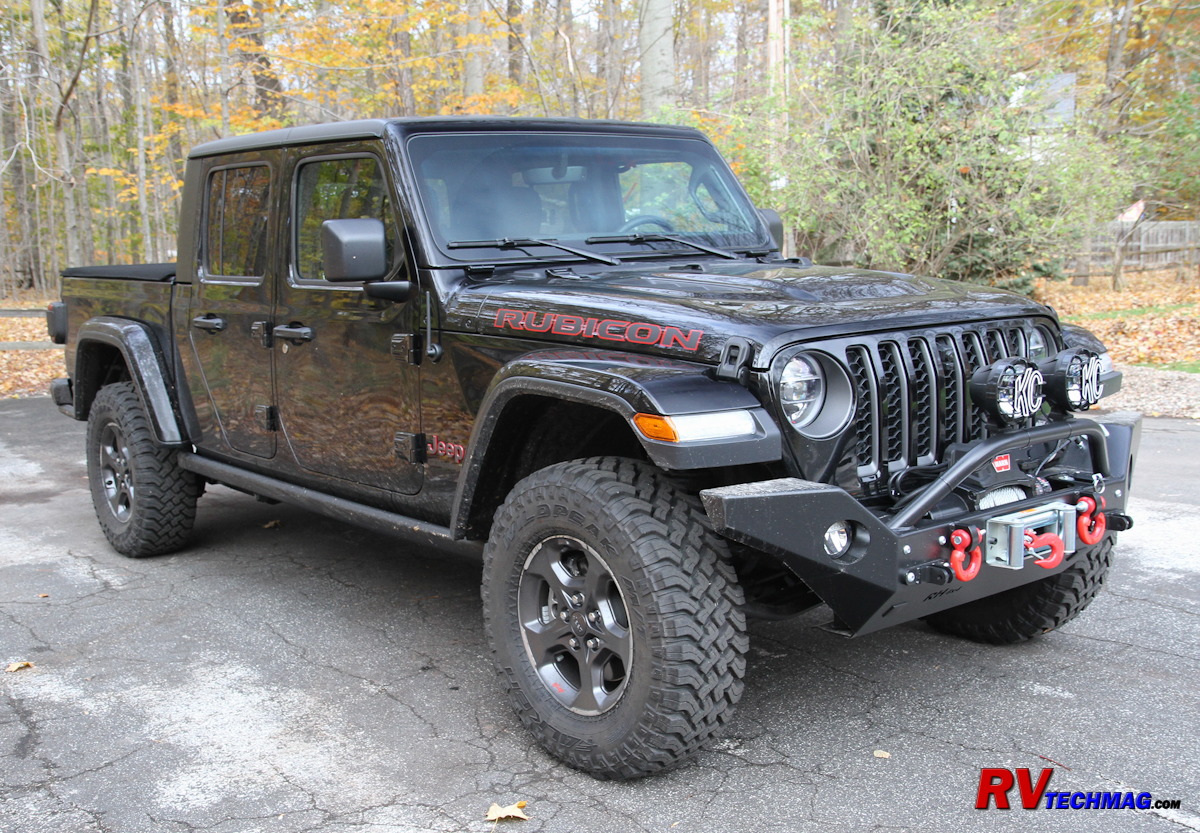
2020 Jeep Gladiator Rubicon Review
Reviewing the Gladiator and Flat Towing Mods
Article Date: November, 2019
Article and Photography by Mark Quasius
Getting Ready to Flat Tow
When flat towing any vehicle behind a motorhome you first need to be certain that your vehicle can be flat towed. Many vehicles
cannot while some can be but need modifi8cations such as transmission lube pumps or driveshaft disconnects. But the Wrangler and Gladiator do not need any of
that stuff and are perfect for flat towing, which explains their popularity with motorhome owners. In order to flat tow you do need to make a few changes to
the towed vehicle. First off all you need a tow bar, which is normally folded up and stored right in the motorhome's hitch when not in use. You also need an
attachment point on the towed vehicle. Normally the tow bar manufacturer makes base plates that mount to the vehicle's frame and provide mounting tabs for the
tow bar to connect to. You also need a lighting system so that the towed vehicle's lights will operate in conjunction with the motorhome's lights. Finally, an
auxiliary braking system is required to apply the brakes on the towed vehicle when towing.
|
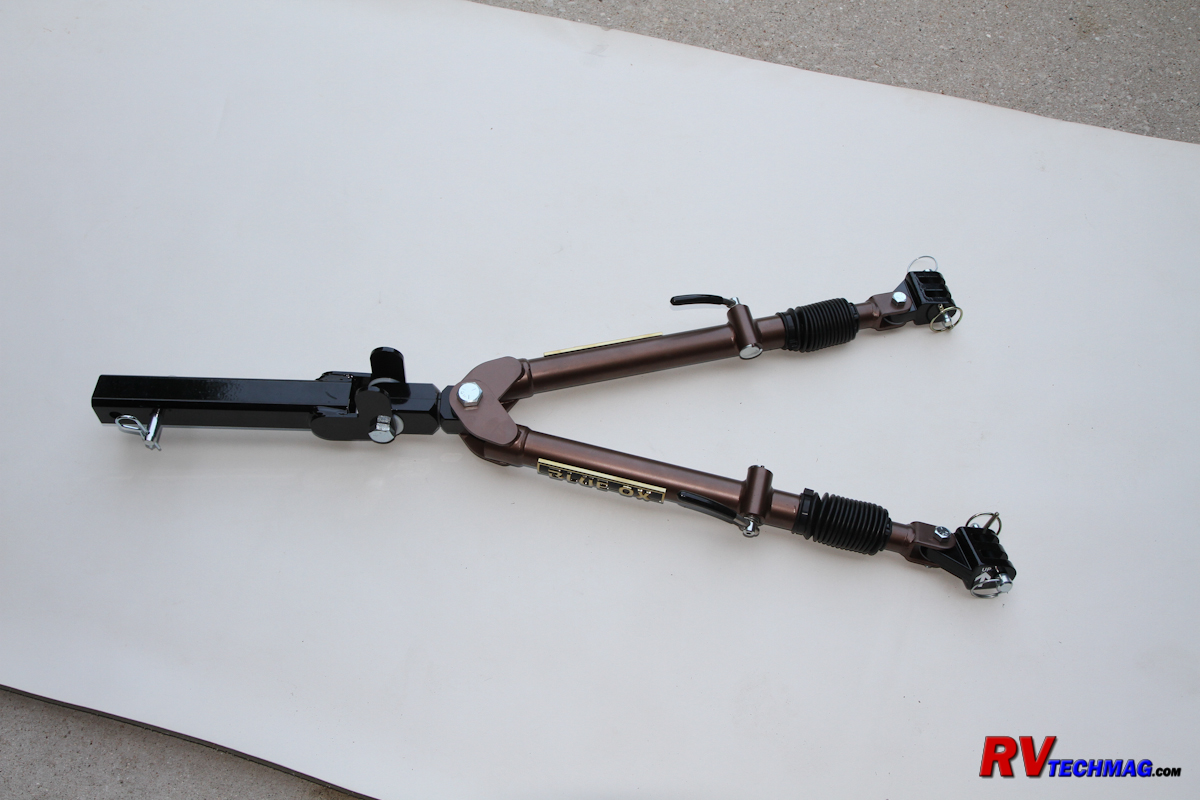
I selected a Blue Ox Avail tow bar.
|
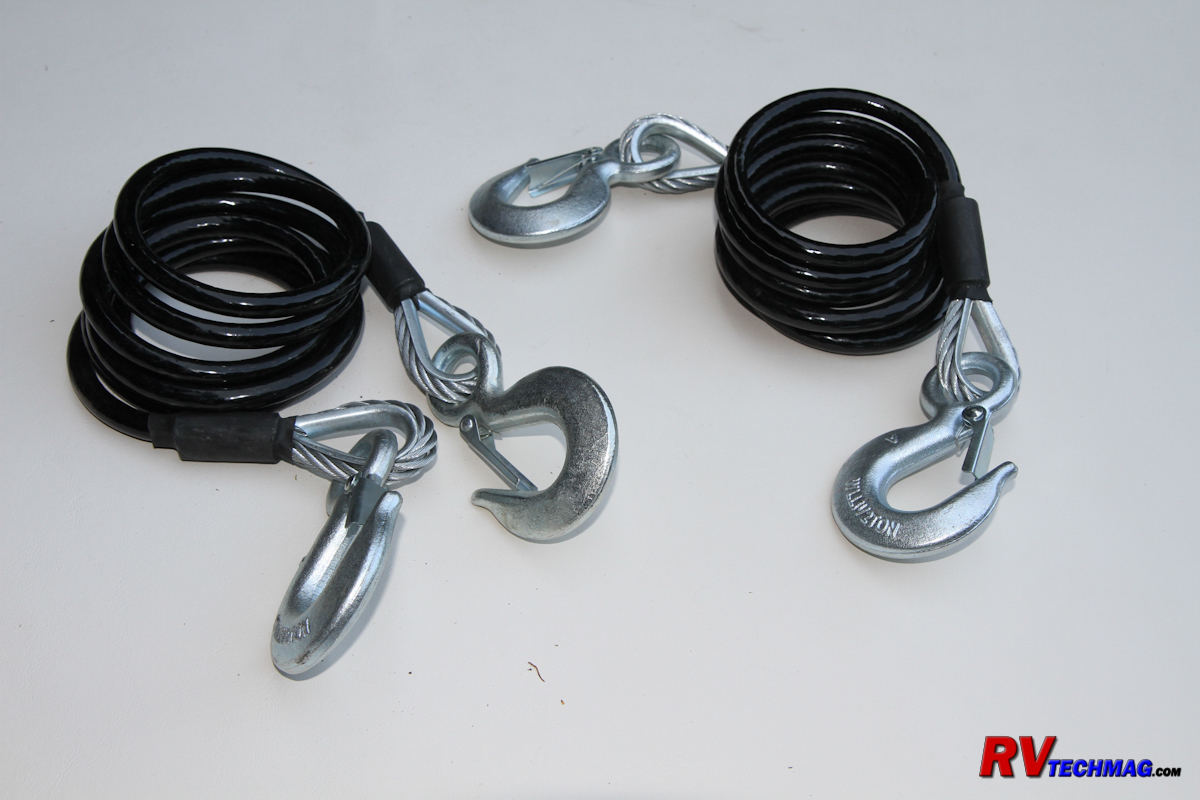
The tow bar came with coiled safety cables.
|
|
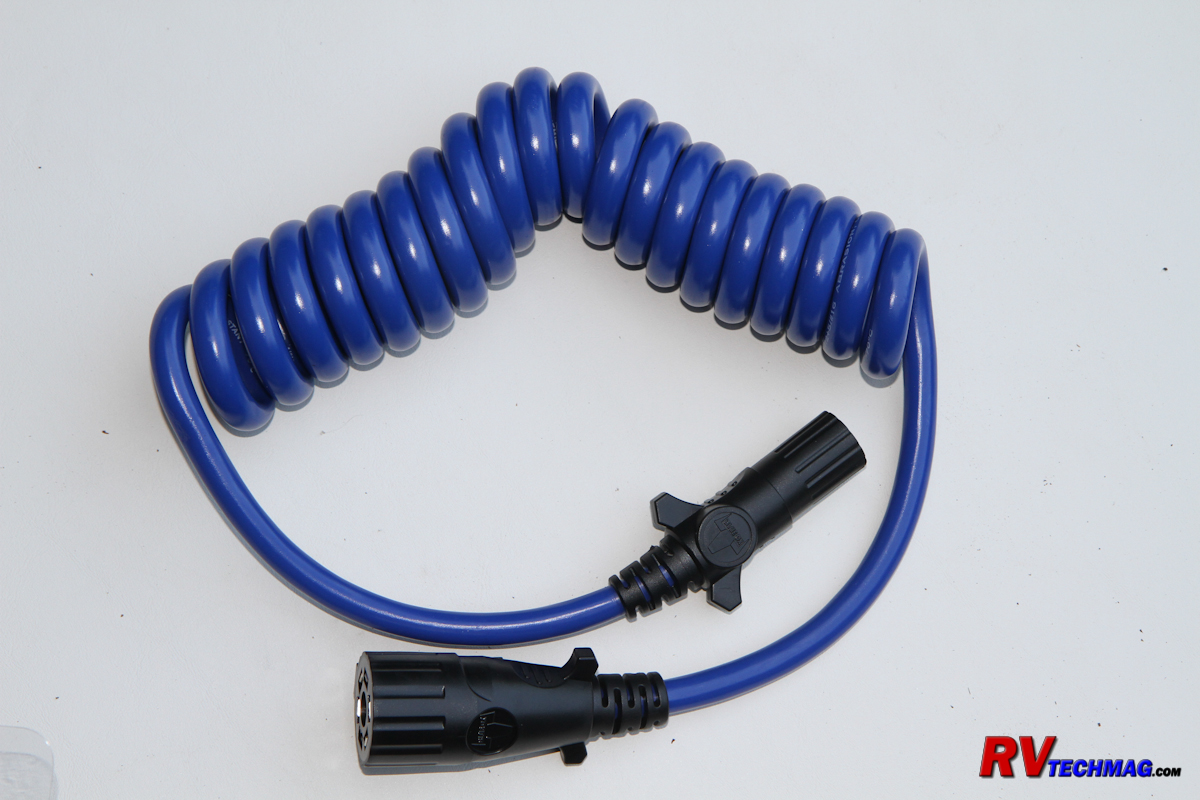
The 7 pin to 6 pin coiled lighting cord.
|
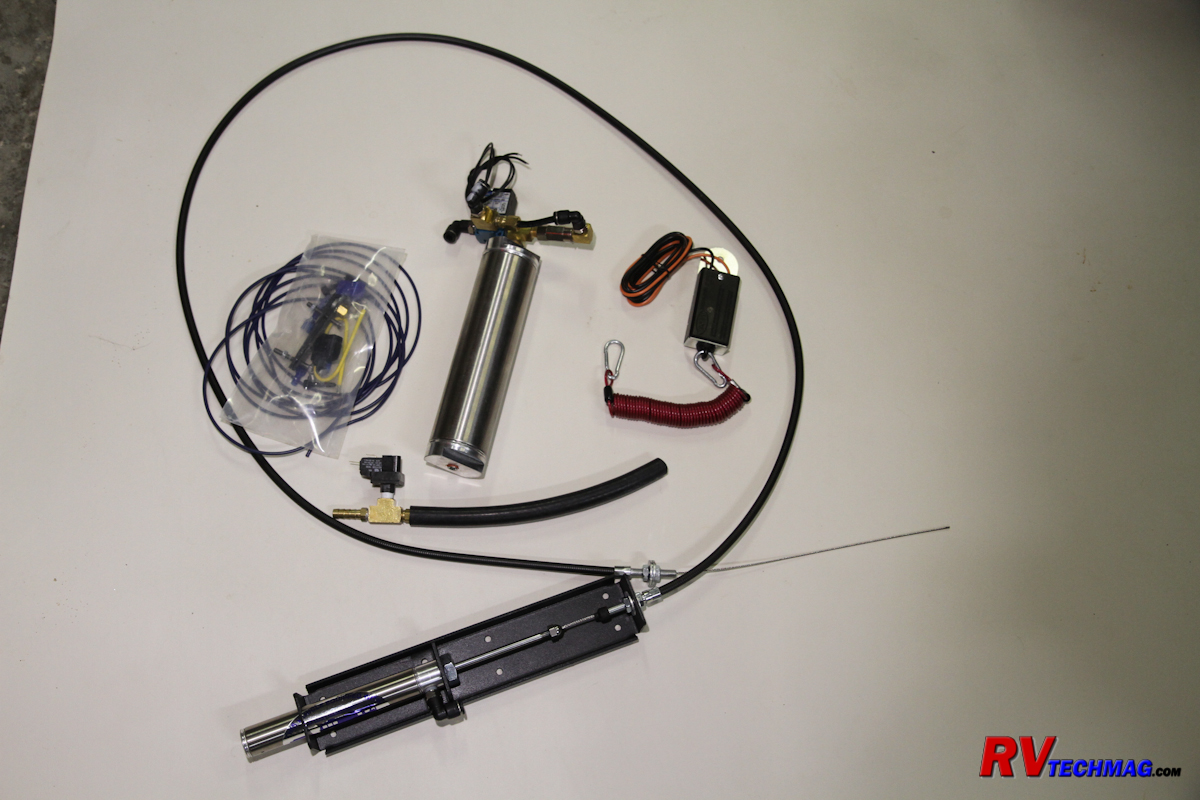
The M&G auxiliary braking system.
|
I had a tow bar and base plate setup on our older TJ Wrangler but I didn't care for it because we did plenty of off-roading and I didn't
like the idea of this bracket mounted low so that it could get damaged on rocks when wheeling. I planned on replacing the original front bumper with a nice heavy
steel bumper capable of handling off-0road travel as well as a solid place to mount a winch.
Rockhard 4x4 makes an excellent steel bumper and I have used them on our JK Wrangler
with excellent results. It is made from heavy 3/16" steel plate and offers a low mounting position for the winch, which gives the winch a better vantage point
for winching and also prevents it from blocking the air flow to the radiator. Rockhard also offers tow tabs for most major tow bar manufacturers. These tabs bolt
to the front of the bumper and use the existing factory bumper mounting locations so that they are pulling directly on the frame rails. This eliminates having to
use a base plate (which also saves some money) because the tow bar connects right to the bumper mounted tabs. The bumper also includes heavy duty D-ring shackle
mounts typically used for retrieval purposes that are perfect for attaching the towbar's safety cables to. This setup gives me the ability to flat tow the Gladiator
and go off-road with no limitations. On our JK Wrangler I did have chance to test the strength of this once when my 5/8" hitch pin sheared and the entire tow bar
slid out of the receiver. I felt a strong jerk and noticed that our Wrangler< was following about 10' back from the coach. I pulled over, replace the pin with a
spare and went on our way. The safety cables held up fine and did their job so I was sold on Rockhard's system. In fact I may get their entire skid plate system
for the Gladiator like I did on one of our Wranglers.
|
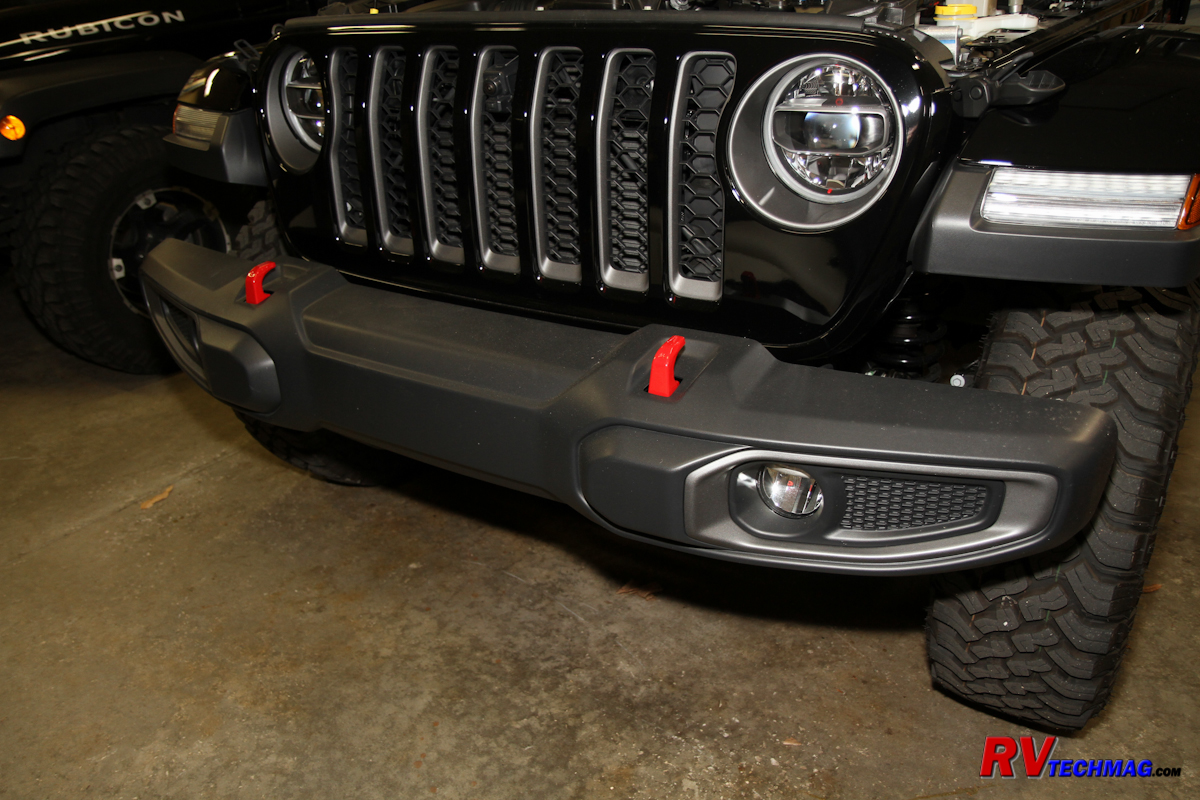
The original bumper wasn't suitable for flat towing.
|
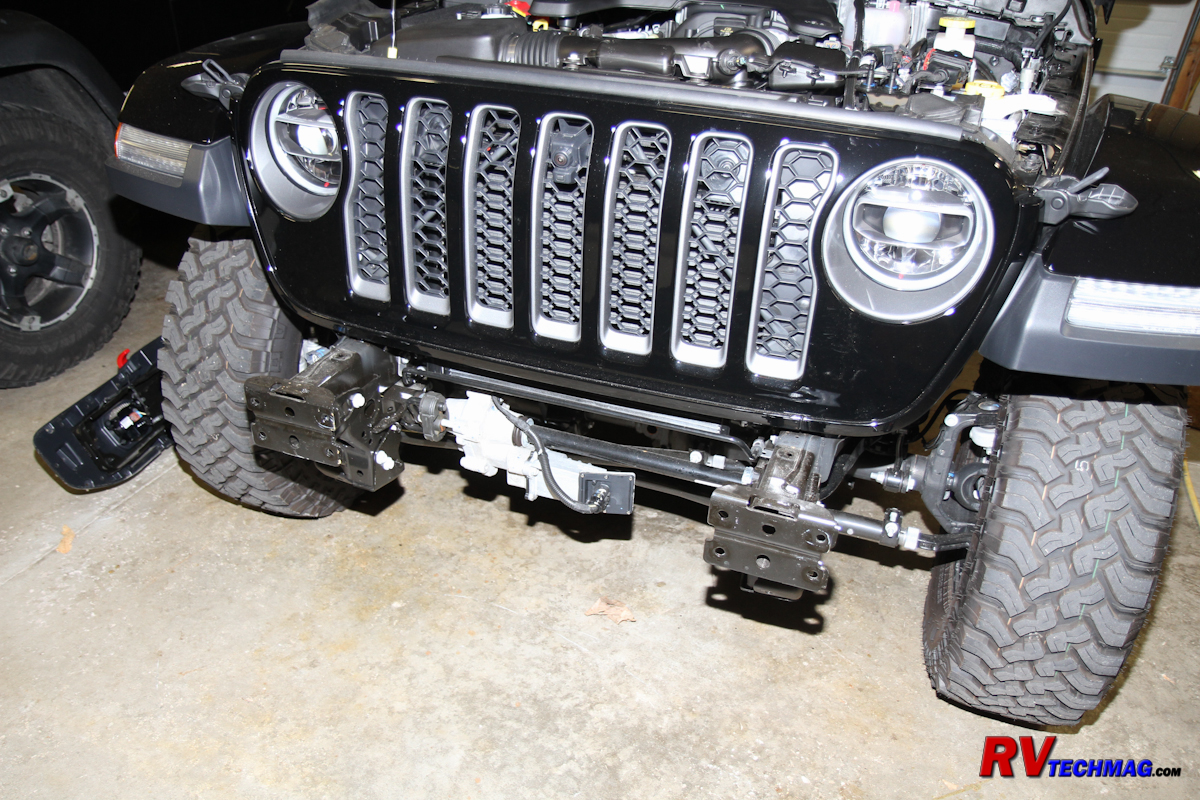
I removed the OEM bumper to prepare for the Rockhard bumper.
|
|
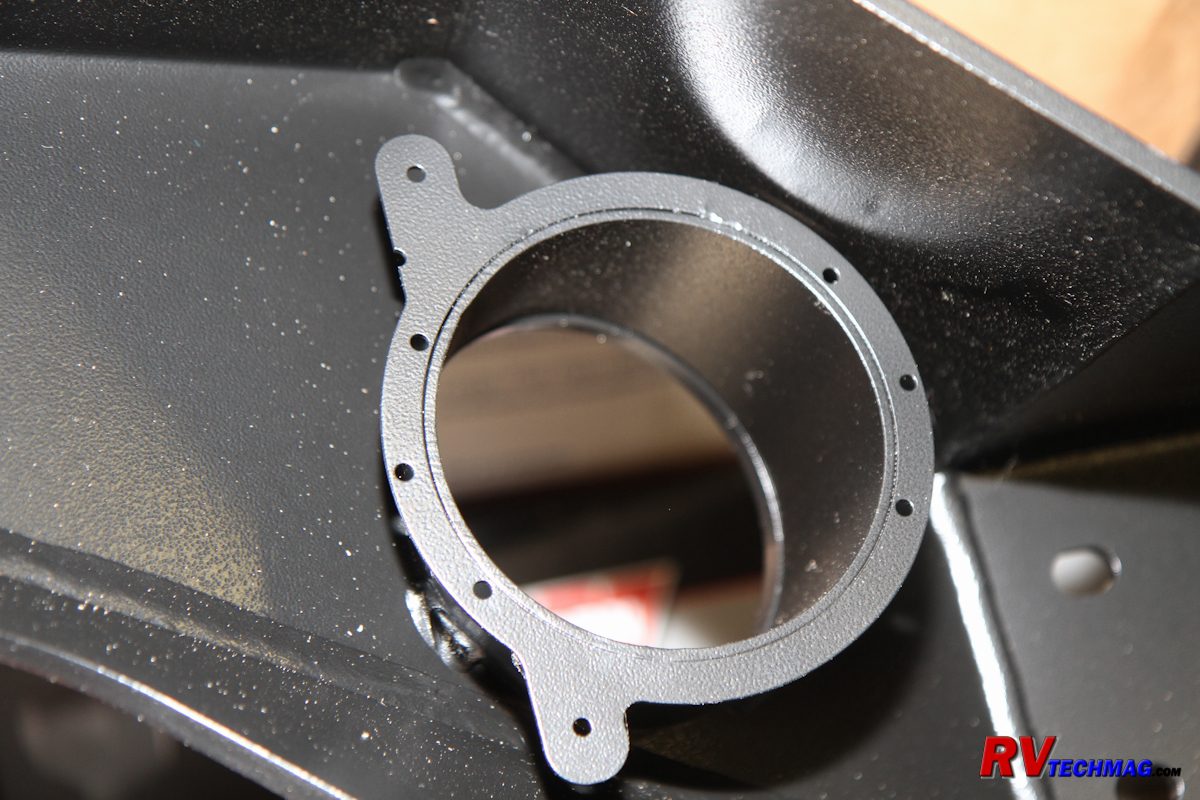
The Rockhard bumper is machined to accept the factory fog lights.
|
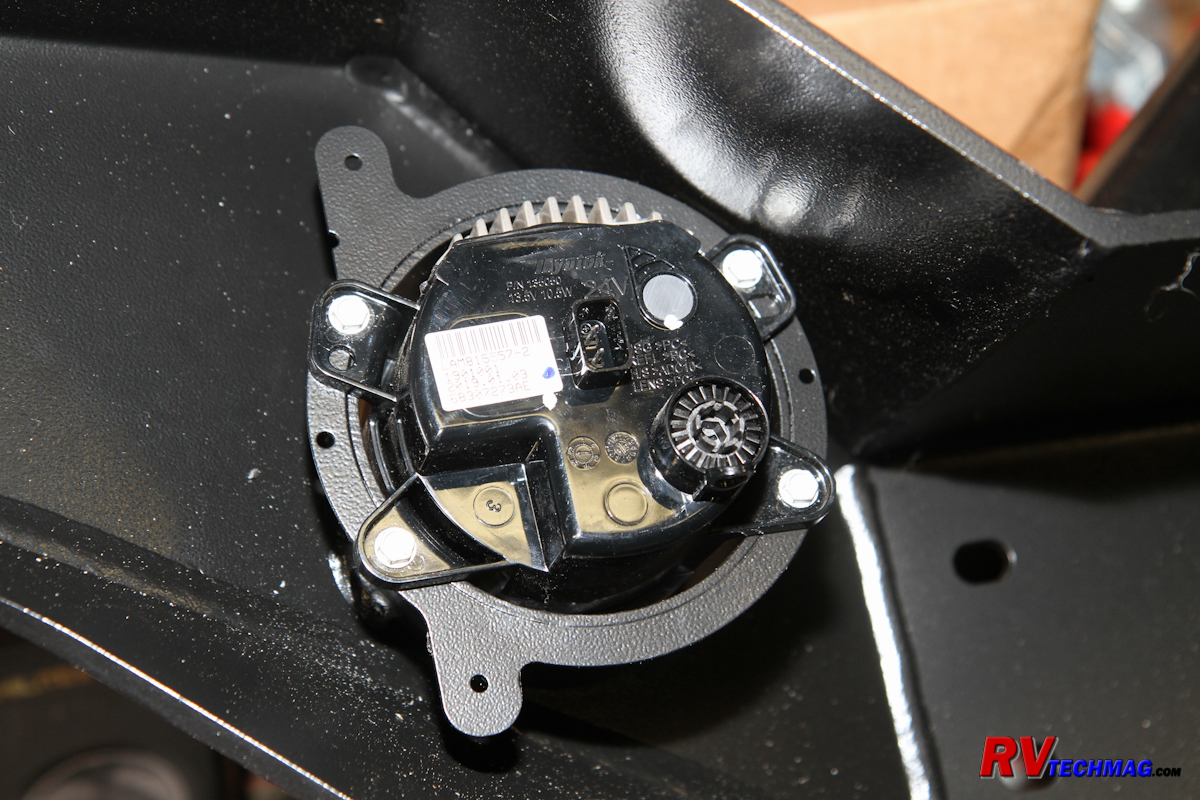
Fog lights installed.
|
|
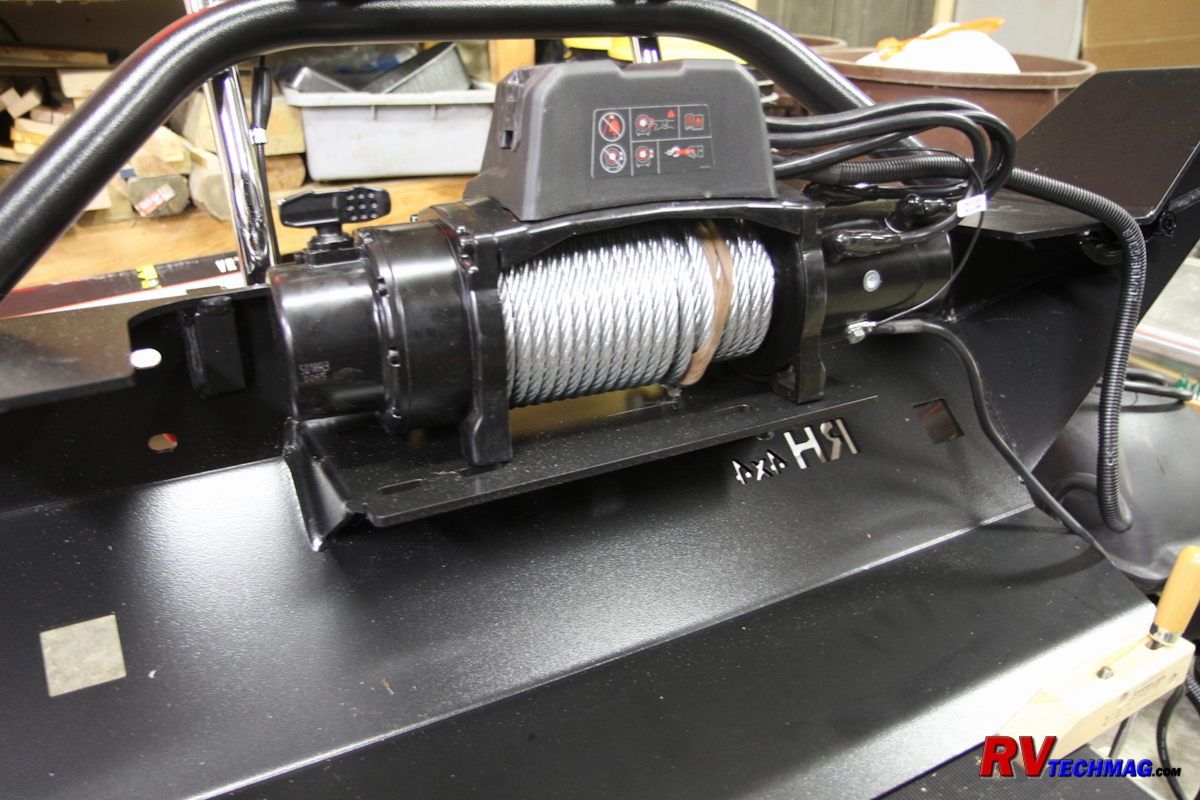
The Warn winch installed into the Rockhard bumper.
|
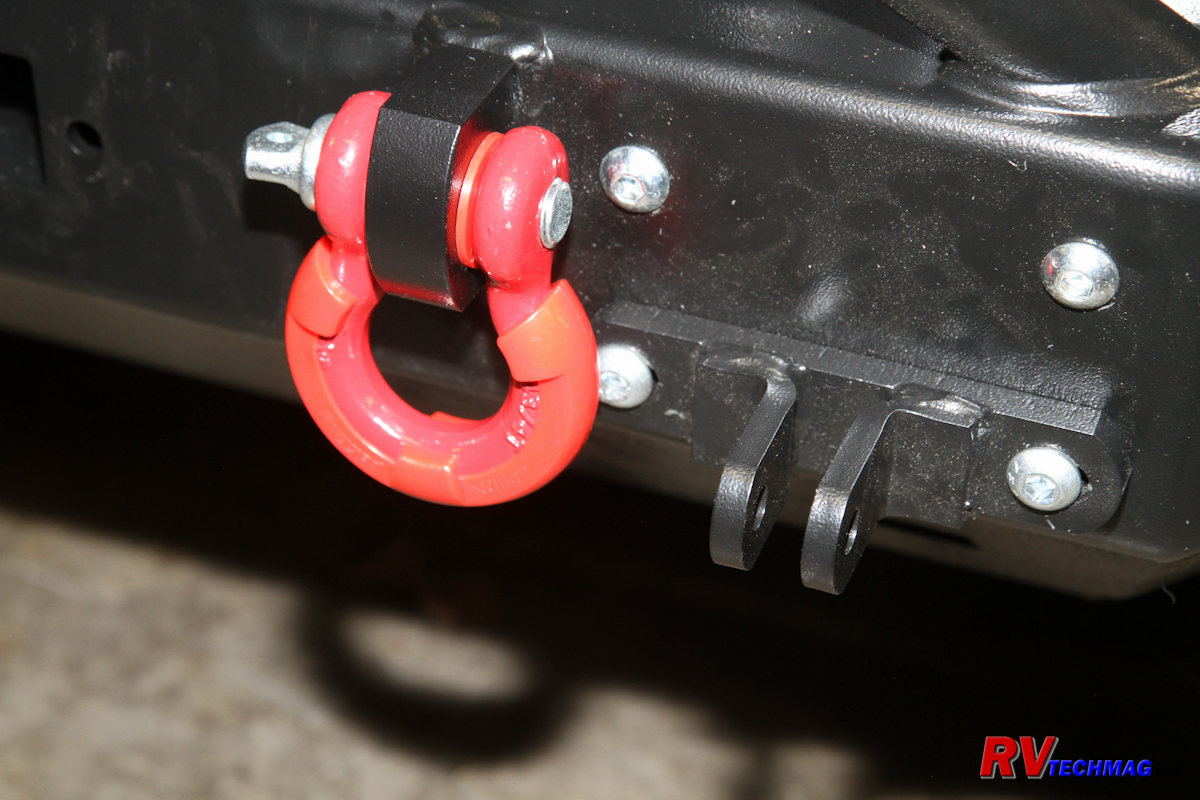
Towbar mounting tabs and shackles for safety cables.
|
Now that the Gladiator was hooked up, the next step was to connect the tail light assemblies to the RV. The motorhome was equipped with
the standard 7 pin RV connector that is commonly used. Tow bar manufacturers sell a popular 7 pin to 6 pin coiled umbilical cord to connect the RV to the towed
vehicle. A 6 pin socket is generally inserted someplace into the front of the vehicle for this cable to plug into. I decided to mount my socket into the
Rockhard front bumper because it was a convenient location and there were a number of flat surfaces where it would be easy to mount the socket in. The next step
was to connect the socket to the rear lights and there are several ways to do that. Method one is to add a second set of bulbs to the taillight sockets and
connect them directly to your lighting socket. But this only works if your sockets are particularly large which is usually the case. The most popular method is
to run your wires to a set of diodes and then to your existing lights. This prevents backfeeding to the towed vehicle's electrical system. But this method isn't
perfect because the towed vehicle's auxiliary braking system can actuate the brake lights. For example - if you turn on the right turn signal when preparing to
make a turn the towed vehicle's right turn signal will begin to flash. However, when you step on the motorhome's brake pedal the auxiliary braking system on the
towed vehicle will most likely apply the brakes on the towed vehicle, causing the brake lights to go on. But the steady brake light signal from the towed
vehicle will override the flashing turn signal from the RV so the turn signal will stop flashing and you'll just have two steady brake lights.
Of course this won't happen if the towed vehicle has separate red brake and amber turn signal lights but that is typically not the case.
The way to eliminate this unwanted scenario is to completely isolate the towed vehicle wiring from the motorhome's wiring. Mopar makes flat towing wiring harness
kits for both the JK and JL series Wranglers. These kits consists of a custom wiring harness that eliminates having to cut into and patch any of the existing
wiring. The plug and play harness includes solid state relays that switch between the two electrical systems automatically. All you have to do is plug in the
cord from the motorhome to the Jeep and the relays will sense 12 volt power on the charge line pin and energize the relays to disconnect the rear lights from
the Jeep and connect them to the RV. Once you unplug the lighting umbilical the lights automatically return to the Jeep circuits. As of this writing Jeep does
not yet make a kit for the Gladiator but the lighting sockets use basically the same connectors as the JL Wrangler so I purchased Mopar wiring kit part number
82215382 and cut the middle wiring loom and extended it by a couple of feet to allow for the 18" longer wheelbase of the Gladiator and ran that.
|
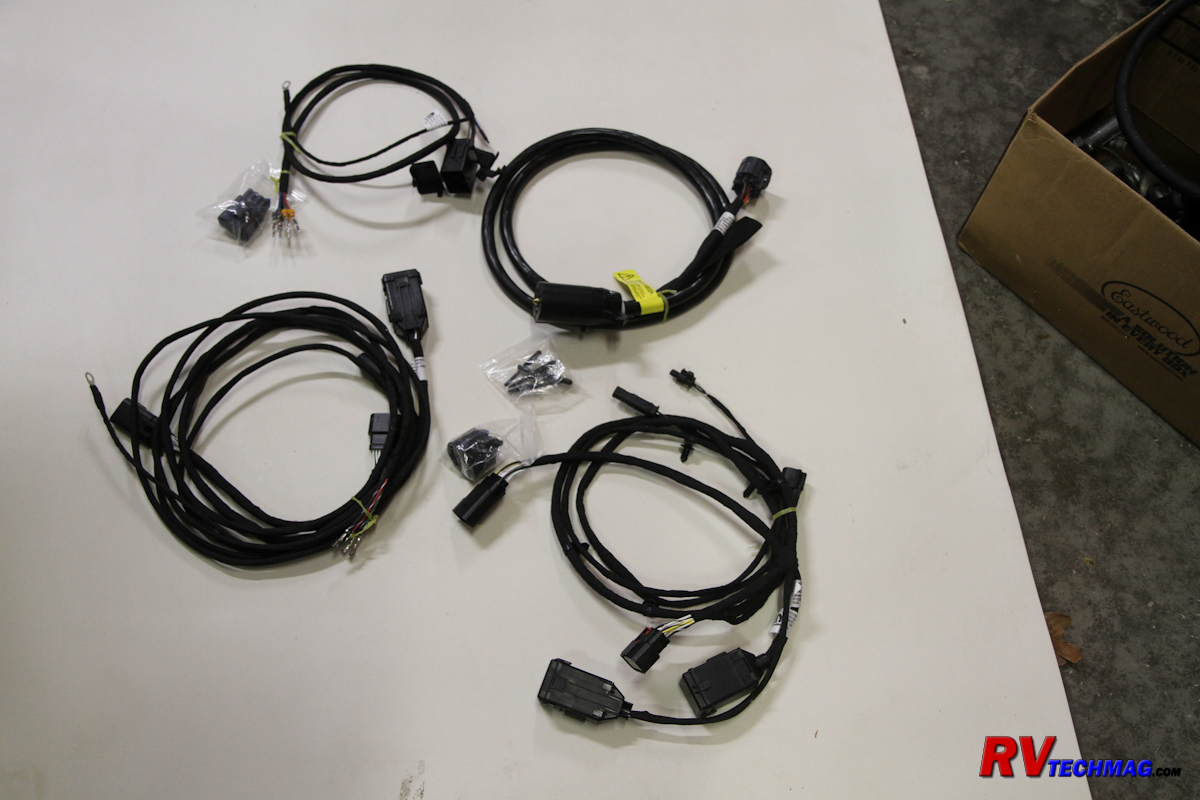
The Mopar flat towing wiring harness kit.
|
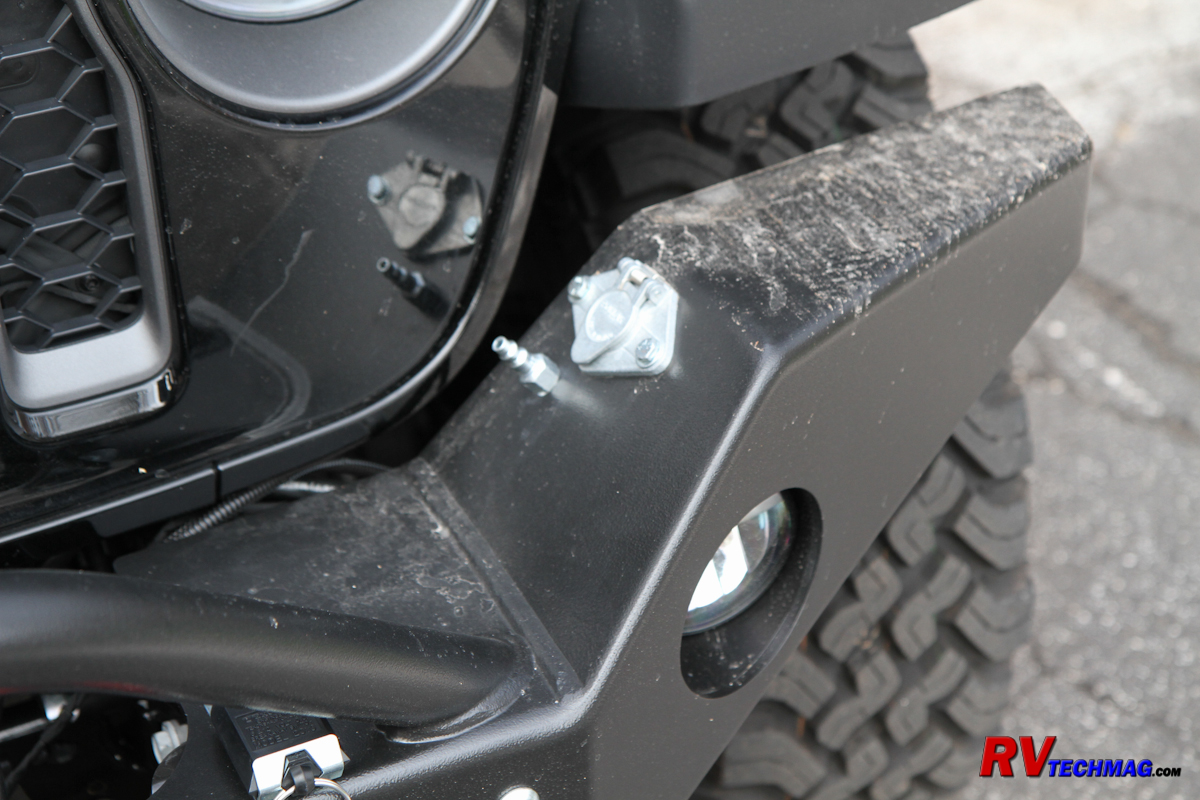
I installed the lighting socket and the auxiliary braking system connector into the front bumper.
|
Lastly, I needed an auxiliary braking system. I chose to go with
M&G Engineering's towed braking system 2.0. This system uses an air cylinder
with a stainless steel cable that connects to a bracket on the brake pedal. An air hose connects the motorhome to the Jeep via quick disconnect couplings. When
the air brakes on the motorhome are applied, the RV sends an equal and proportional air pressure to this cylinder, which then applies the Jeep's brakes. The bracket
that mounts to the brake pedal arm is unobtrusive and doesn't get in the way of my big feet. I mounted a quick disconnect fitting on my Rockhard bumper and my
braking system is also automatic. I did order the optional breakaway system as well, which utilizes an air cylinder and breakaway switch (again, mounted on my bumper)
to apply the brakes should something go wrong and the Jeep become disconnected from the motorhome when towing. The M&G system also requires the brake booster to
be charged up with vacuum when towing. They can supply an auxiliary 12 volt vacuum pump to do this when towing but most Mopar products already have a 12 volt pump
so all I had to do was tap into the pump's power line and connect it to the incoming battery feed from the motorhome. I then added an
RVI Towed Battery Charger to prevent backfeeding when not towing while
allowing the motorhome to keep the Jeep's battery charged up.
|
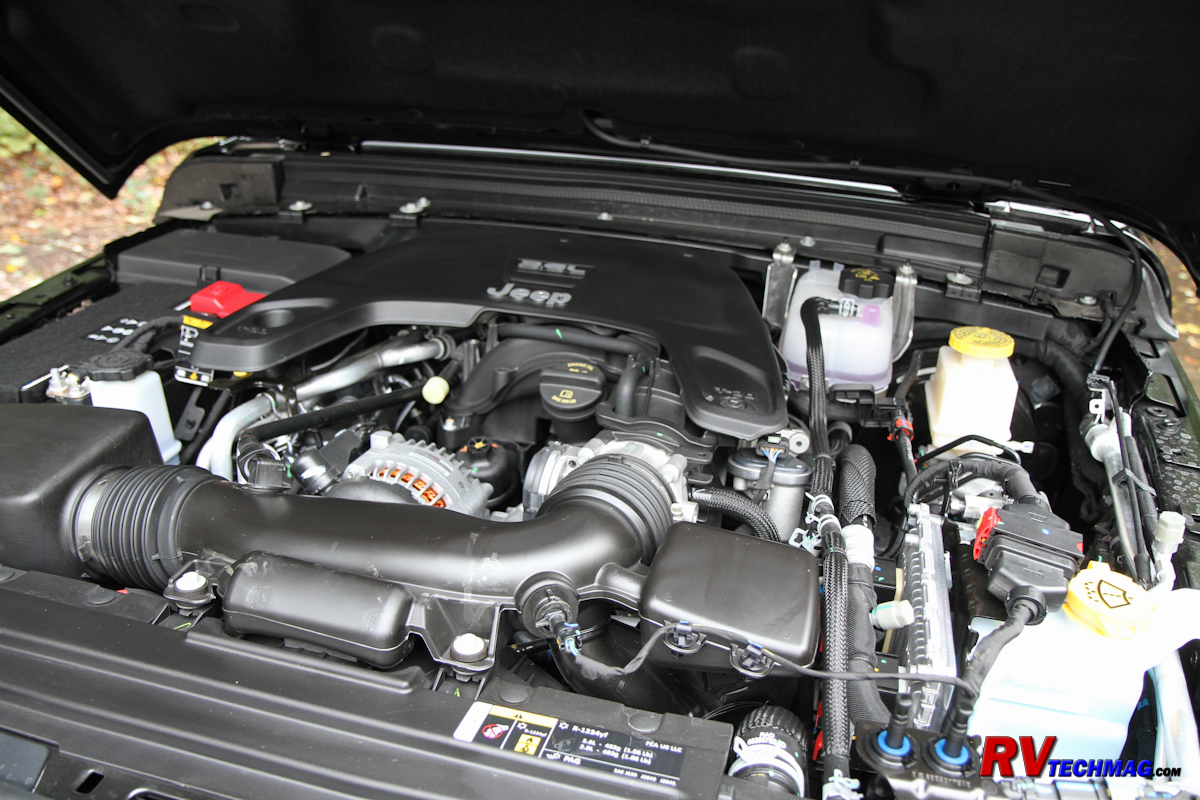
The under-hood area had just enough room to install the M&G braking system.
|
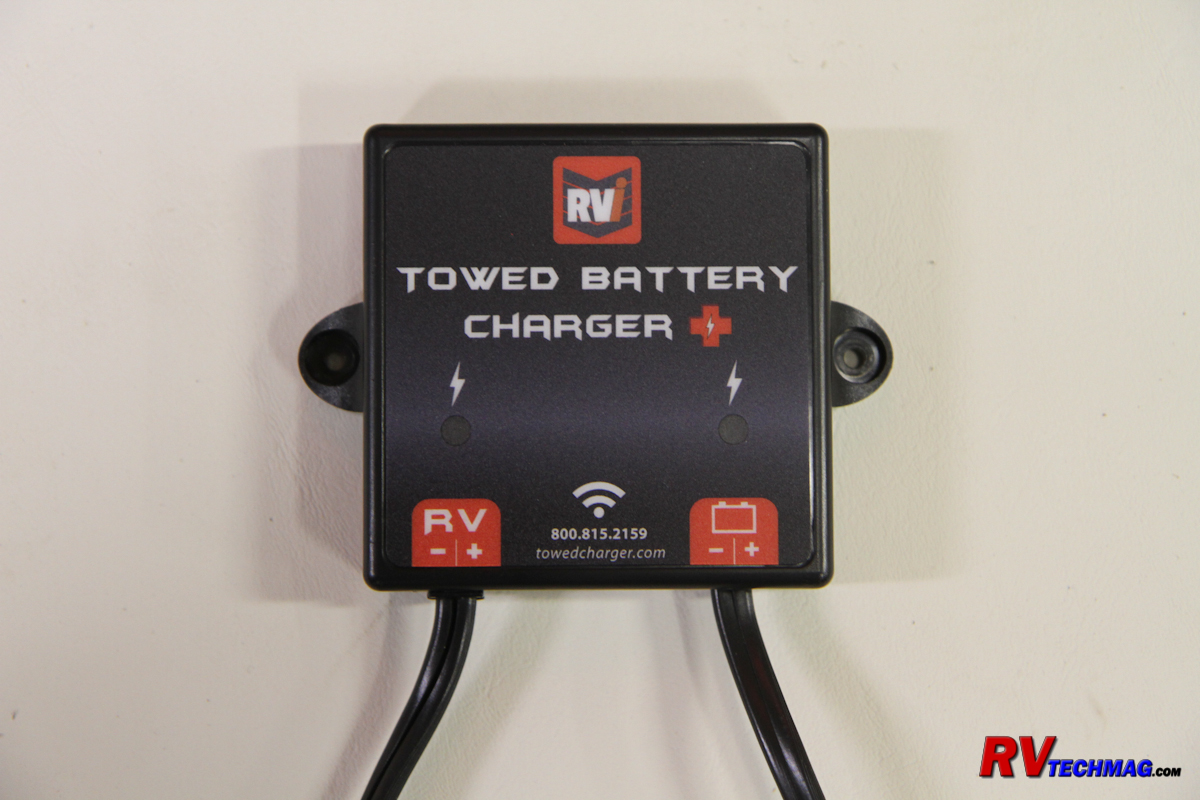
An RVI Towed Battery Charger prevented any battery drain.
|
Finally, I did add a pair of K-C Hilites LED driving lamps to help illuminate the night under certain conditions and added a shorty
antenna. I dropped a Warn winch into it's new home in the Rockhard bumper and made sure to order red D-ring shackles and winch hook to keep the black with red
accents look. Even the factory rims had little red Jeep's accenting each wheel rim. I also added a second set of SmarTire tire pressure monitoring sensors. These
Bendix TPMS sensors mount on the inner ring of the wheel rim and communicate with the SmarTire TPMS system in the motorhome that monitors both the motorhome and
the towed vehicle when being towed.
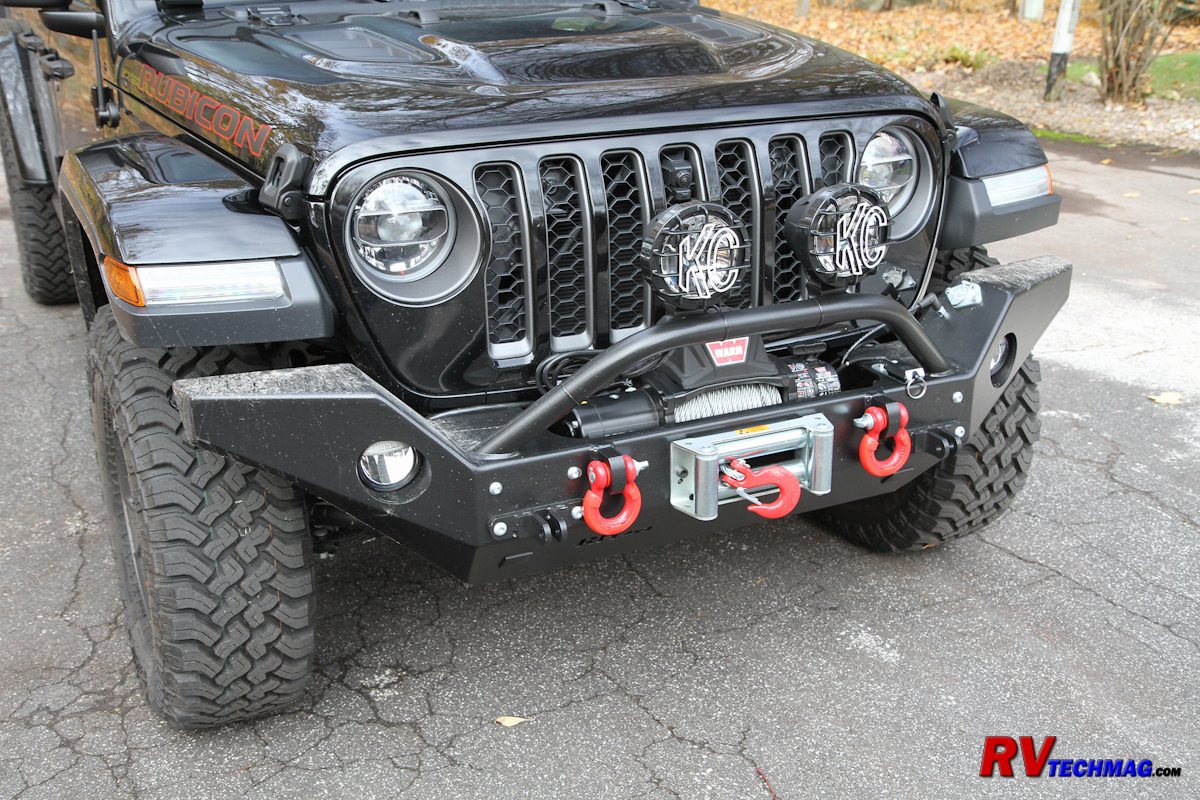
The finished project.
All in all I am extremely happy with my Gladiator. I can't wait for spring to come so that we can hook it up behind
the motorhome and head out west for some off-road wheeling.
Sources
Return to Home Page
If you enjoyed this article be sure to recommend RVtechMag.com to your friends, like us on Facebook or Twitter
or subscribe to our RSS feed.


|
