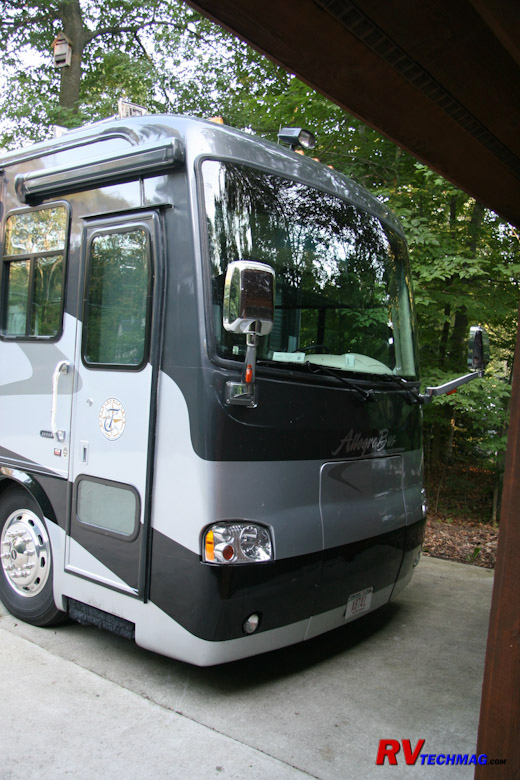
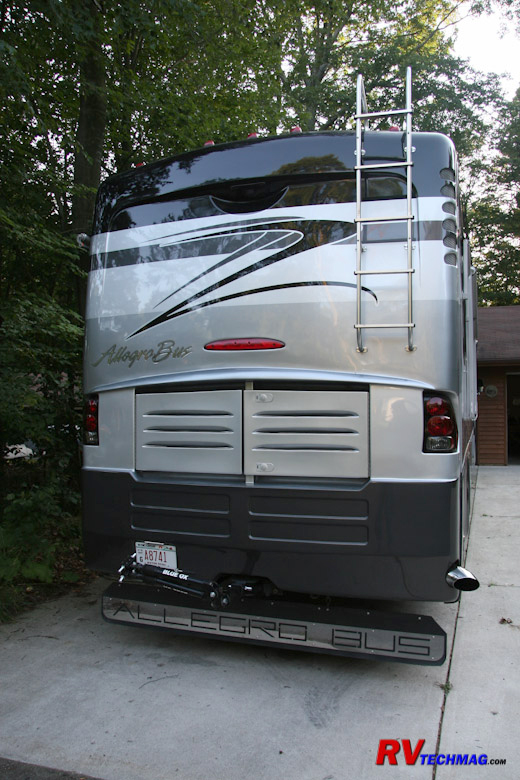
2004 Allegro Bus 40DP
Detailing the Custom Upgrades Done to Our RV
Article Date: August, 2005
Article and Photography by Mark Quasius
Introduction
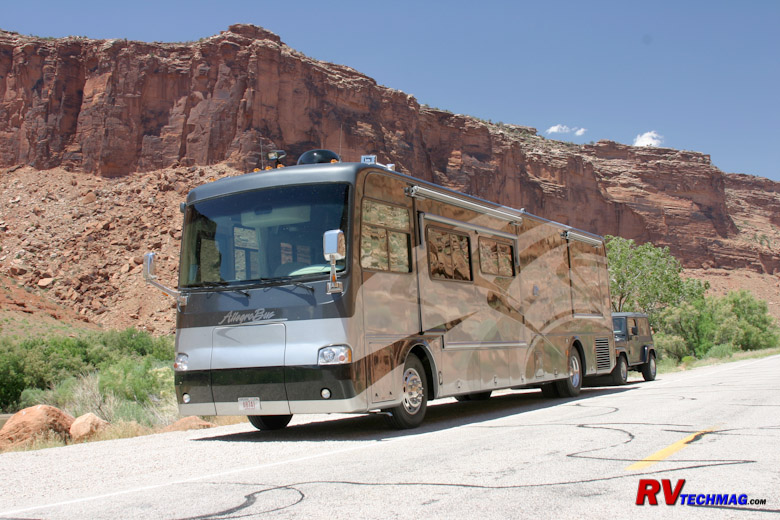
Prior to getting our 2007 Alllegro Bus 42QRP we had a 2004 Allegro Bus 40DP. It served us very well for 3 seasons and was
loaded with a number of options and unique features and was a big upgrade from our 2003 Suncruiser. It was the 40DP floor plan with NASA exterior
and Cherry interior and was on a Freightliner XC chassis with a 400 HP Cummins ISL, putting out 1,200 ft-lbs of torque. We ordered the Splendide
2100 washer-dryer, KingDome in-motion satellite dome, Flexsteel VersaFlex power sofa that makes into a queen bed at the push of a button, and a
bunch of other options from the factory. Then I added some custom features myself, such as (6) AGM house batteries, Xantrex RS2000 true sine wave
inverter, automatic generator start, 440 watt solar panels, Smartire tire pressure/temperature monitoring system, TripTek computer, Sony color
rearview monitor, SeeLevel digital tank monitoring system, SurgeGuard hardwired 50 amp surge protector, etc.
Exterior
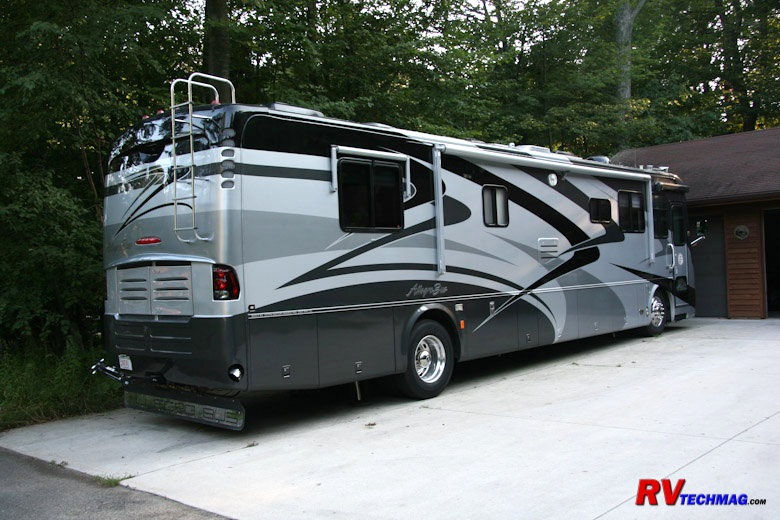
This coach was painted in the NASA color scheme. It came with a chrome faced mudflap and Diamond Shield protective
film on the front.
Electrical Mods
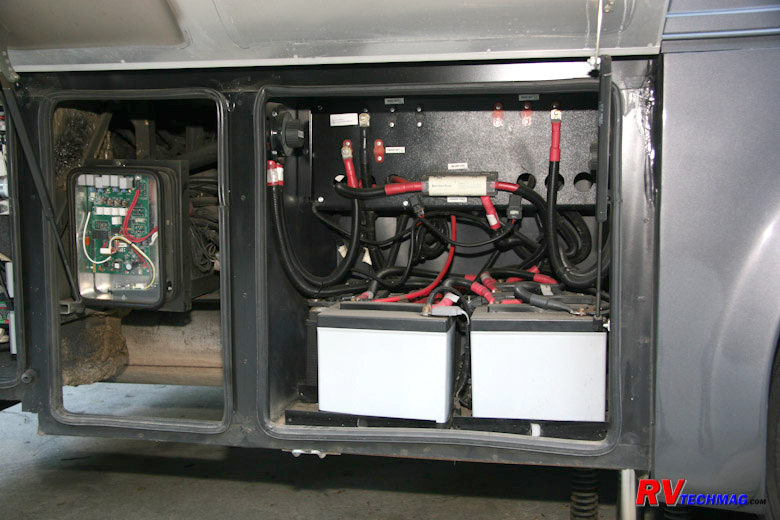
I did a large number of upgrades to this coach in the electrics and technology end of things. The original 4 flooded batteries
were replaced by AGM batteries in June of 2006. AGMs can be drawn down deeper and will recharge faster. They have a longer life and they do not
outgas hydrogen when being charged. This eliminates battery terminal corrosion and it also allows you to place them in unvented compartments. I
found that the switch to AGMs gave me approx 25-35% more battery runtime. Because they can be placed in unvented compartments, I then added two more
AGM batteries, for a total of 6, and placed them in an unused corner of the basement storage and ran heavy duty battery cables to them. This gives
me a battery bank capacity of 660 amp-hrs but I have adequate cabling and room to add 2 more batteries for a total of 880 amp-hrs should you want
that much power for serious boondocking. My battery runtime is now substantially more than the OEM flooded batteries gave me. To the left of the
batteries you can see the HWH automatic leveling unit.
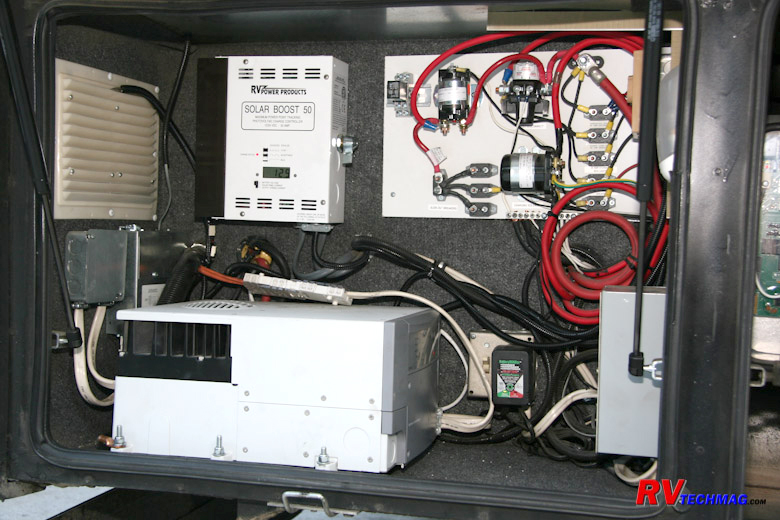
My biggest mods were in adding even more boondocking capacity by adding solar panels and a charge controller and upgrading
the original inverter/charger. I went with four Shell 110 watt solar panels. While the Shell panels cost more than most other brands I've found
them to outperform larger panels in minimal lighting conditions, therefore giving you more total amp-hrs over the course of the day. To manage the
440 watt solar panel array I installed a 50 amp Solar Boost charge controller. A charge controller is necessary to regulate the output voltage from
the panels and to act as a check valve to prevent dark current from draining the batteries through the panels at night but this controller uses
Mean Power Point Tracking technology. MPPT allows the controller to trade of excess unused volts for amps. The net result is an average 30% boost
in power output from the panels. The charge controller is also shown in the picture below.
It's unfortunate that RV manufacturers today always install modified sine wave inverters. Modified sine wave is not the best
for sophisticated electronics (except laptops, which use the battery as a buffer) and won't keep digital clocks running accurately. I removed the
2,000 watt Xantrex Freedom 458 inverter and replaced it with an Xantrex RS2000 true sine wave inverter/charger. This unit puts out utility grade
power and I can even hear the difference in the microwave when it runs because it's running at it's full RMS voltage. This inverter uses the
Xanbus network protocol to talk to other devices so a cat5 communications cable was run to the System Control Panel inside the coach. This panel
can also control other devices on the system, so I also installed an Xantrex Automatic Generator Start module at the same time. In the picture
above the RS2000 is plain to see.
Inverters typically generate a fair amount of heat. This leads to failures when in an enclosed area. The existing vent
louver (shown above) just doesn't remove enough air by itself and I've found the compartment to get very hot on summer days. I installed two
120mm 12 volt fans behind that louver and wired them to a thermostat in the compartment. Now the compartment stays nice and cool when driving
on hot days.
Inverters will charge the house batteries, but not the chassis batteries. The only way to charge them is via the alternator
when driving. I installed a BatteryMinder pulse type trickle charge and hardwired it to the chassis batteries. I then installed a dedicated shore
power outlet to power it. Now, when parked the shore power will automatically keep the chassis batteries charged. An additional benefit is that
the pulse technology keeps the batteries desulfated. The charge and outlet can be seen below. The gray electrical box to the right houses a relay
that disconnects the 12 volt output side of the charge from the batteries whenever shore power is not present to keep them from draining when
boondocking.
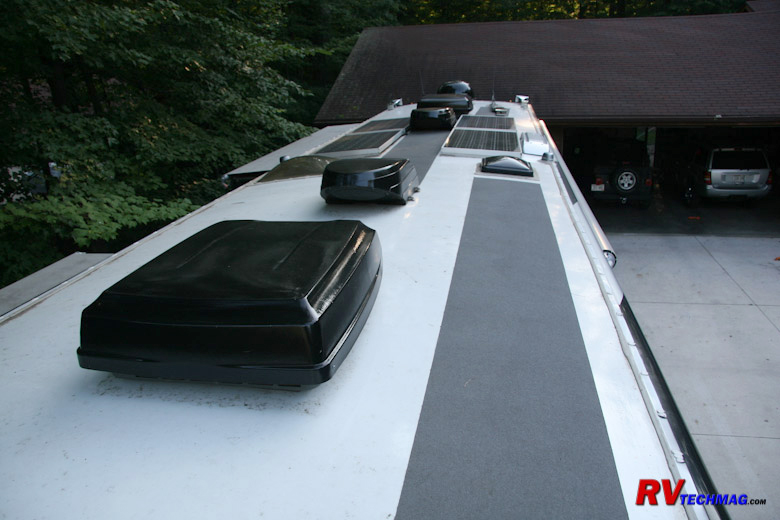
The roof received a few mods as well. Shown are the two 15,000 BTU low profile Dometic Penguin air conditioners with heat
pumps. I also replaced the existing vent lid over the Fantastick vent fan in the toilet room with a dual pane insulated one to keep the summer heat
out and the winter heat in and to eliminated condensation. I also replace the existing lids over the bathroom vanity and galley with clear dual pane
insulated lids. Then I installed two MaxAir FanMate turbo vent hoods over them and painted them with the same 2 step paint and clear coat as used
on the coach. We can now leave the lids open while driving or in a rain storm. I installed 3M Safety Walk non-skid rubberized traction mat to the
roof in key areas so that I could walk up there and not slip off when wet or snow covered.
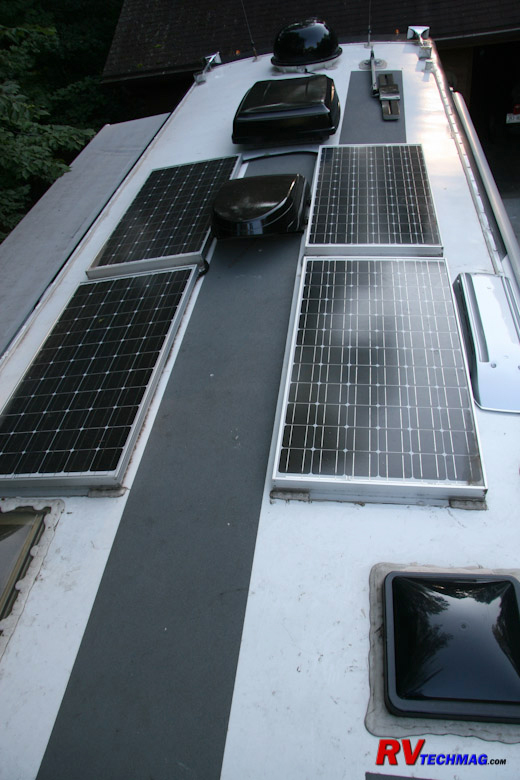
The solar panels are Shell-Siemens SM-110s. I went with the Shell 110 watt panels rather than the typical Kyocera 120 watt
panels because, while more expensive, they do a better job of putting out power at lower light levels. Any panel will put out its rated wattage at
high noon on a sunny day in Arizona but they all fall of in varying amounts as the light level goes away. The SM-110 panels do an excellent job when
it's overcast compared to other brands of less expensive panels and I've found that the total daily output is greater with these. I have 440 watts
of panel up there and the current is fed through the refrigerator vent cap via #8 wire to the charge controller in the basement. As you can see in
the picture below, I park under trees at home.
|
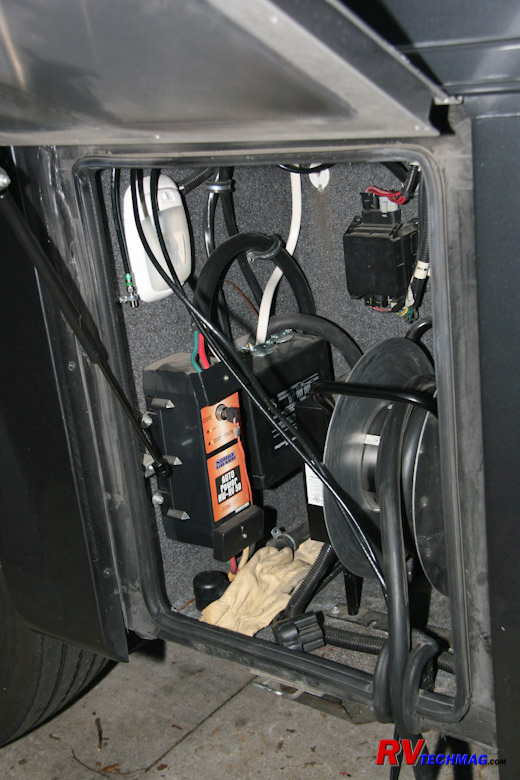
The coach has 50 amp service and a power cord reel. I also installed a 50 amp SurgeGuard hard wired surge protector
which has saved the coach from electrical system damage a few times due to low voltage at campground pedestals. You can also see 2 coax cables
entering the compartment. My DirecTV system uses dual channel DVRs rather than single channel receivers. This allows me to watch one show
while recording another channel on the hard drive. This means I need two coax feeds from the dish to power both channels. The KingDome in-motion
receiver is a dual LNB setup so it provides the two signals that I need to run both channels. When hooked up to a portable dish, there are
two A/B switches by the VCR that switch from the KingDome to a remote portable dish. I then ran two new coax lines for that signal from the
overhead compartment down to the shore power compartment in the basement. Now all you have to do is plug in. In addition, there is a separate
cable TV and modem jack as supplied by Tiffin.
|
|
Water Service and Basement Storage
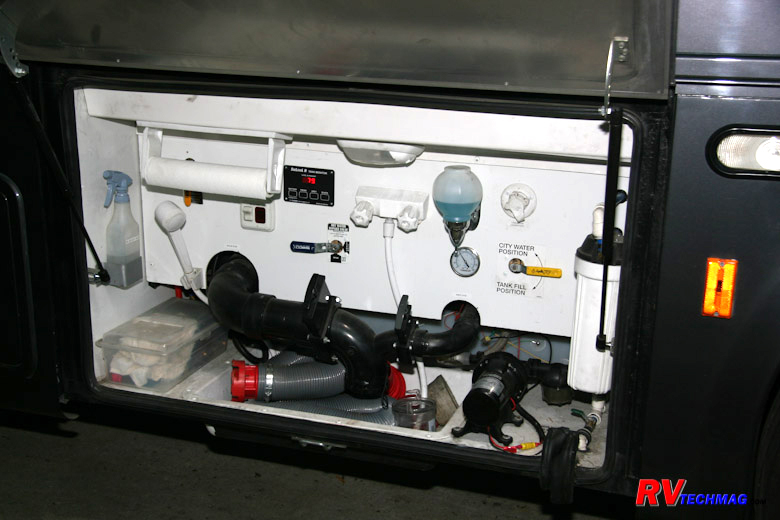
In the plumbing area, I did some more upgrades. I replaced the OEM water filter, which was too restrictive, with a Hydrolife
200 water filter. It's physically the same size but it flows more water and gives much better pressure in the coach. I also use the C2100
Bacteriostatic filter element which does an excellent job of giving us fresh, clean water. I replumbed it from the tank output the tank input. Now
all water entering the coach gets filtered and it will remove any silt or rust sediment from building up in the water tank. In the picture below
you will see a round gauge. This is a glycerin filled industrial quality pressure gauge that I installed to tell me what the water pressure is.
Most campgrounds don't have that much water pressure so this way I don't have to connect a regulator if it's not necessary. I also installed
ShurFlo Smart Sensor 5.7 water pump which is much quieter and supplies more water than you could possibly use.
Behind the paper towel dispenser is a ball valve. It's hard to see in the picture. Originally there was a hose connection
for the black tank flushing attachment there. The black tank flusher never did put out enough water so I removed it and drilled out the orifices.
Now it does a great job of cleaning out the black tank. I also removed the hose fitting and connected it directly to the water supply. Now I don't
have to hook up a second hose to flush the tank. The ball valve is a positive shutoff but I installed a brass check valve as well as a redundant
step to any water draining back into the fresh supply. Actually, it couldn't happen anyway because there is a vacuum break in the line that is
mounted high up in the bathroom vanity cabinet, but I still like lots of redundancy.
There is a small black panel visible to the right of the paper towel holder. This is one of my SeeLevel digital tank
monitoring panels. The SeeLevel system uses external tank sensors that monitor the level inside the tank. They are very accurate and report
in 2% increments rather than the old Empty, 1/3, 2/3, Full readings of the OEM sensors. Plus, they cannot foul up so they always work. This
panel displays battery voltage, fresh water level, gray water level, and black water level. There is a larger panel upstairs in the galley but
it's nice to have this second panel in the basement when you are draining or filling.
Other Basement and Outside Photos
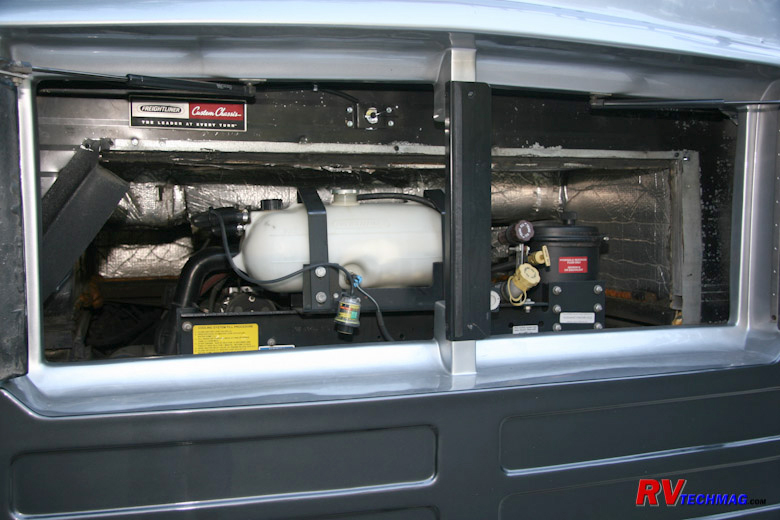
This unit is on the Freightliner XC chassis, with 276" wheelbase, 150 gallon fuel tank, and solid front axle with 50
degree wheel cut. This is the only way Allegro Busses were fitted in 2004. It has a 32,000 lb GVW and the cargo carry capacity is in excess of
5,000 lbs. It's powered by a 400 HP Cummins ISL engine with 1,200 ft-lbs of torque and is coupled to an Allison 3000 series 6 speed automatic
transmission. It has a side radiator design, controlled by a hydraulically driven fan motor. In the image below you may notice a small antenna
above the coolant surge tank. This is for the tire pressure monitoring system. This particular antenna monitors the towed vehicle.
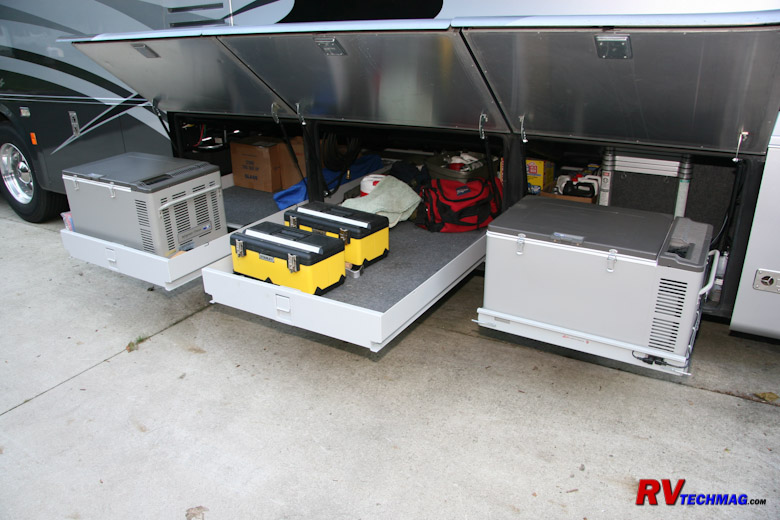
This is a shot of the basement storage area. The two compartment doors to the rear open to the large basement pass-through
storage area. There are two full length slide trays that can come out either side. On the rear slide tray you'll see a Norcold 120 VAC/12 VDC
freezer/refrigerator. I have wired dedicated 12 volt and 120 volt circuits on the ceiling above to power it. To the front there is a shorter
compartment (the fuel tank area is behind it) where a second freezer is installed and mounted on a Kwikee slide tray. Dedicated outlets are also
provided for this freezer on the wall to it's right. We've found these freezers to be indispensable in our travels.
The Generator and AGS Module
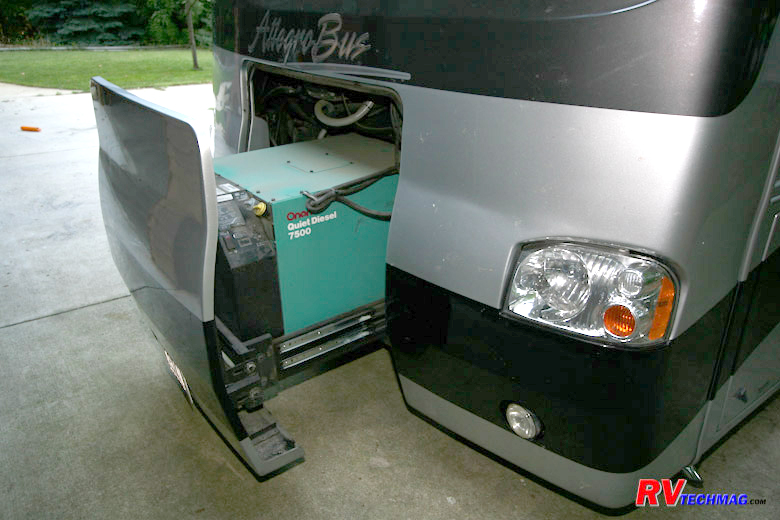
The generator that came with the Allegro Bus is an Onan 7500 watt quiet diesel which is mounted on a slide out rail
mechanism for service access and powers the coach through the automatic transfer panel.
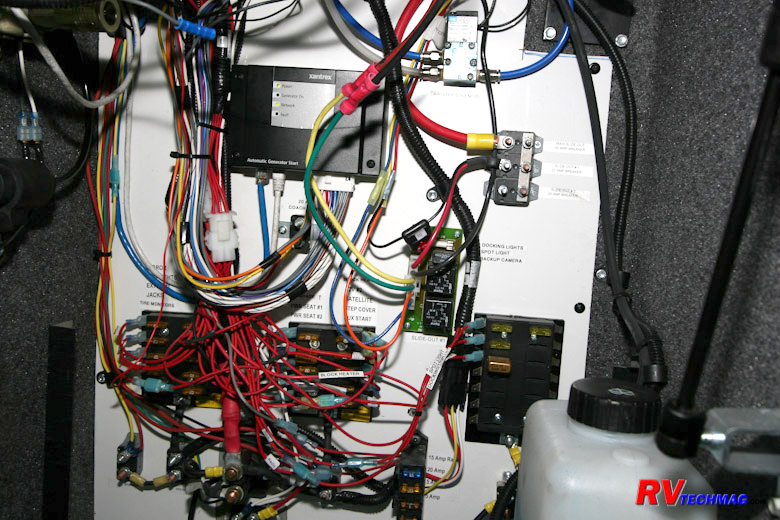
Underneath the driver's seat is a basement compartment where much of the 12 volt wiring is housed. The unit came with
two 12 volt fuse panels - one for battery fed circuits and one that was powered when the ignition key was on. Occasionally I wanted to use an
accessory while parked and had to turn the key on. When that happens you get all sorts of annoying buzzers and warning chimes warning you that
your jacks are down, the air pressure is low, etc. So, I added a third fuse panel (visible to the right) that was powered from the Accessory
side of the key switch. I then relocated the docking lights, backup camera, etc to that panel so that I can use them without having to listen
to all the annoying buzzers and chimes.
As mentioned previously, I added an Xantrex Automatic Generator Start module. The control module is the large dark gray
unit mounted near the top of the component mounting board. It interfaces with the inverter and System Control Panel via cat5 cable. It can be
set to start the generator in response to heavy inverter loads, low battery voltage, or a request for cooling from the thermostat. It can also
be set to lock out during quiet time hours and to exercise the generator on a monthly basis if desired. I've also added a shore power interlock
relay so that it won't start the genset in response to an air conditioning thermostat request when the shore power is on. This way I can leave
our dog alone in the coach while touring the area and if the shore power goes out the genset will start to keep the coach from overheating once
the thermostat requests cooling.
The Cockpit Area
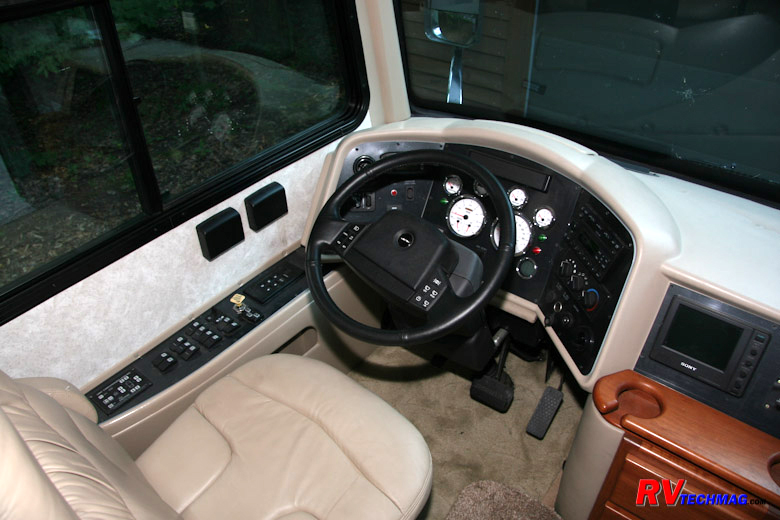
The cockpit area received a few upgrades as well. Extra cup holders were added for snacks and a number of electronic
aids were added.
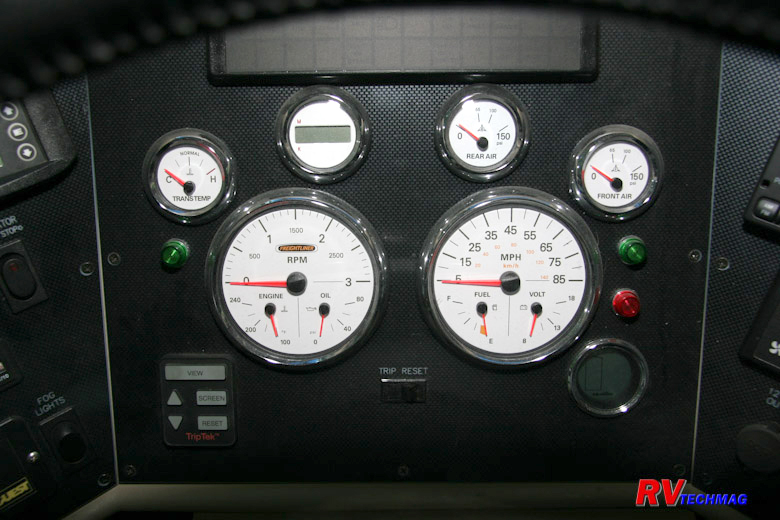
The OEM turn signal indicators were part of the light annunciator bar near the top of the picture shown below. It's impossible
to see though because the steering wheel rim is in the way. So, I added two additional green turn signal indicators in the dash where they could
easily be seen. The single red pilot lamp is for the engine block heater.
Also shown in this picture is the control for the TripTek computer. It is located at the bottom right of the dash. The
TripTek provides a number of features. It can track mileage and generator hours and issue service warnings when service is due. It can monitor
and display engine information, including things such as turbo boost pressure, that are not displayed by Freightliner. It also has 3 separate
trip computers - typically one for the day's travel, one for the entire trip, and one for the "since last refuel" log. It will display miles
per gallon, etc and it has a handy checklist when first starting out to make sure you have the antenna down, doors latched, etc. The beauty of
the TripTek is that it does not require a separate display because it uses the backup camera monitor. The system can be toggled through the
various displays via the dash panel control pad or it can be blanked so that it is not displayed on the rear view monitor.
In the lower right corner is a 2" round display for the SmartTire tire pressure monitoring system. This system uses
internal sensors inside the tires that will report both pressure and temperature. It is fully programmable and will issue an alert should the
tire pressures fall beneath a predetermined threshold. The system can be used to check the pressure and temperature of any tire while driving
via the control pad that is mounted on the left side console. The receiver has 3 antennae that I mounted in the vehicle. One is by the front axle,
one is near the rear axle, and one is above the coolant surge tank to monitor the towed vehicle. The system can monitor just the coach or the coach
with toad. However, you will need to buy 4 toad sensors ($255 at last look) for your toad should you decide to add that protection (which I highly
recommend).
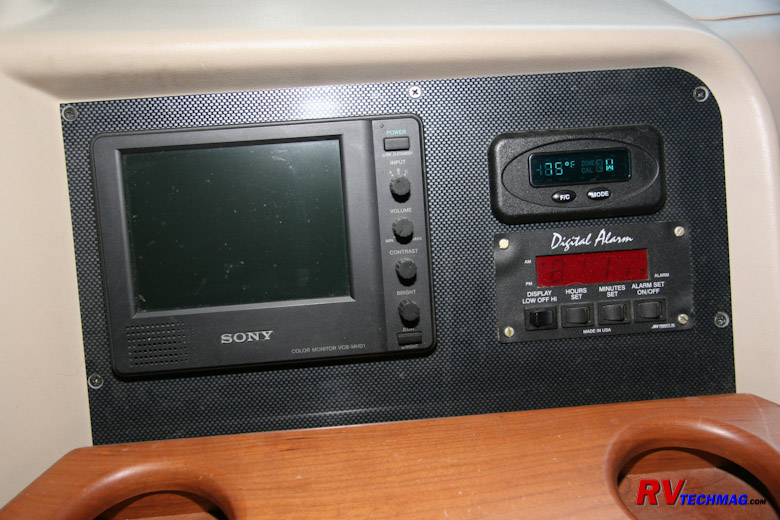
The original rear view camera and monitor were an ADTH brand. This wasn't the greatest camera around so I replaced it with
a Sony color camera and flat 6" color LCD monitor. This system really does provide an awesome view of the road and I find that the color camera
works better than black and white. It seems to take less time looking at tit in order to understand what you are looking at. Apparently, with black
and white cameras the human brain needs a bit more time to decode a black & white image because it's not used to seeing things that way. This means
you only need quick glances and can keep your eyes on the road. The monitor is a 3 channel monitor so additional cameras (such as side cameras)
could be added if you so choose.
To the right of the monitor is a digital alarm clock. Not that an alarm is needed, but the red LED makes it handy to see what
time it is when sitting in the coach. Above that is an ATC compass and outside temperature display. This accurate display will tell you what direction
you are pointing, which is no big deal to me, but gives accurate outside temperature readings. It also has a built in ice warning feature.
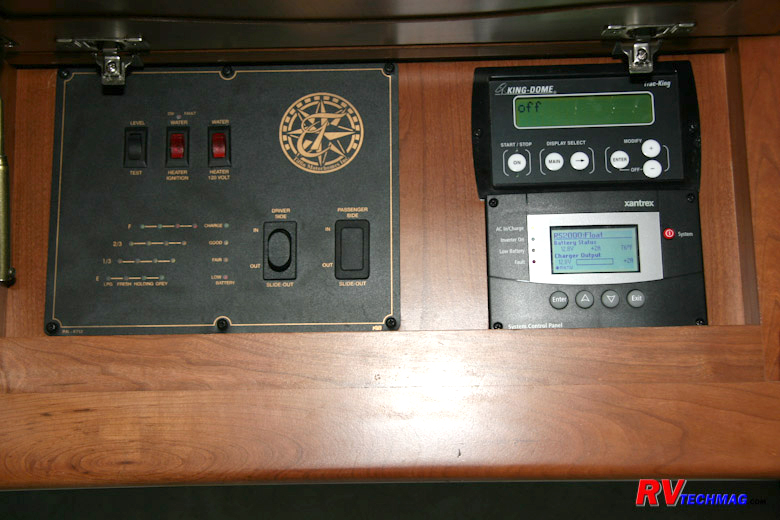
Above the entry door is the factory monitor panel. This panel has the slideout control switch as well as switches for the
electric and propane hot water heaters. A tank monitoring system is in place but it uses internal sensors, which are always subject to fouling, so
I use the more advanced SeeLevel display in the galley. On the top right is the KingDome in-motion satellite receiver control panel. Beneath it is
the System Control Panel for the RS2000 inverter and AGS module.
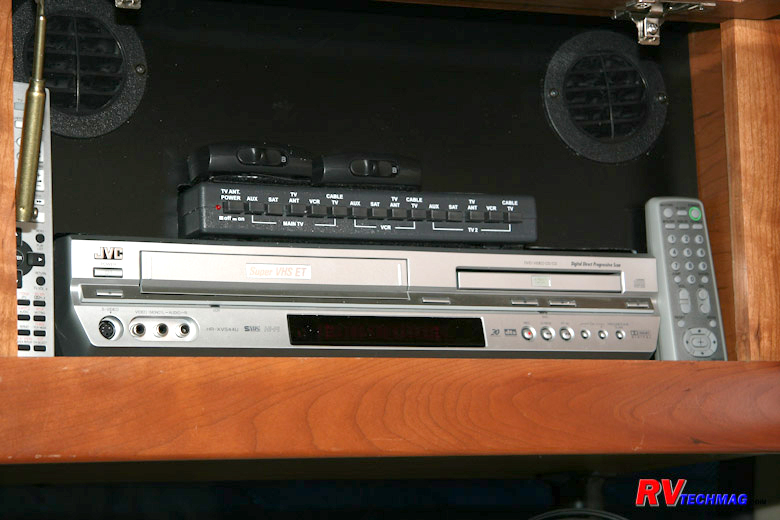
In the overhead compartment, to the right of the 26" CRT TV, was the OEM VCR and video selector switch. The DVD player and
surround sound system are in the left cabinet, as is the location for the DirecTV satellite receiver/DVR (not included). The DVD-Surround Sound
system doesn't play DVDs to the bedroom TV and the VCR was a cheap mono VHS unit so I replaced it with a JVC combination DVD-VCR. The VCR plays
S-VHS as well as VHS tapes and both it and the DVD can now be fed to the bedroom TV via the video selector switch. The two remotes are velcro'd
to the wall for storage. Directly above the video selector switch are the two A/B switches that select either the KingDome or portable remote
dish inputs.
Interior - Bedroom
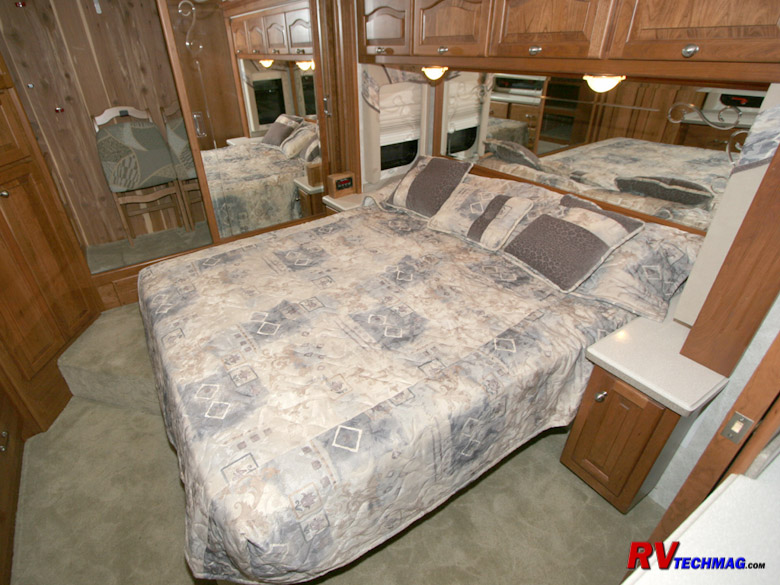
The Allegro Bus came with a full queen bed. The TV is a 21" CRT TV and a pair of coax cables is fed to the cabinet beneath the
bedroom TV via a multiswitch so that you can install a second satellite receiver or DVR so that you can watch something different than what is
playing on the front TV. One of the closet doors is open so that I didn't get a reflection in the mirror from my camera flash and you can see the
extra folding dinette chairs on the back wall that are supported on some brackets that I made.
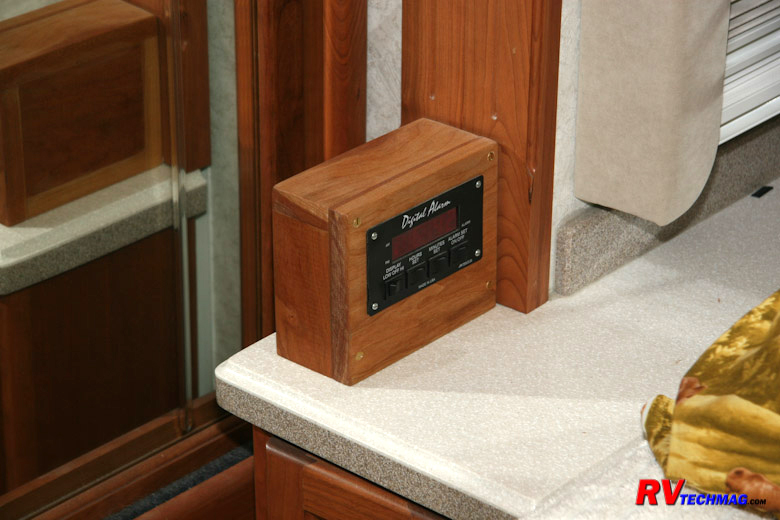
I also built a cherry wood enclosure to match the existing cherry woodwork and installed a digital alarm clock next to the
bed. This is a 12 volt clock and is a perfect complement.
Interior - Hutch and Dinette
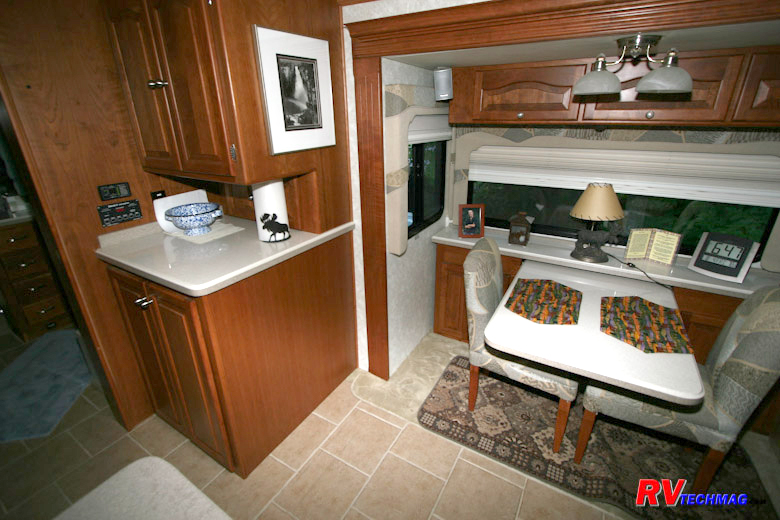
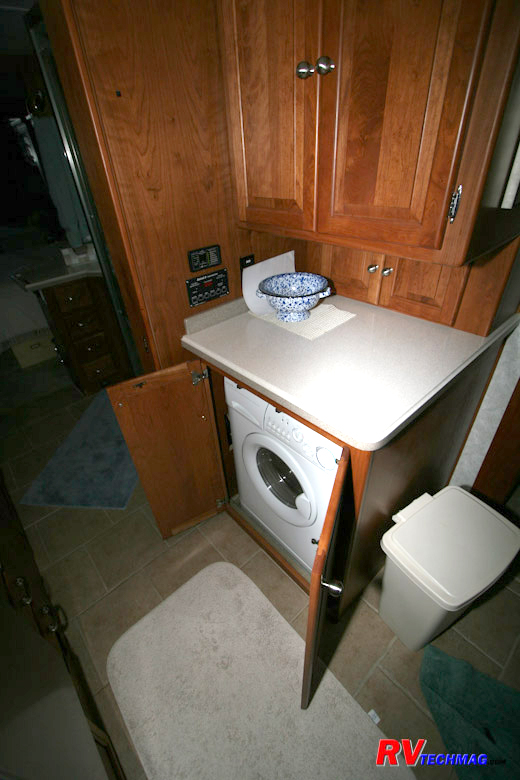
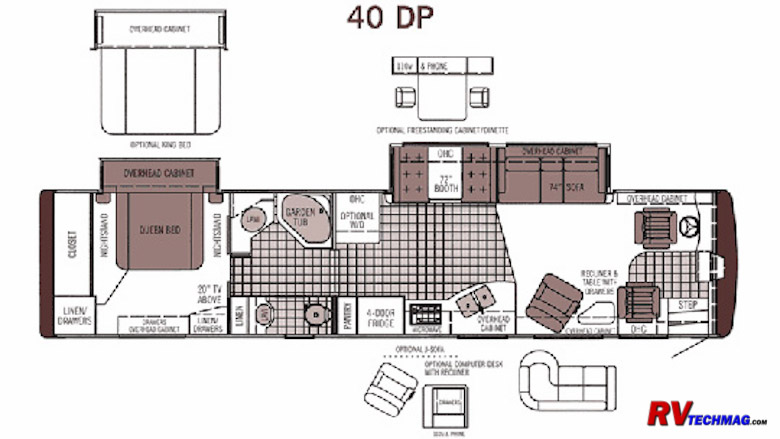
The dinette area is a freestanding (legless) table that is attached to a very handy cabinet/buffet/sideboard unit. The table
pulls out to extend when 4 persons are dining. To the left you will see the hutch cabinet. The top half is loaded with shallow sliding drawer, which
are a real asset to the pantry area. Underneath is another solid surfaced work area and directly beneath that is the Splendide 2100 combo washer-dryer
(larger capacity than the Splendide 2000). This was one of the things we really liked about the 40DP floor plan. Having the washer-dryer midship
instead of buried in the back bedroom corner was a plus for us.
On the wall directly above the countertop, you'll notice two monitor panels. I forgot to take closeups of these but one is
another SeeLevel panel and the other is the EMS display panel. The larger SeeLevel panel features the same tank monitor displays as the basement panel
but it also can display LP tank levels and inside temperature. It also has switches for both hot water heater elements so that you can control them
from the galley rather than going up front over the entrance door.
The EMS monitor is connected to the breaker panel. I removed the original breaker panel and replaced it with an Intellitec
breaker panel. This panel had a separate four breaker section (as a sub-panel) for the inverter fed circuits. Now, every outlet on the coach as well
as the microwave are fed by the inverter rather than just a select few. Also, the Intellitec panel has an Energy Management System (EMS). The EMS will
detect when you are plugged into 30 amp shore power and will shed certain circuits to prevent blowing the pedestal breaker all the time. Now, when you
turn the microwave on, it'll temporarily interrupt the electric water heater to jeep the total amperage draw below 30 amps. It will then do the rear
air conditioner next, then the front air conditioner, etc until it sees 30 amps or less. When the offending load (like the microwave) is shut off, it
will bring those other circuits on line again automatically. This display panel will display the amps being used and which circuits have been
temporarily shed. It will also display the amp draw when the generator set is running but it won't shed any loads because the genset is big enough.
Interior - Galley
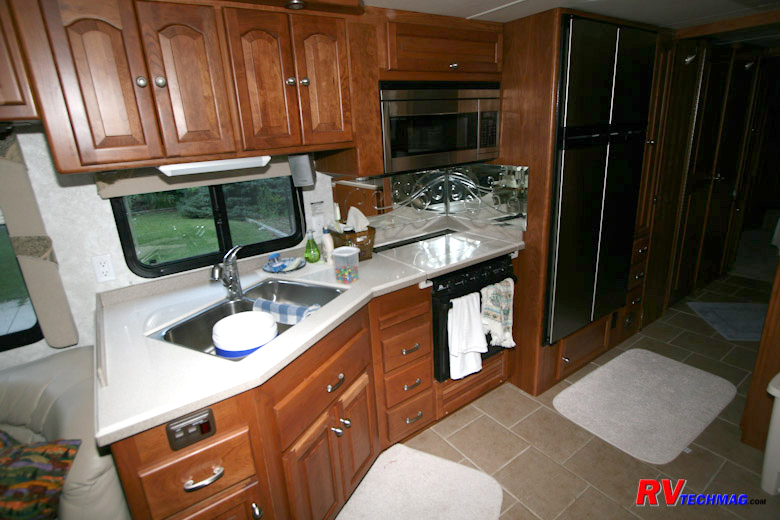
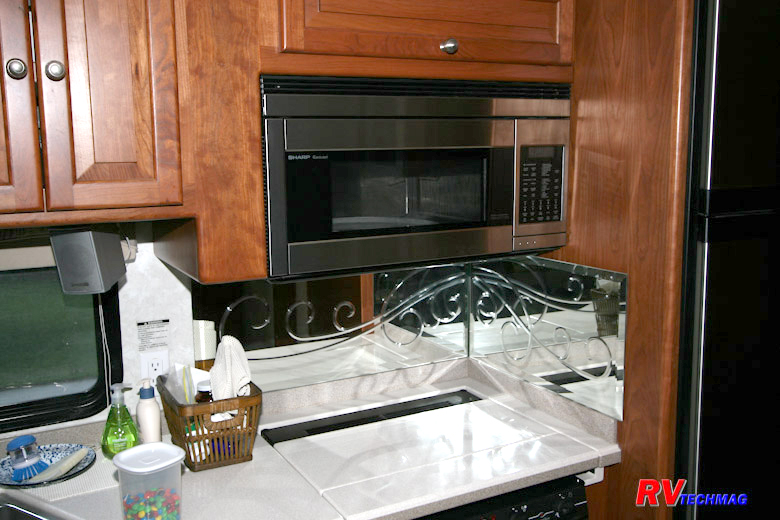
This galley is designed for cooks. The Sharp Microwave/Convection oven is finished in stainless steel, as is the 4 door Norcold
12 cu ft refrigerator. The 3 burner range and oven gives you even more options for cooking or baking. The backsplash behind the cook top is mirrored so
that it's easy to clean. The 2 tub sink is stainless steel and a Moen faucet is standard. The AC breaker/EMS panel is located behind the door underneath
the refrigerator and the central vacuum cleaner hookup is right next to it.
Interior - Main Salon
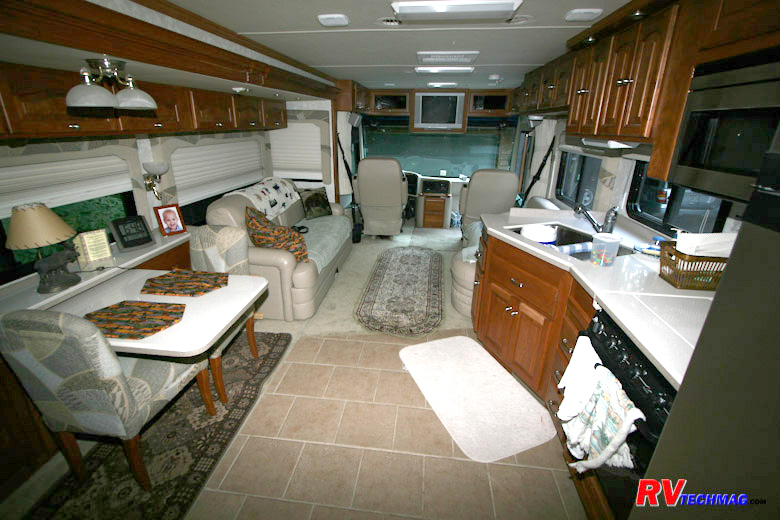
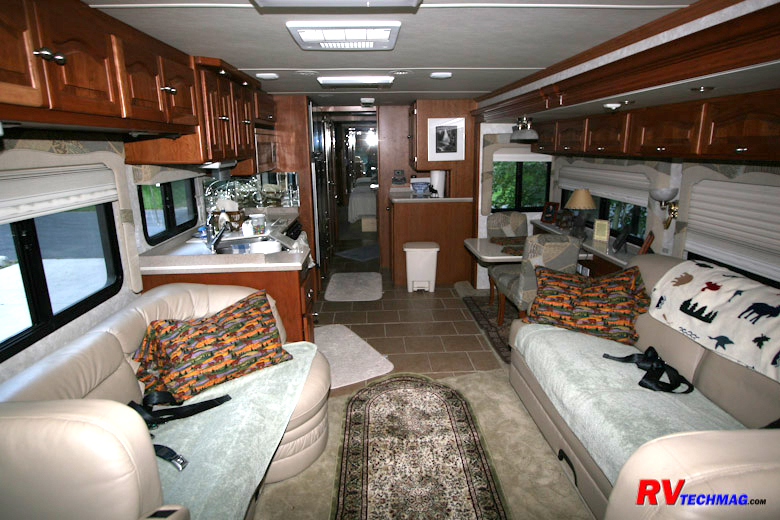
The main salon features a Flexsteel power sofa-sleeper. This sofa can recline or lay flat to make into a full queen size bed
just with the push of a switch on the sofa armrest. It's a very comfortable bed and the occupants can sleep crosswise rather than lengthwise and there
is no steel ribbing or anything to irritate your back. It's finished in Ultra Leather.
Also in Ultra Leather is the J lounge directly opposite the sofa, which feature a handy storage drawer underneath. The front
half of the salon is carpeted while the rear half and bath area are ceramic tile. All cabinetry is cherry hardwood in the Allegro Bus.
Return to Home Page
If you enjoyed this article be sure to recommend RVtechMag.com to your friends, like us on Facebook or Twitter
or subscribe to our RSS feed.


|


