Building an Entegra Coach
Following the Construction of a 2016 Cornerstone from Start to Finish
Article Date: January, 2016
Article and Photography by Mark Quasius
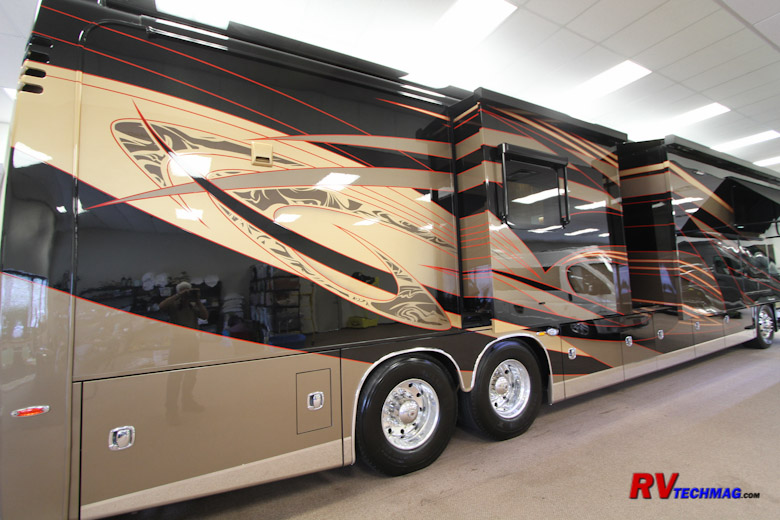
Entegra Coach has developed a reputation for building motorhomes that offer high quality and innovative design.
In fact, owners of Entegra Coaches are some of the most loyal customers within the RV industry and very proud of their coaches. I was
recently given the rare opportunity of being allowed to follow and document the construction of our new 2016 Entegra Cornerstone from
start to finish and this article will give you an idea of how Entegra's are built and what really makes up an Entegra Coach. If you walk
into a new Entegra Coach at a show you will see a well built coach but much of what truly makes an Entegra Coach what it is cannot be seen
at first glance. You have to look deeper into the construction so hopefully this article will give you a better understanding of just how
an Entegra Coach comes together and what sets it apart as truly unique.
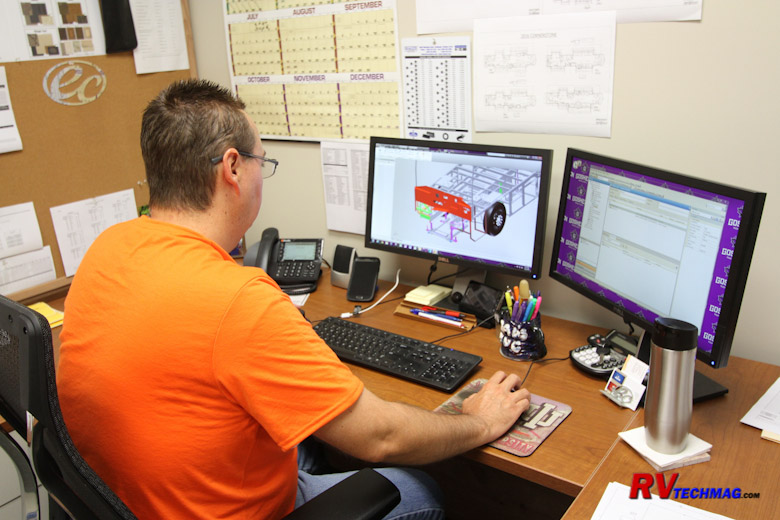
Like most coach manufacturers, Entegra begins with the design process. The engineering staff uses CAD systems to
lay out the floorplan and engineer all of the components that will be used in this particular model. The supporting framework is designed
into the chassis and every bracket and fastener is specified. At the same time, the engineering staff will be
designing the electric
system and wiring harness and plumbing systems. After the designs have been completed a prototype unit is built and the various sales,
engineering and production departments weigh in and determine if any changes need to be made before beginning production.
The Chassis
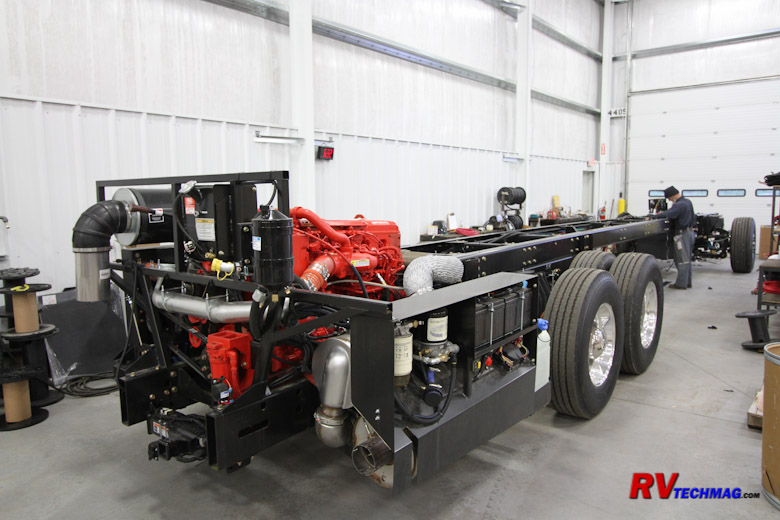
The bare chassis arrives from Spartan Chassis and is unloaded at the rear of the main assembly plant. The chassis
then enters the building and is prepped. This stage involves running the battery cables, hydraulic jack lines and other items now while
it is easy to access before all of the welding is done.
|
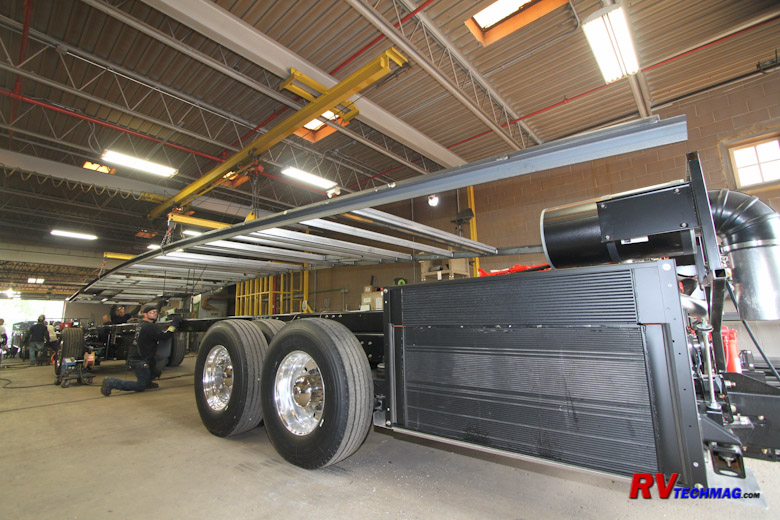
The sub-floor structure is created in a jig and then lowered onto the chassis.
|
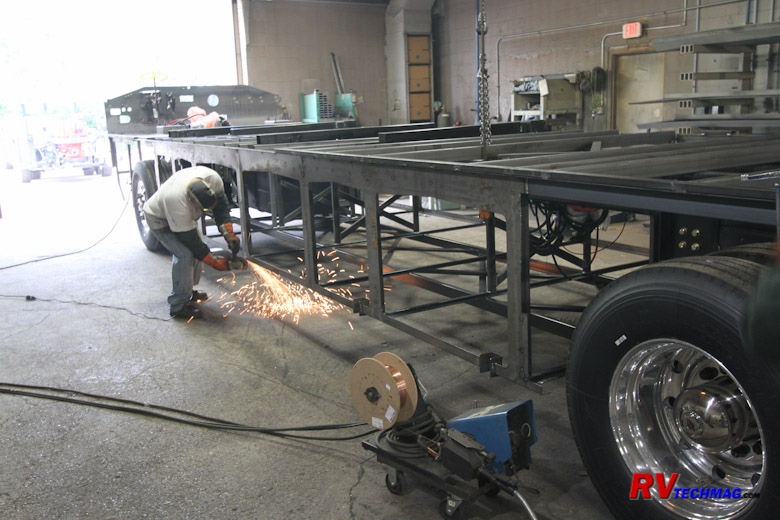
The framework for the basement compartments and the diagonal bracing is welded in place and all weld joints are
ground down.
|
|
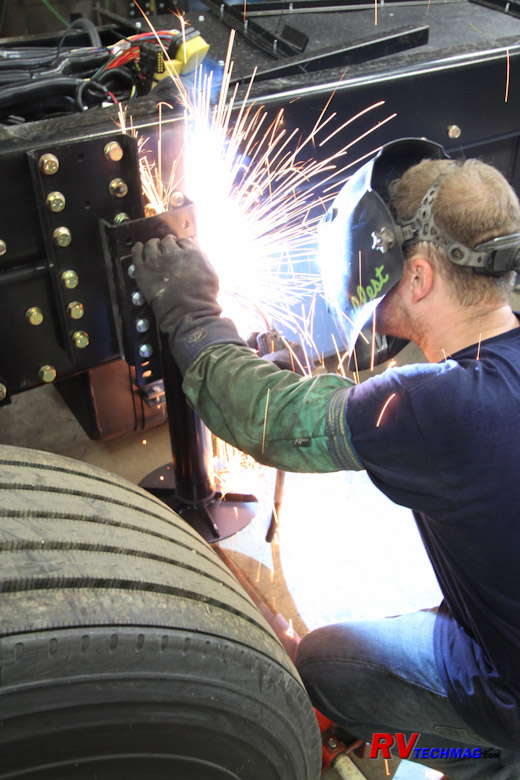
The mounting plates for the Equalizer leveling jacks are welded into place after the jacks have been bolted to the mounts
to ensure proper jack alignment.
|
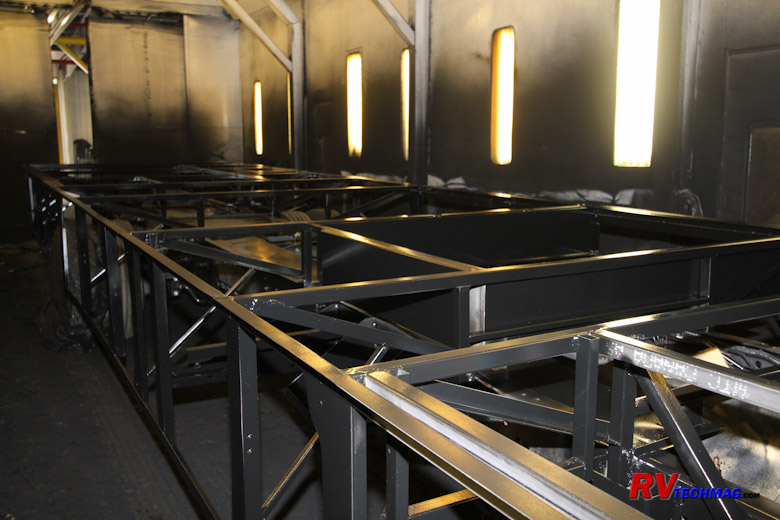
The last step is to paint the newly welded chassis to prevent any rust or
corrosion.
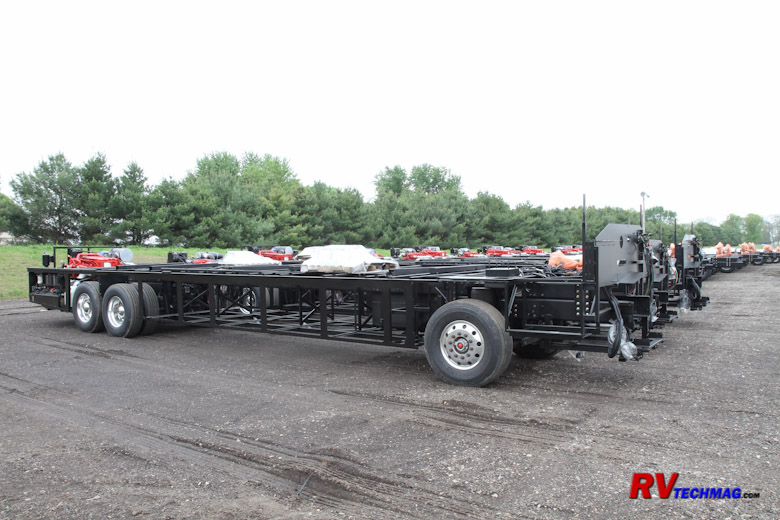
After the welding is completed the chassis is parked at the rear of the assembly plant, ready to begin construction.
|
The chassis then goes to the weld shop. At this point the steel sub-structure that supports the coach is built and
welded to the chassis frame. The hydraulic leveling jacks are added, a bulkhead is installed, the generator mounting system is added and
the diagonal X-bracing is added. This X-bracing is added both vertically and horizontally and is a major
contributor to Entegra's
reputation for an excellent handling motorhome. This minimizes flex in the chassis and allows the suspension to do its work more
effectively. This also creates less stress on the superstructure of the motorhome, which eliminates the squeaks and groans that can occur
over timer when the coach body flexes during travel.
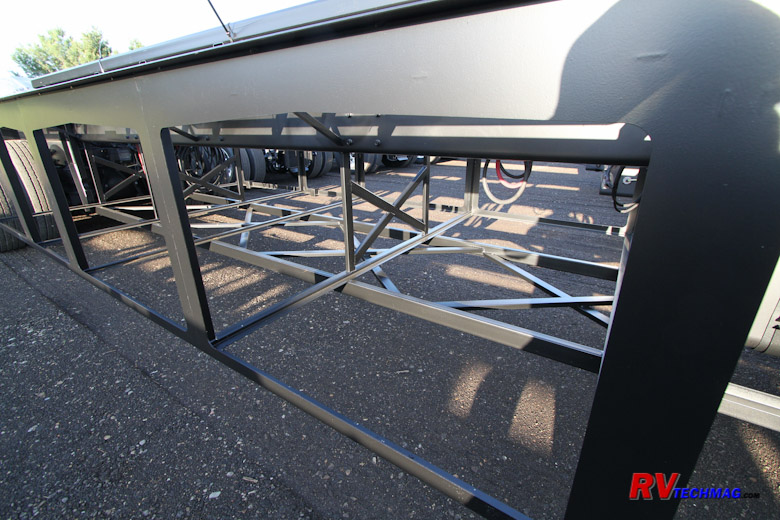
The finished chassis, showing the X-bracing that contributes to Entegra's ride and handling.
At this point the chassis is returned to the main assembly plant where it will spend the next three weeks as
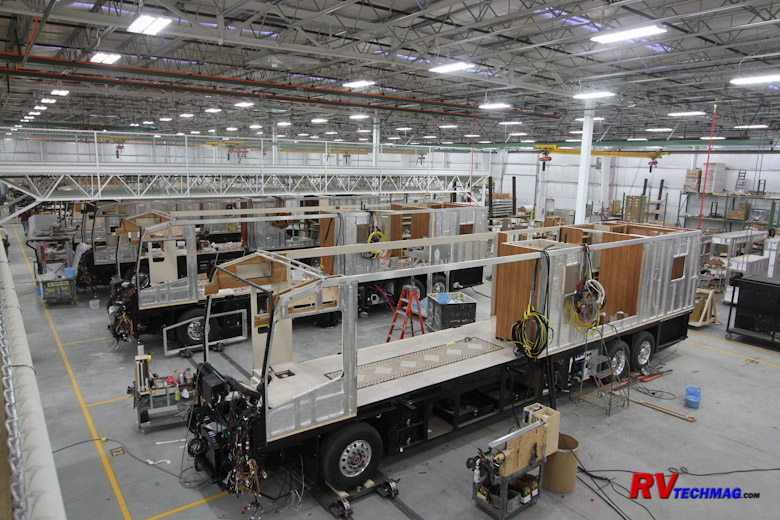
it progresses down the assembly line. Entegra's new 135,000 square foot plant was launched in April of 2015. This coach is actually the first
Cornerstone to be built in this state of the art facility. The coach is driven into the first bay where the initial steps are taken, which
include installing the primary wiring harnesses, generator, batteries and other major components.
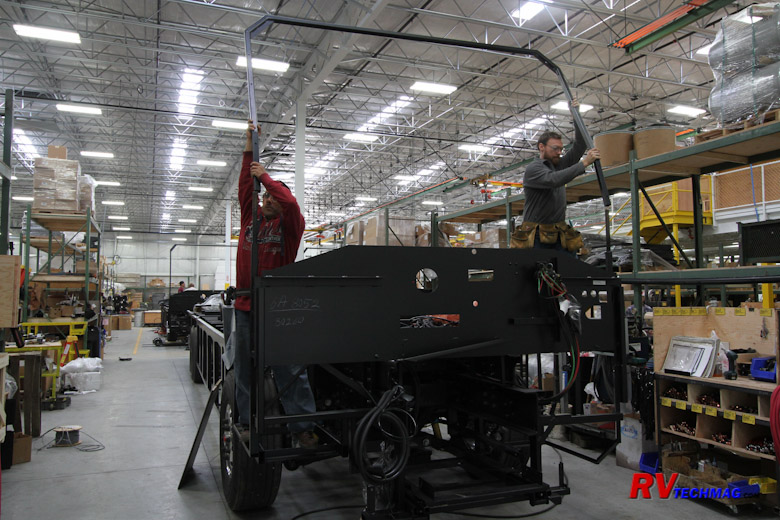
A steel roll bar style hoop is added to the front of the chassis to
afford additional occupant protection in the
cockpit area as well as eliminating any flexing that could cause stress in the windshield area.
|
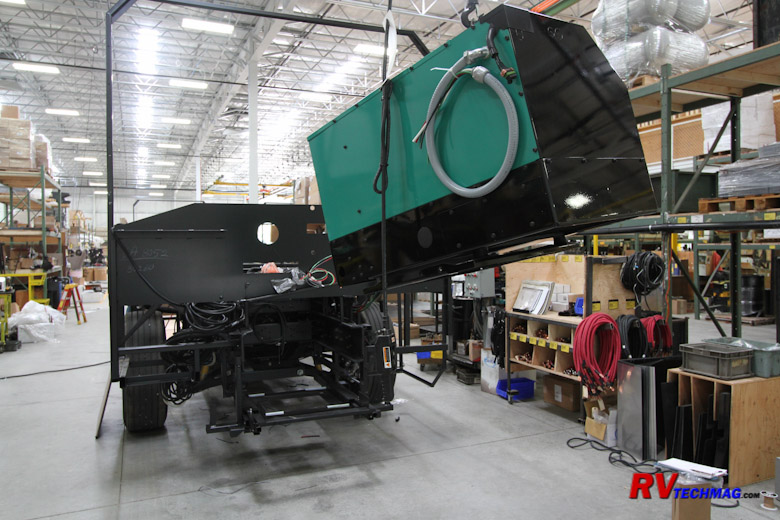
The 12,500 watt Onan generator is installed into the chassis via an overhead hoist.
|
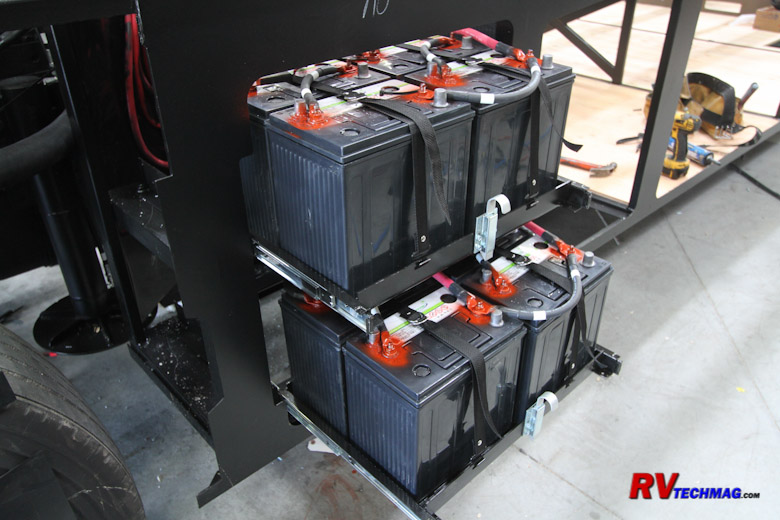
A bank of eight AGM batteries is added to a pair of slide-out battery trays for ease in service access. Circuit breakers
and fuses are installed and the batteries are connected to the system.
|
|
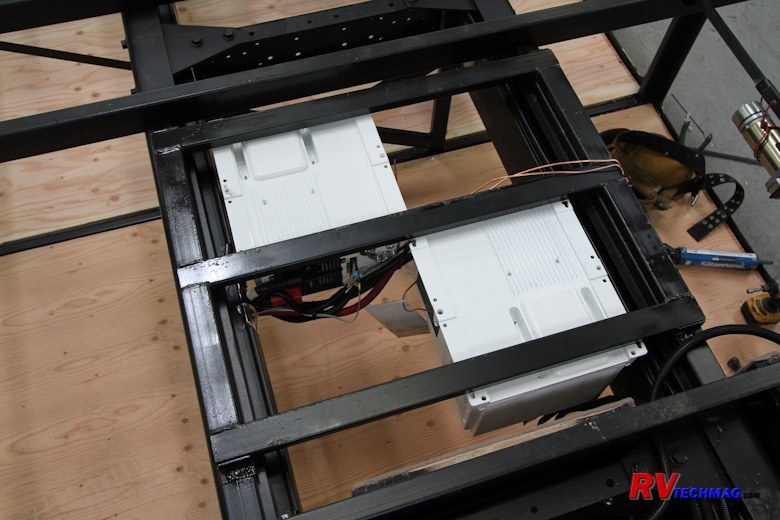
A pair of Magnum true sine wave inverters are mounted into a steel frame which is lowered into a space between the
frame rails so as to not intrude on any basement cargo storage space.
|
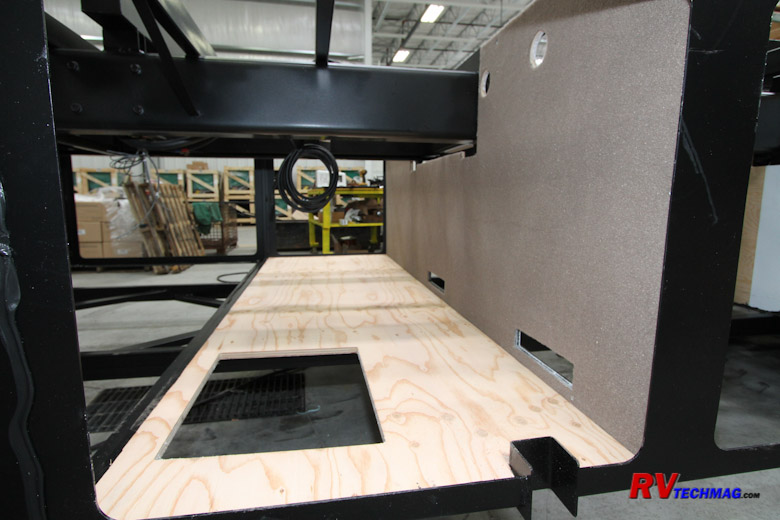
The basement compartments are fitted with plywood floors and walls.
|
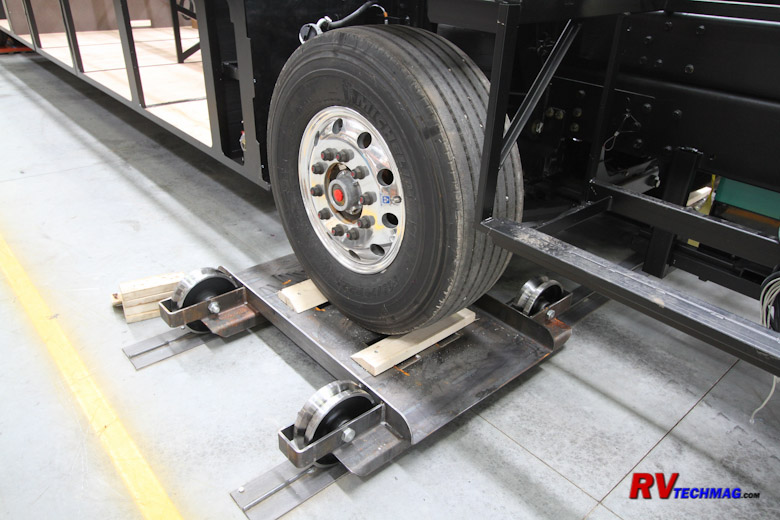
The coach is then rolled back to the main assembly line. The front tires of the coach are placed on tracked
dollies while the rear axles are placed on pneumatic hover pads that will move the coach laterally from station to station as it
progresses down the 30+ stations in the plant.

Outfitting the Chassis
At this point the main electrical harnesses have been run through the chassis and the generator and batteries
have been installed. The hydraulic leveling jack pump is the installed and connected to an automatic cycling machine that cycles the
jacks up and down to ensure that there are no trapped air pockets in the system.
|
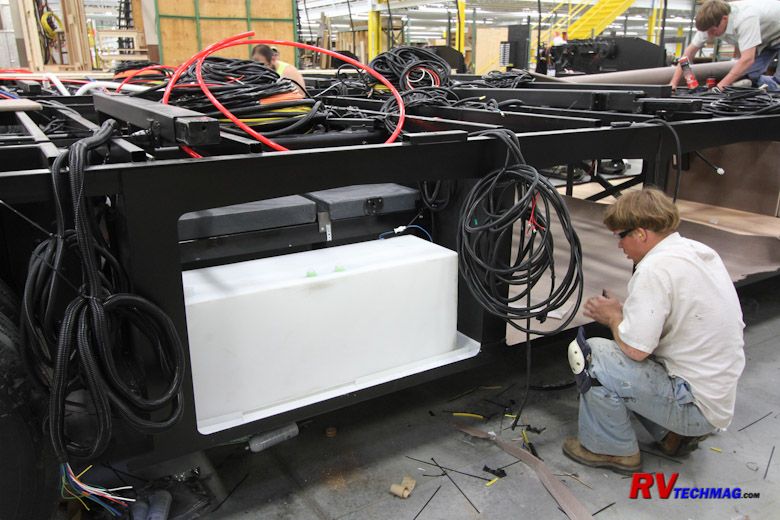
Once the main wiring harnesses are in place, the fresh water and holding tanks are installed.
|
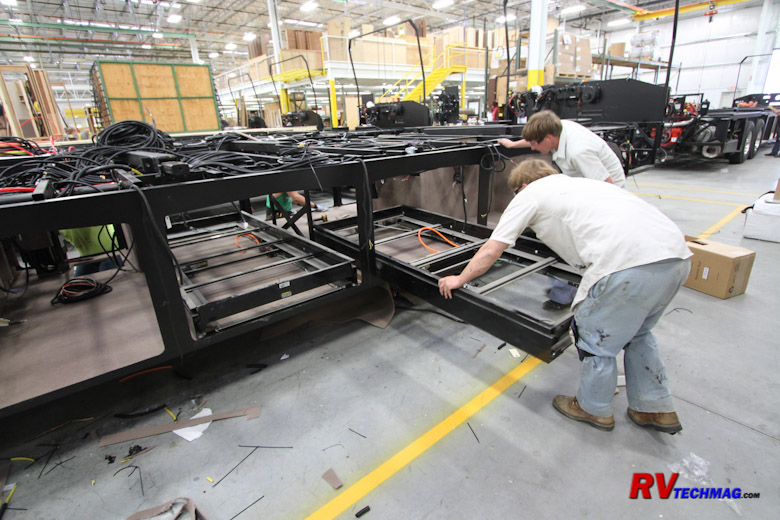
After the basement is fully carpeted, the power cargo slide trays are installed.
|
Once the plywood floor and walls is fully installed in the basement the surfaces are carpeted or covered.
The fresh water and holding tanks are installed and the cargo slide trays are installed.
|

Foam insulation is applied to the every possible location where air could penetrate the coach.
|
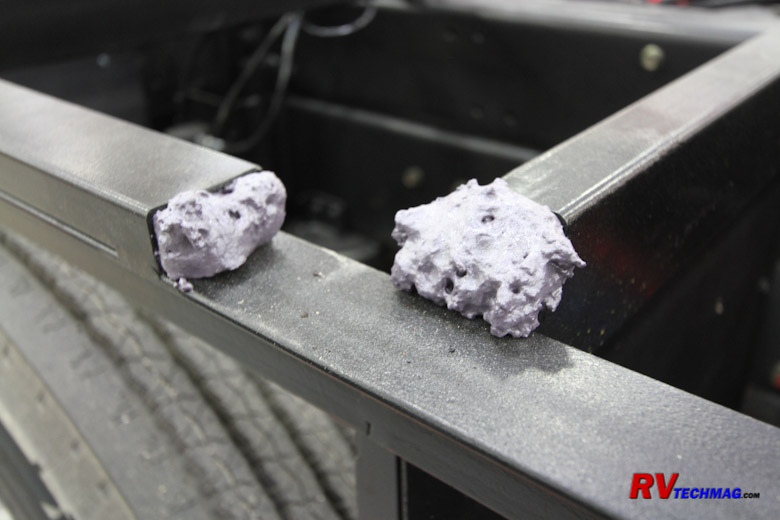
Any exposed ends of structural steel tubing are also foamed to minimize any noise or harmonics from entering the coach.
|
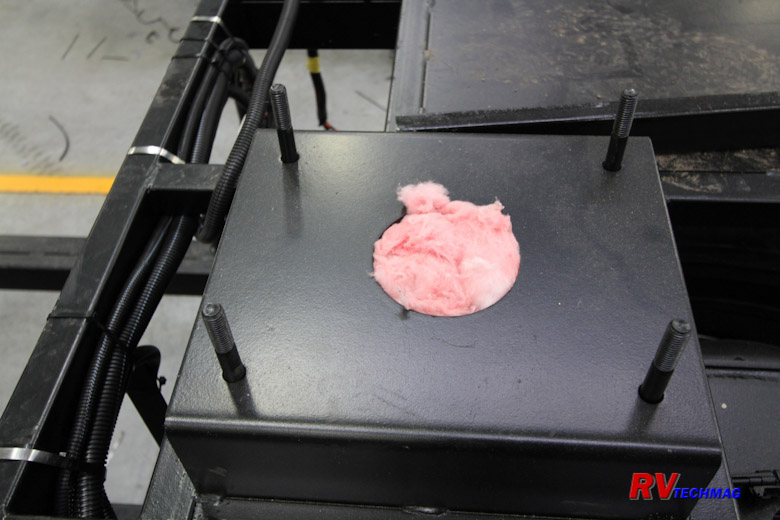
A typical example of the extreme lengths that Entegra goes when insulating is this cockpit seat pedestal mount, which
is filled with fiberglass insulation.
|
|
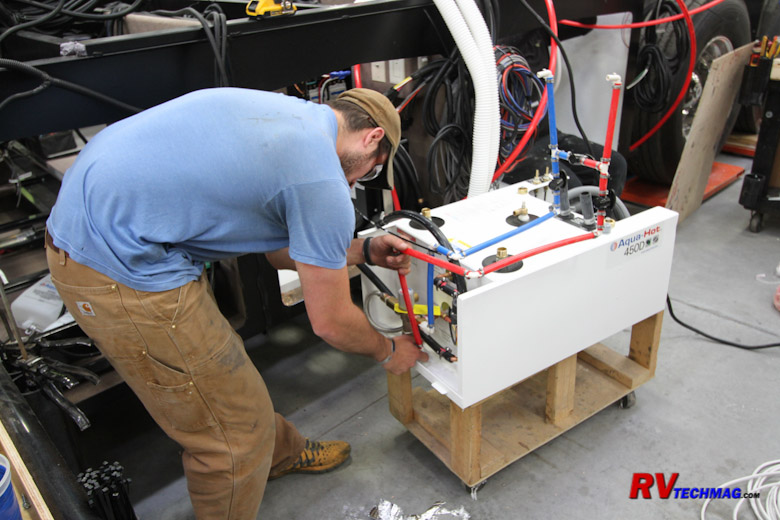
The Aqua-Hot boiler is prepared for installation into the coach.
|

The Aqua-Hot boiler, automatic transfer switch and power cord reel are installed and connected.
|
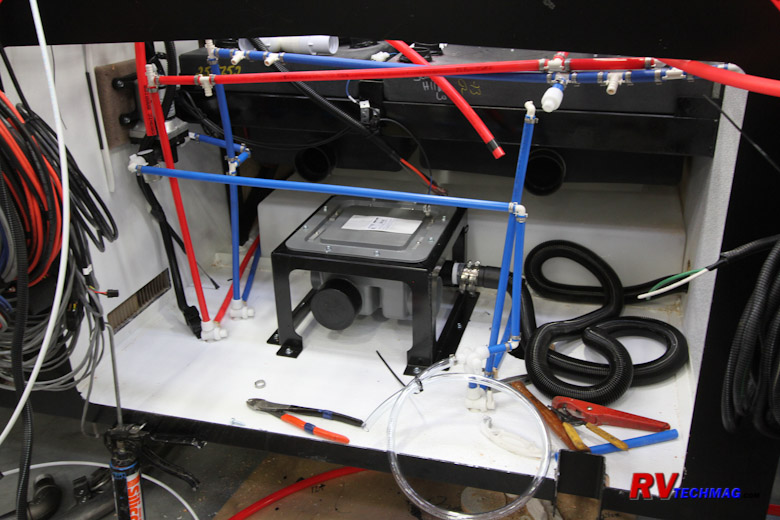
The Sanicion Turbo macerator and water pump is installed in the plumbing utility bay and the initial Pex water lines are run.
|
Entegra goes to extremes when insulating their coaches. Insulation deals with two
issues, noise and heat. Sprayed foam
insulation is used to seal off any penetration. It is also applied to the ends of any open structural tubing. This
minimizes noise from
harmonic vibrations to ensure a quiet ride. Various components, such as the transfer switch, power cord reel and Aqua-Hot boiler are added at this
time. The water pump and macerator are installed and some of the primary water connections are made via Pex tubing.
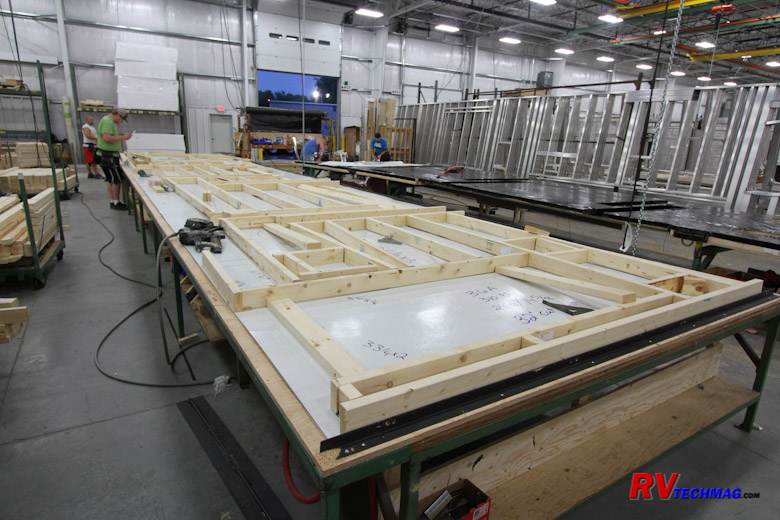
One major reason for Entegra's uniqueness is their floor design. Most motorhome floors consist of
OSB sheeting over the steel framed substructure. Entegra departs
from that and builds a thick 2x4 framed wooden floor that is placed
on top of the steel framing. This thick floor absorbs any road noise or vibration when driving. It consists of a 3/4" plywood floor and plywood
base, separated by 2x4s. This floor is then filled with insulation.
|
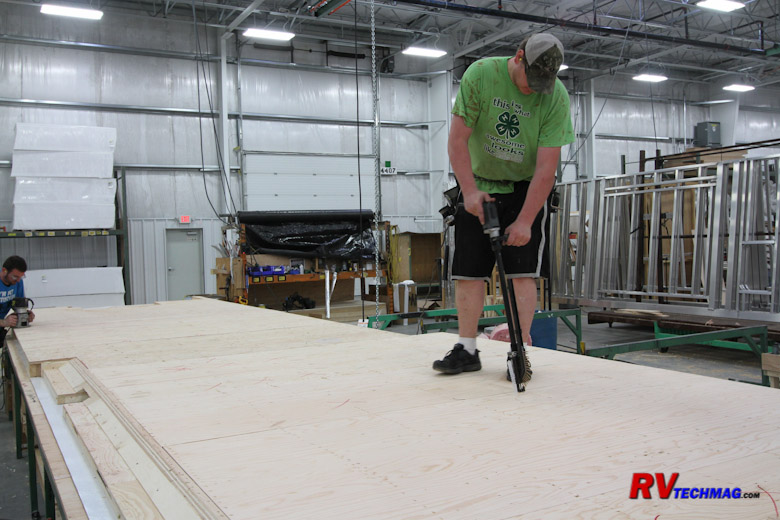
Once the 2x4 framing has been assembled, the 3/4" marine grade plywood is fastened down to the framing with deck screws.
|
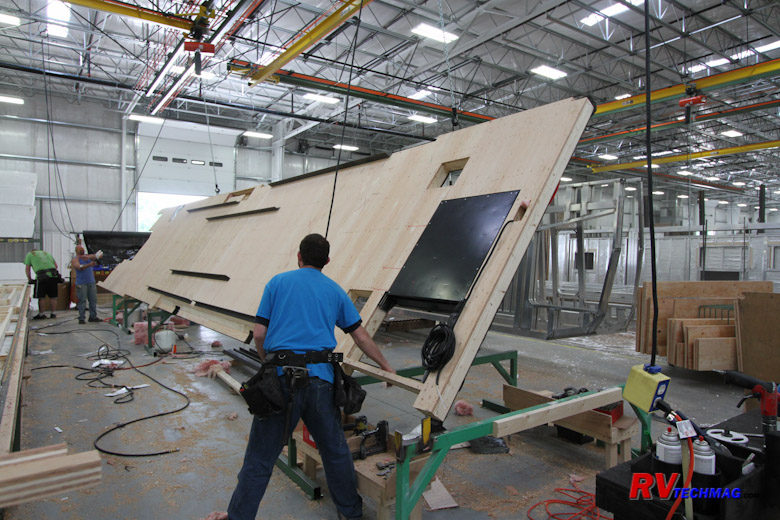
After the plywood is installed the entire assembly is hoisted off the table for access to the underside.
|
|
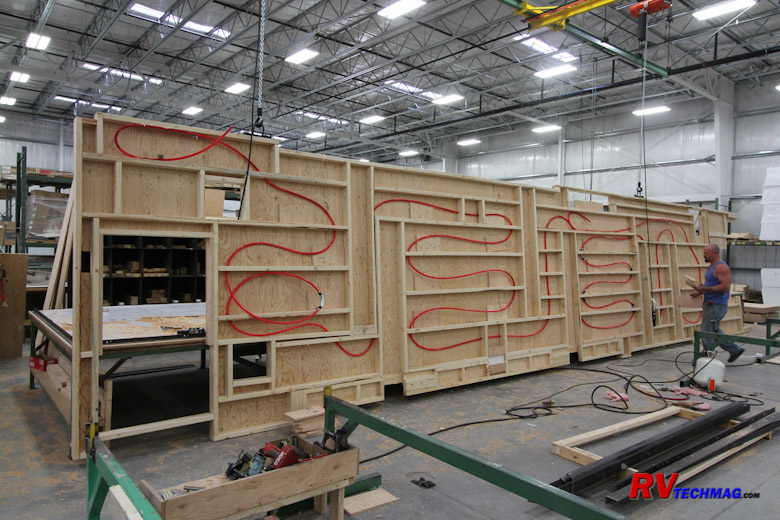
The Pex lines for the hydronic floor heat are installed.
|

Cleats are applied at every plywood joint to ensure no future shifting and a squeak free floor.
|
A Pex loop is installed in the floor to provide in-floor heat from the Aqua-Hot hydronic heating system. Every
plywood joint is fitted with cleats to ensure that no joint will every shift or cause a squeak during use.
|
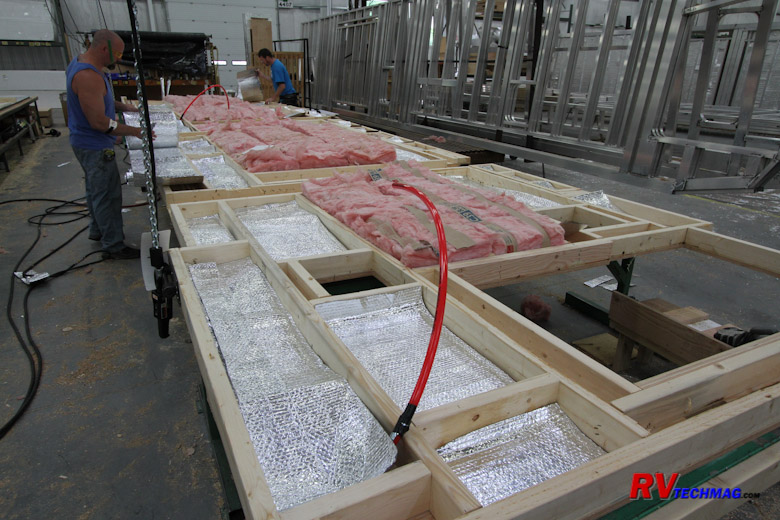
The floor is inverted and reflective Flex Foil and
fiberglass batt insulation is added before the final plywood
cap sheet is added.
|

The thick floor allows the flush floor slideout mechanisms to be
integrated into the floor to minimize any impact on
basement cargo space.
|
The floor is then returned to the layout table in an inverted position. Reflective Flex Foil insulation is
applied to direct the hydronic floor heat upwards. The cavities are then filled with fiberglass batt insulation. A plywood sheet
finishes off the basement ceiling and is covered with a black Tyvek style membrane. The result is a floor with an impressive R33
insulation value that also blocks out noise and provides for a very quiet coach.
|
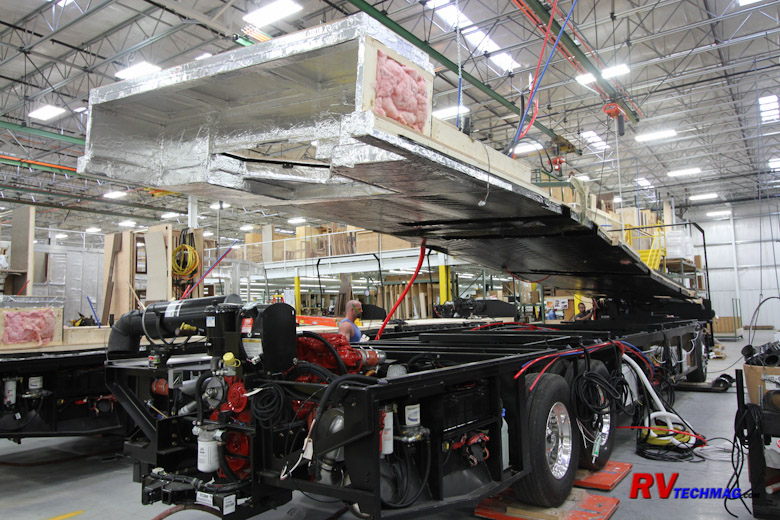
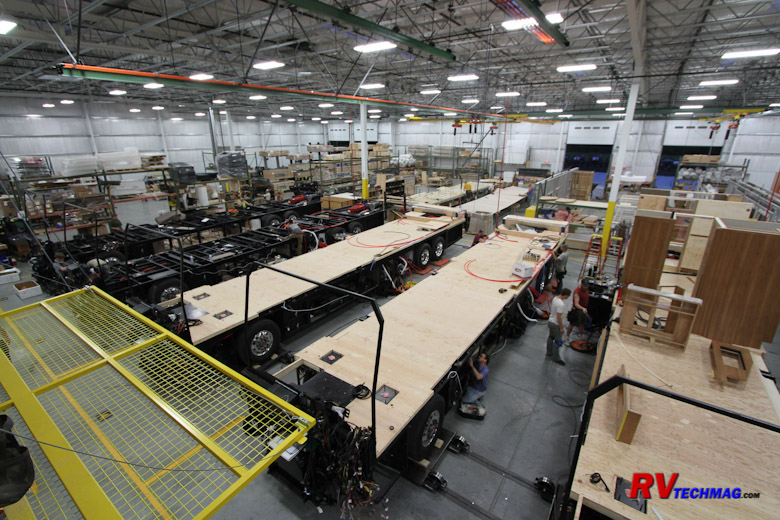
The finished floor is then hoisted by an overhead crane and lowered onto the chassis.
|
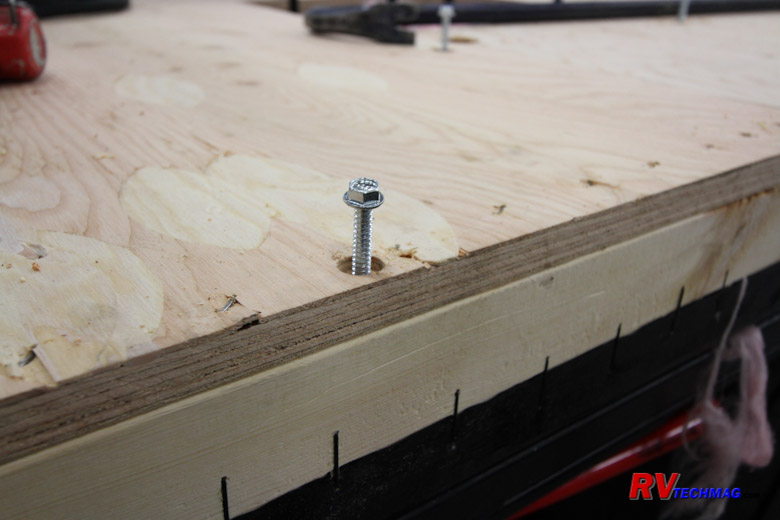
The floor is attached to the steel frame beneath with self-drilling screws.
|
The floor that was built in an adjoining area is now hoisted by an overhead crane and lowered onto the chassis
of the coach. It is then fastened down with large self-drilling hex head screws. Each screw is recessed into the plywood.
Building up from the Floor
Now that the floor is installed on the coach it's time to move further down the assembly line so that
the large interior fixtures and partitions can be installed.
|
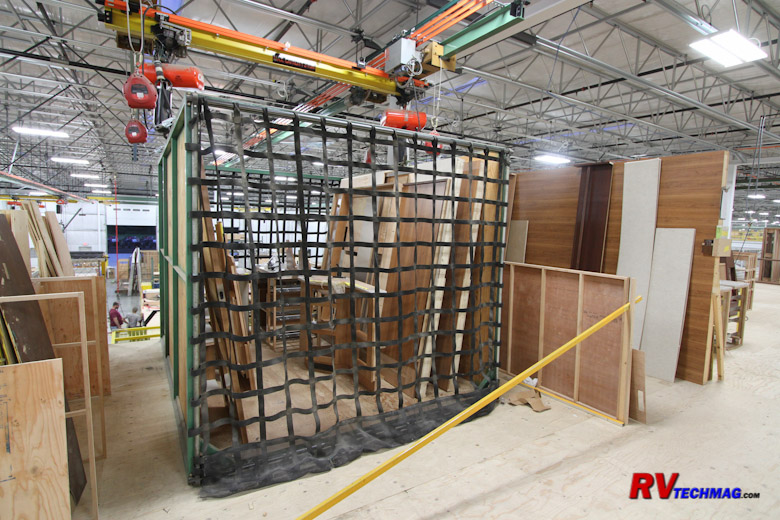
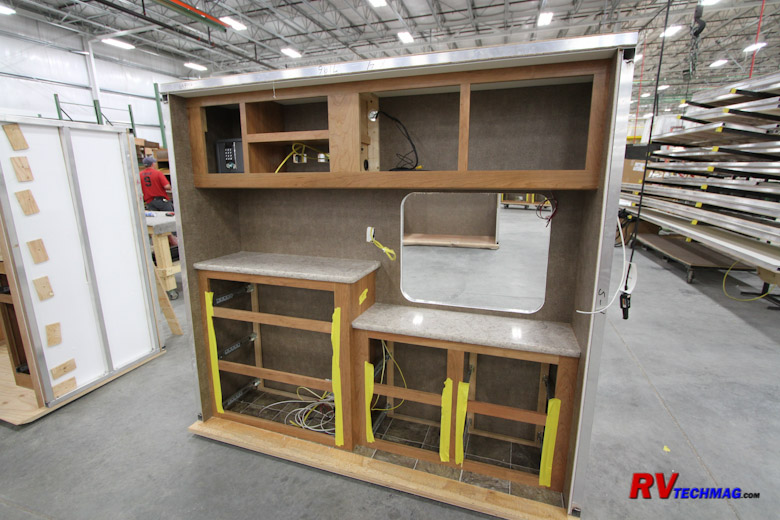
The cabinets are prepared in the cabinet shop and loaded into a cradle when finished.
|
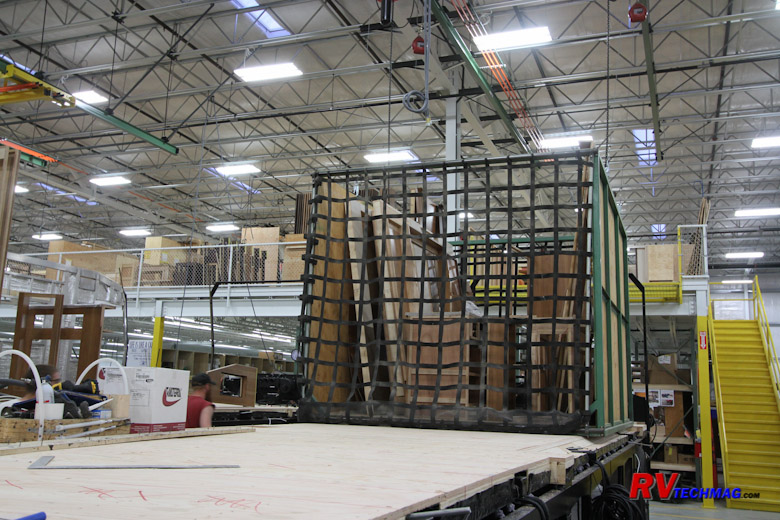
The cradle is then hoisted onto the floor of the coach. Once the cabinets are removed from the cradle and set into their
approximate locations the cradle is removed and hoisted back to the cabinet shop.
|
The cabinets are built by Amish craftsmen in the cabinet shop. Once the cabinets are finished they are placed
in a cradle. When the coach floor is complete the cradle is lowered down to the coach and set on its deck. The cabinets are then
removed from the cradle and placed in position. The cradle is then hoisted off of the coach and returned to the cabinet shop to be
reloaded for the next coach.
|
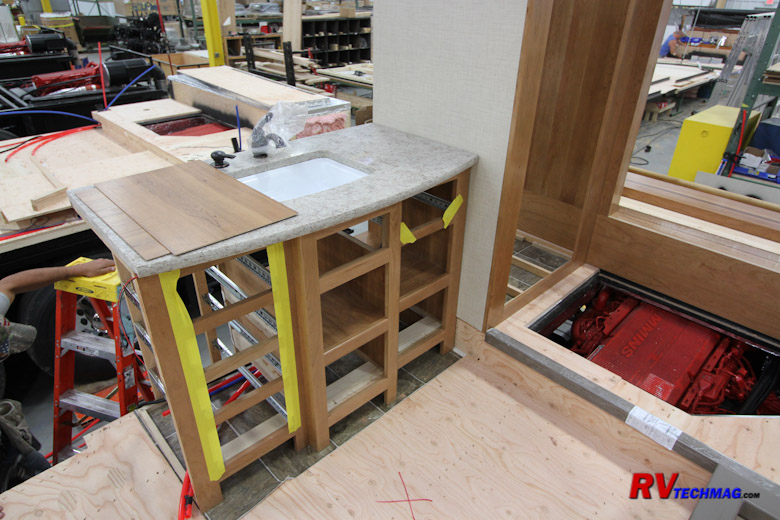
Cabinets, such as this bathroom vanity, are mounted and installed in their intended location.
|
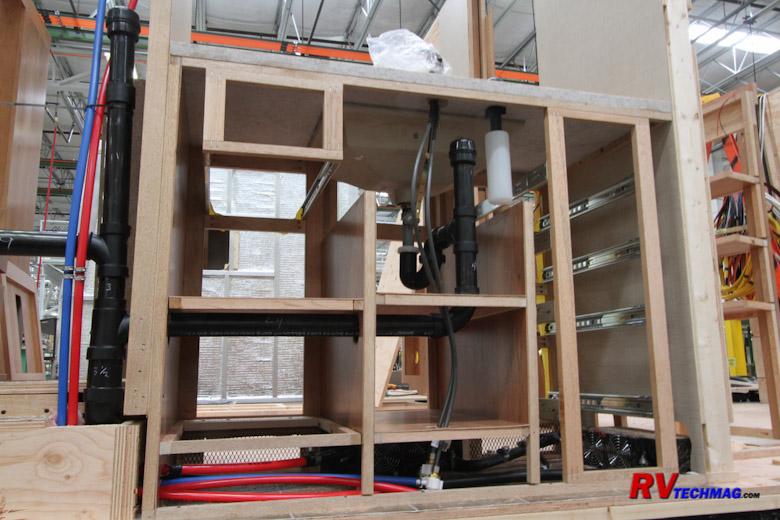
Plumbing runs and hydronic heat exchangers are installed and connected.
|
The cabinets are placed in their correct location. Exact
measurements are taken and the cabinets are then
fastened into place. Every cabinet gets vinyl flooring beneath as a cabinet floor liner. Pex water lines are connected where needed
and heat exchangers for the hydronic heating system are installed.
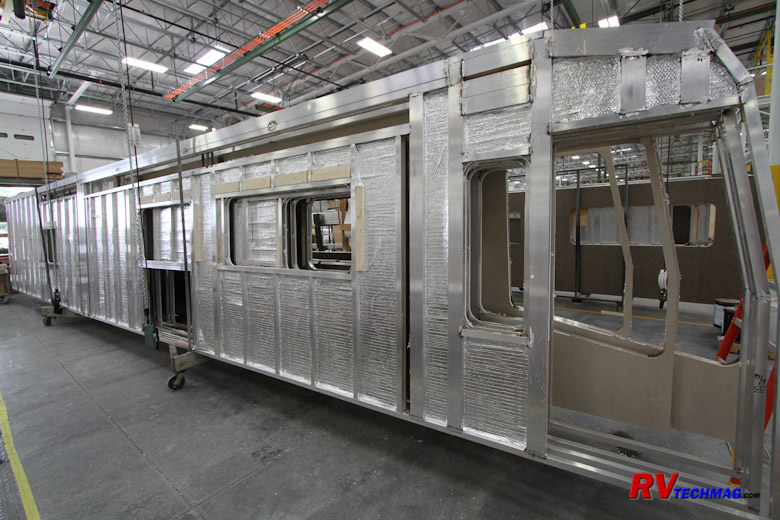
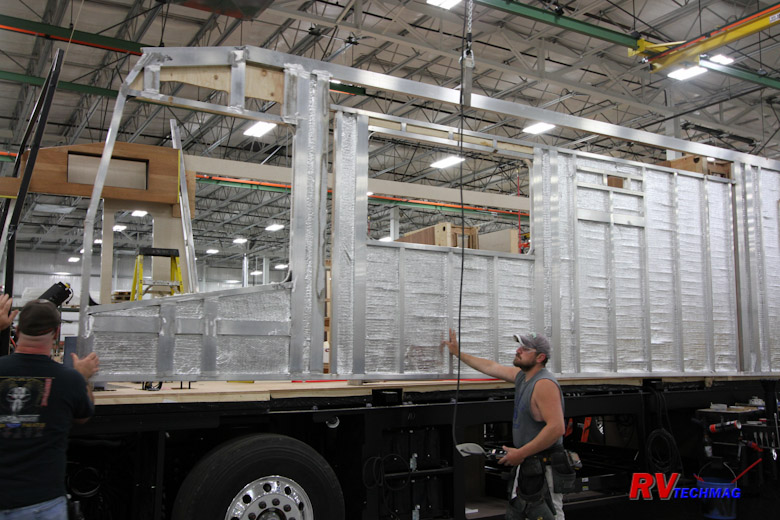
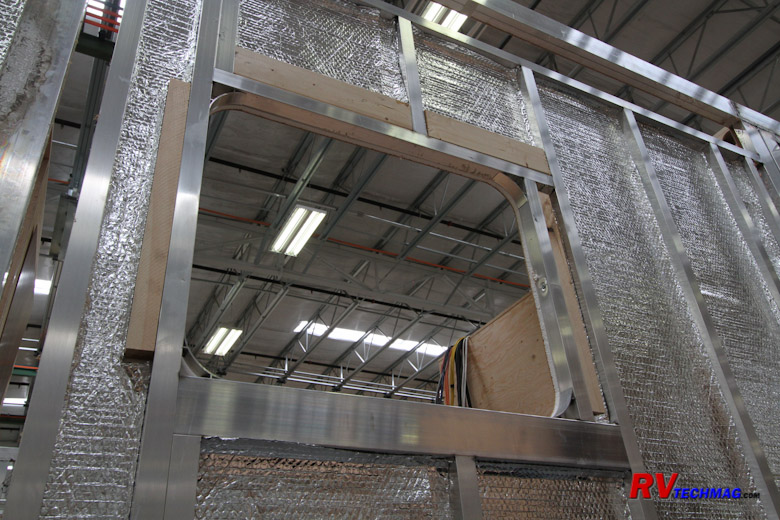
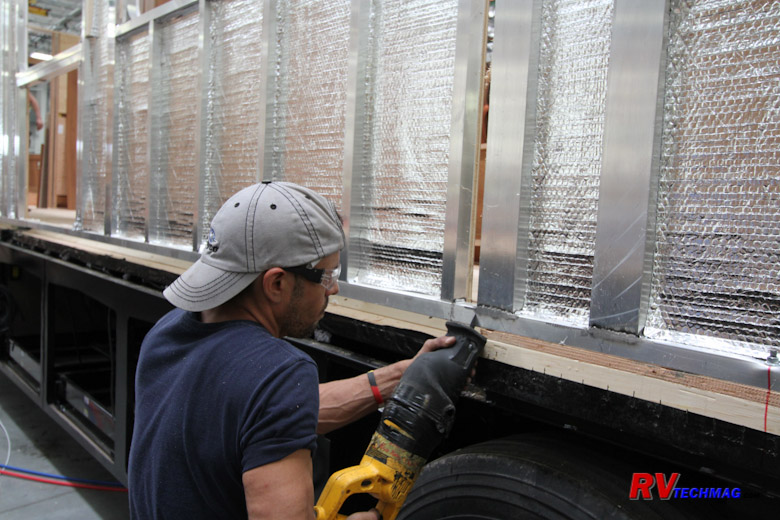
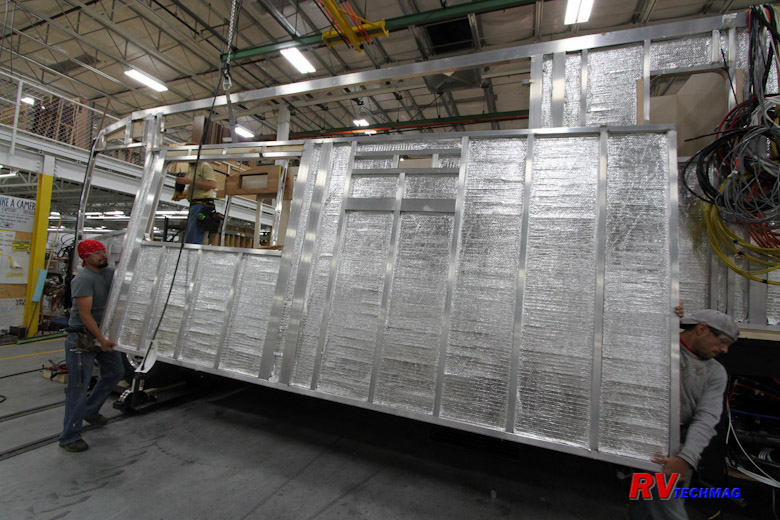
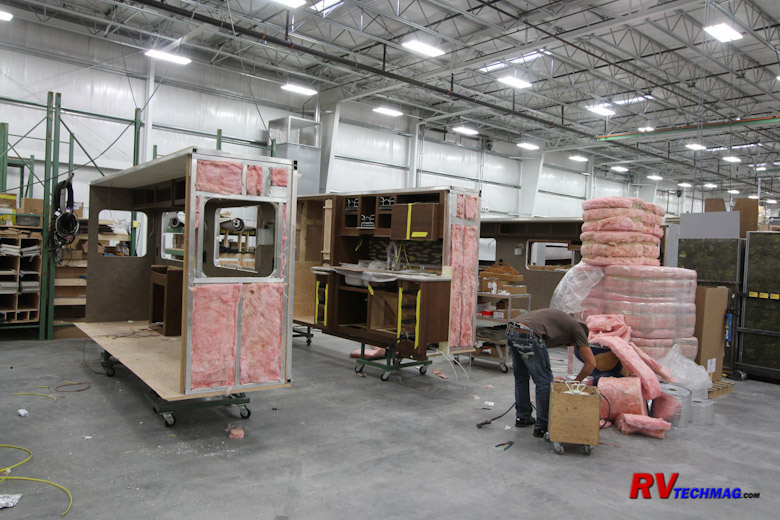
The sidewalls are assembled in a different area. The aluminum frames are covered with 1/2" plywood in most areas.
Reflective Flex Foil insulation is then applied to the outer surface of these interior walls. Every seam is taped and sealed
with foil
tape to ensure an air-tight seal. The sidewall assemblies are then set onto the floor of the coach with an overhead hoist.
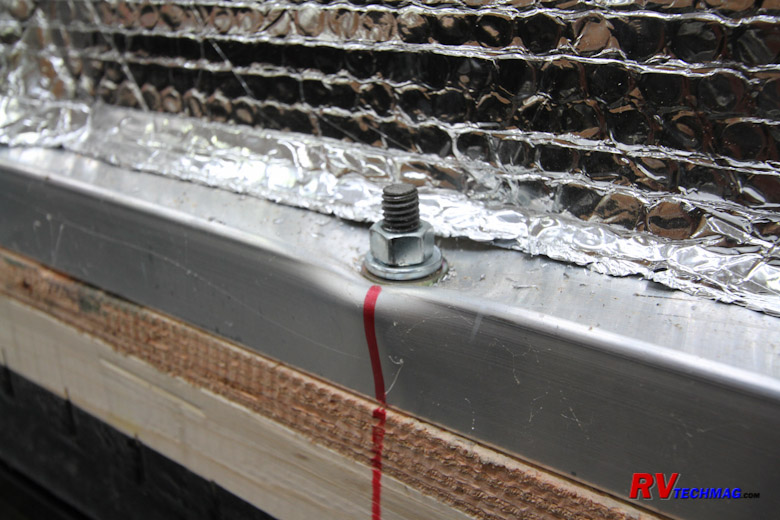
The sidewalls are fastened to the floor and steel sub-frame structure with bolts rather than screws to ensure
that no stripped threads could ever cause a fastener to pull out. Windows are framed in aluminum so that there is no potential for wood rot
in the event of a window sealant failure.
Entegra differs from most manufacturers in that the coach is built on its own aired up suspension. The slideout
walls are part of the sidewall, which is installed as a single assembly. This ensures that the slideout will be a perfect fit with the
opening, providing a tight tolerance fit and seal. Once the sidewall is bolted down to the coach the slideout portion of the sidewall is
cut out and taken away to a side area where the slideouts are built it. This same slideout wall will return to the coach later on when
the slideout has been completed.
|
|
|
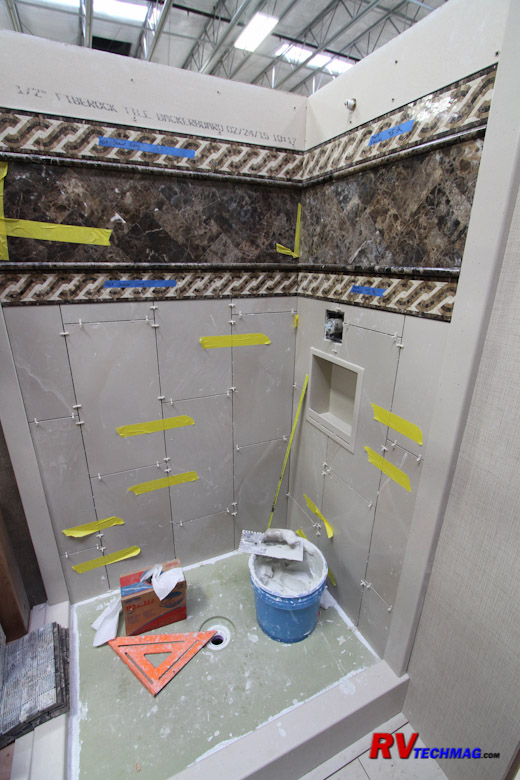
The coach then moves to the tile area. The Cornerstone's shower is painstakingly laid by hand with porcelain
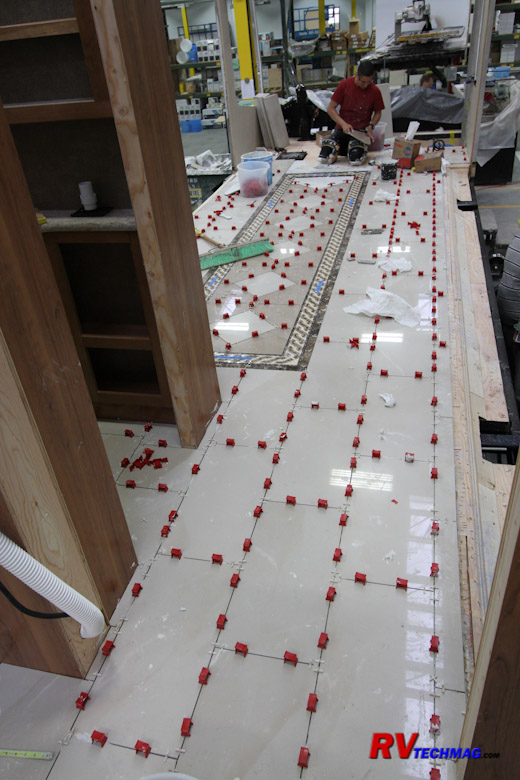
sidewalls and a decorative tile stripe. The floor is finished and then covered with ceramic floor tile. The main floor is made up of
glazed porcelain tiles with a hand-laid decorative inset. Special installation clips and spacers ensure that every tile joint is even
and that there aren't any tiles that are higher than the rest. These clips are then easily removed once the epoxy adhesive is dry.
The coach is then moved to an area to allow the adhesive to set. Once set, the joints are grouted and set aside
to harden.
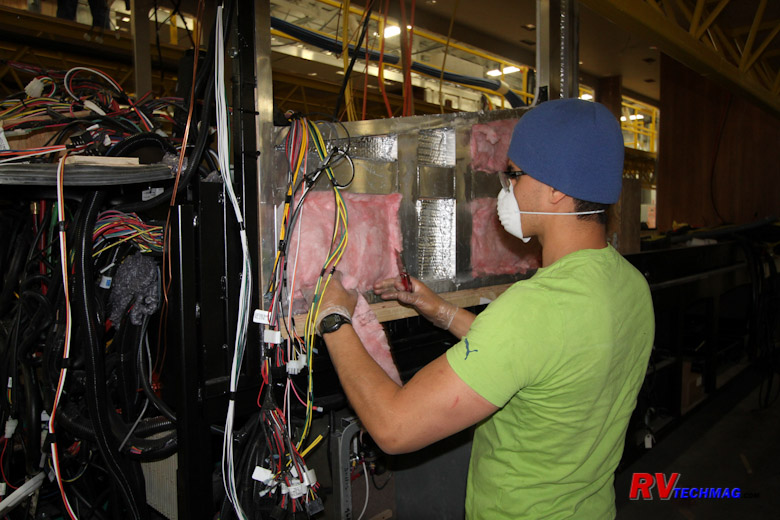
After tiling the coach sidewalls are insulated with fiberglass acoustical batt insulation. Every
possible location
is filled with insulation.

Buttoning Up the Exterior
At this stage we are now ready to apply the fiberglass skin to
the sides of the coach, install the roof and mount
the front and rear caps.
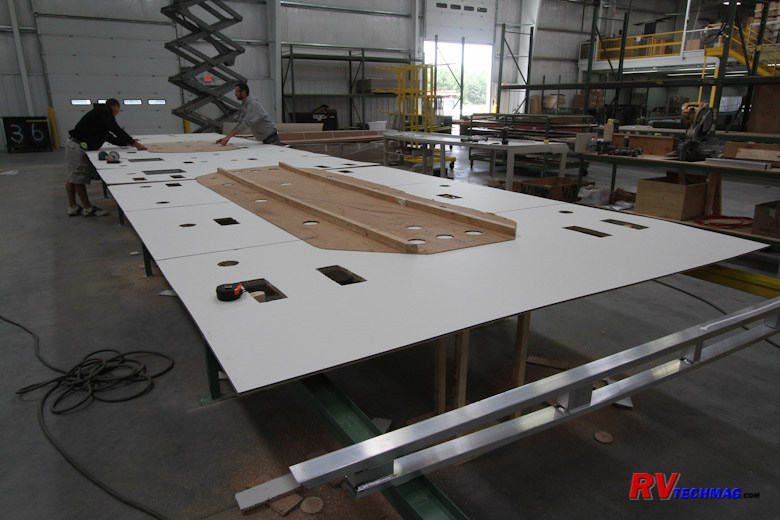
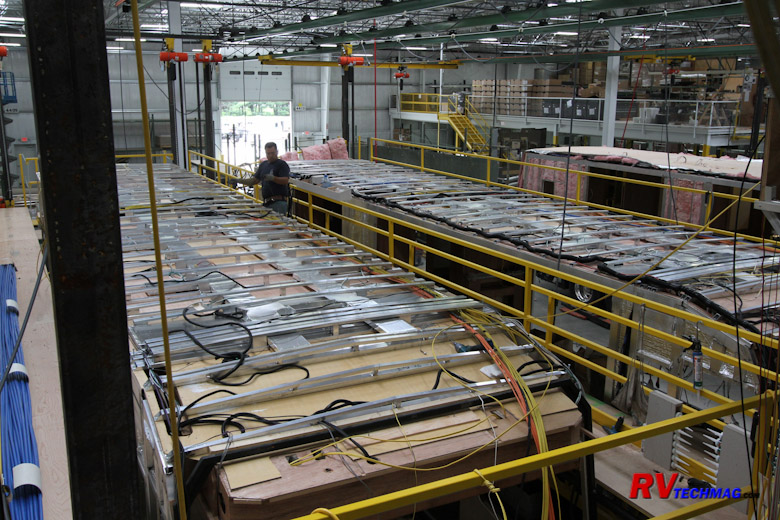
At this stage the ceiling panels are prepared in an adjacent area. These panels are then set in place on top of
the coach and the aluminum rafters are fastened to the sidewalls. Once the
panels are all in place all of the ceiling electrical wiring
is installed as well as the duct work for the air conditioning system.
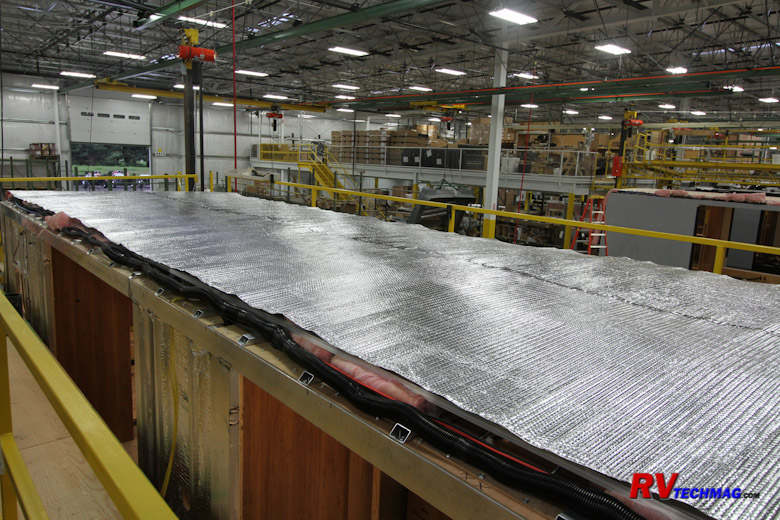
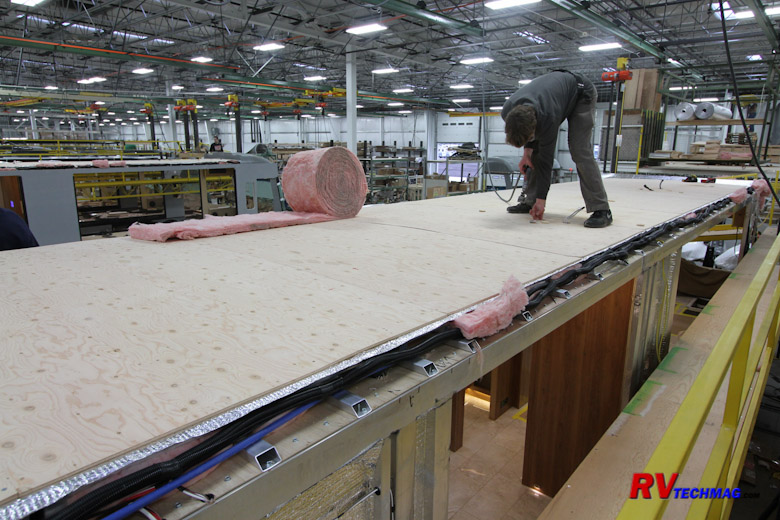
The roof is then stuffed full of fiberglass insulation, which is then covered by more Flex Foil. Next, 1/2" plywood
is glued and screwed to the aluminum roof trusses. Entegra makes a very strong roof with trusses at a maximum of 16" centers and some
cases where they are doubled or even tripled for additional strength in key areas.
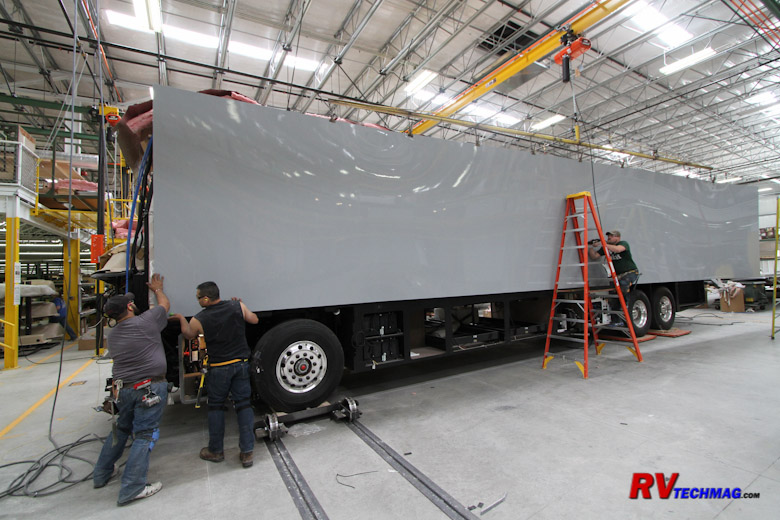
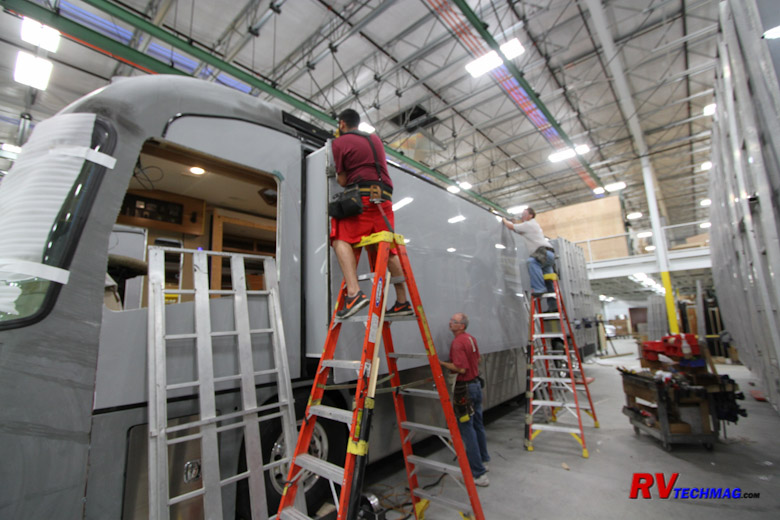
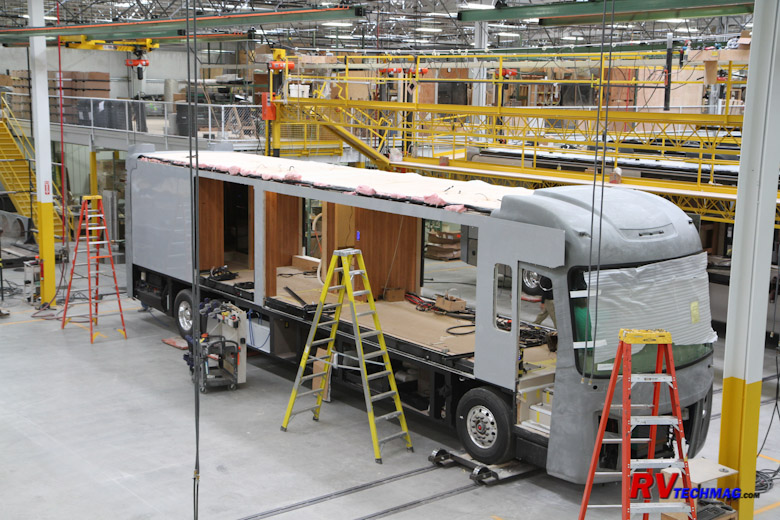
Massive sheets of fiberglass are then suspended by overhead hoists and brought over to the side of the coach.
Each panel is adhered to the sidewall framing with a special fast-set adhesive. Slideout openings and window openings are then cut out
with a router. The slideout pieces are then tagged and sent to the slideout department to be used in that same slideout location.
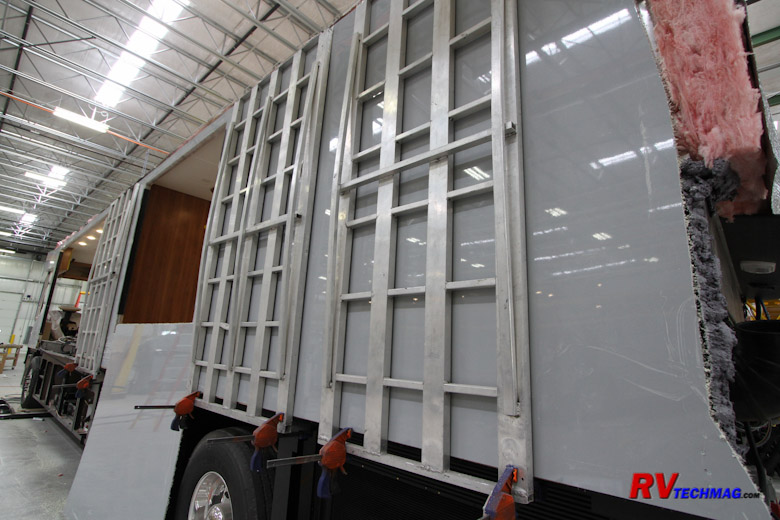
Large aluminum frames are used to clamp the fiberglass while the adhesive cures.
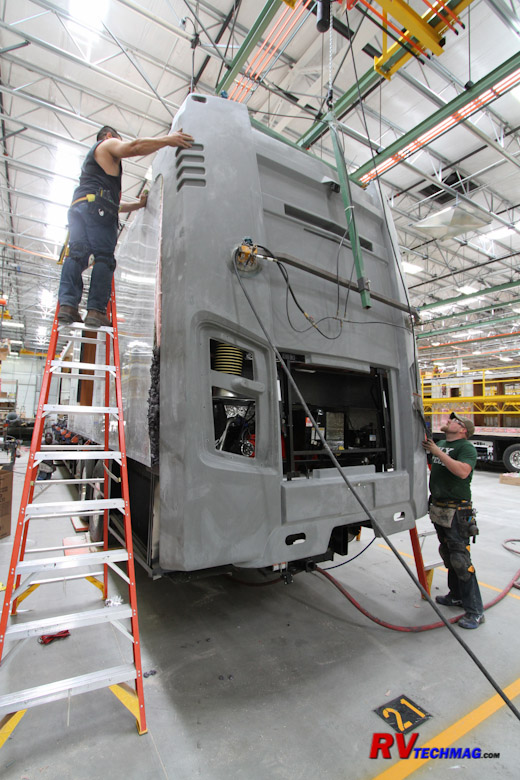
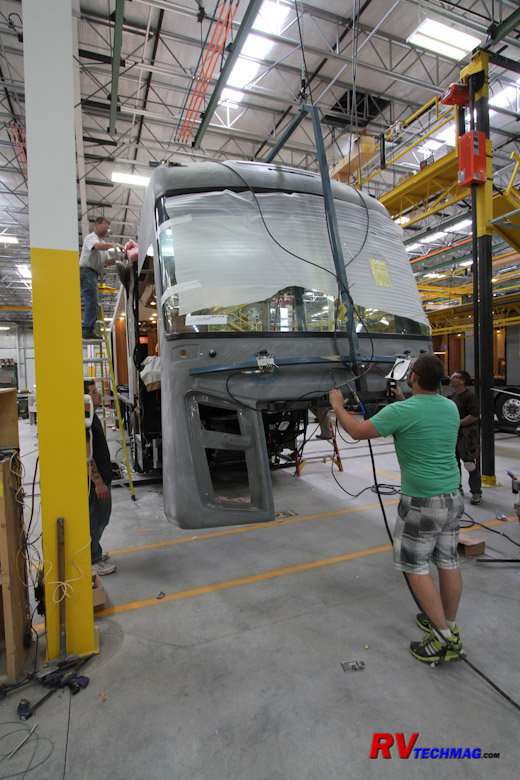
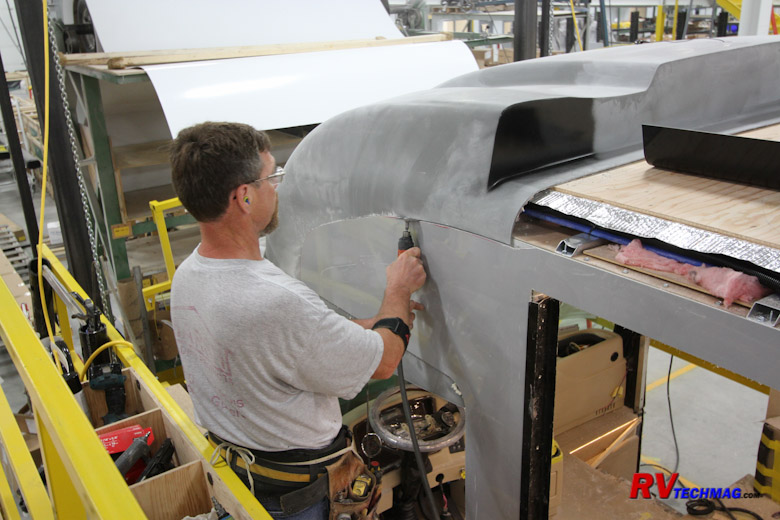
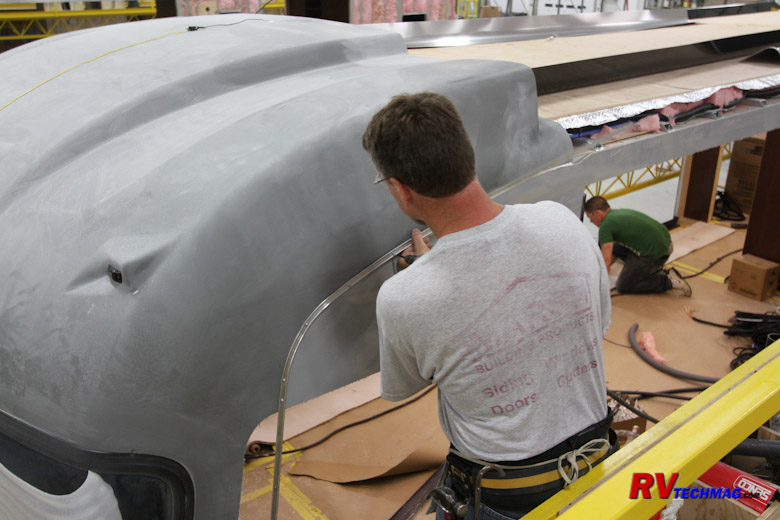
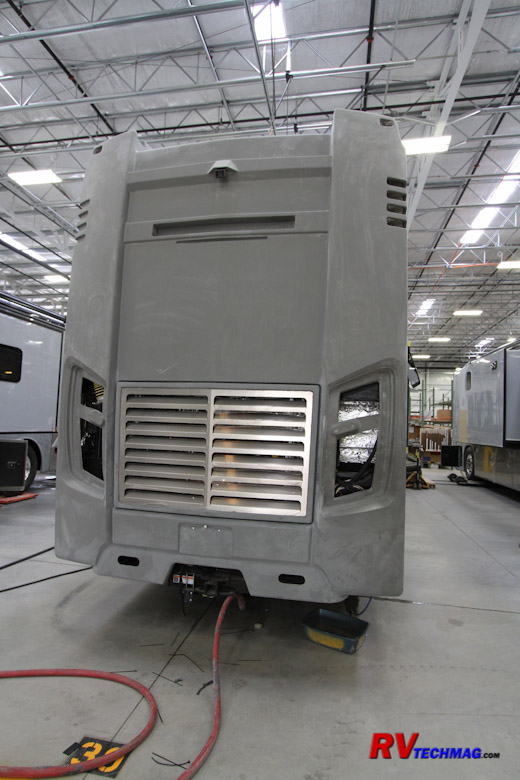
The front and rear caps are grasped by large jigs with vacuum pads and hoisted into place.
The front and rear caps are oversized so that the fiberglass extends and overlaps the sidewalls. A cutting
tool is used to make an exact cut for a perfect fit every time. Adhesive is applied beneath the joint and trim molding installed
over the top of the seam.
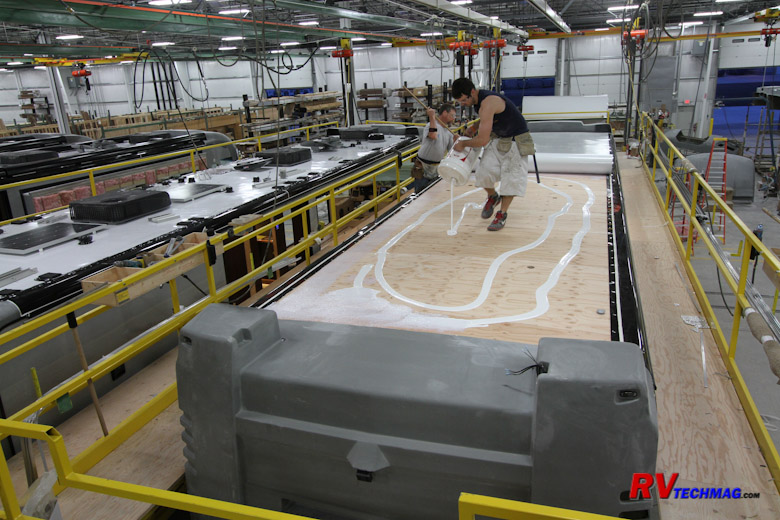
Adhesive is applied over the plywood roof and a continuous sheet of fiberglass is rolled out over the roof.
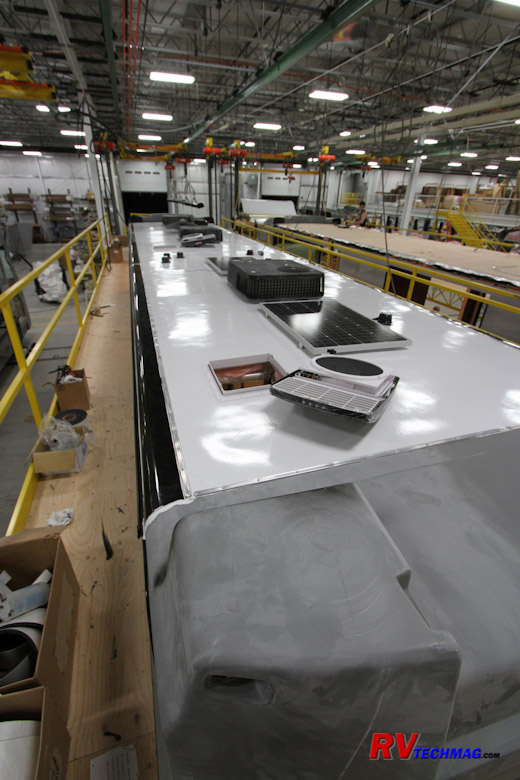
Edge molding is applied at the edges of the roof fiberglass and sealant applied. Once the roof adhesive has
set, the various roof mounted accessories, such as air conditioners, solar panels and fans are installed.
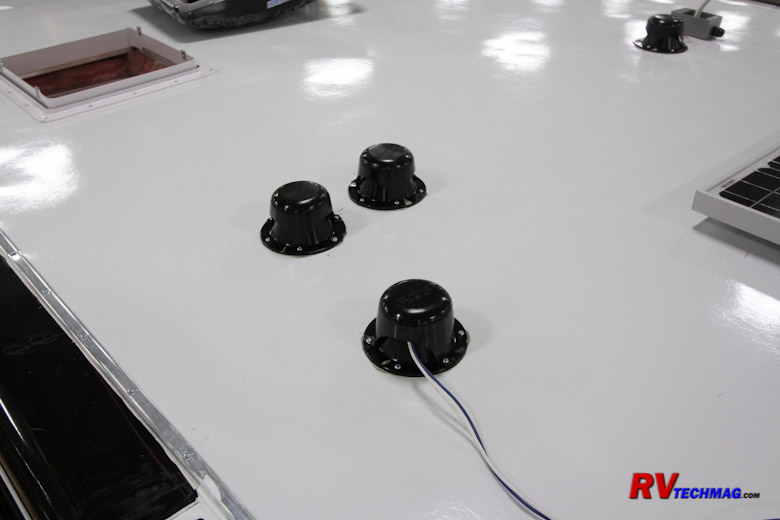
Plumbing vent pipes are fitted with protective caps. These caps are also used to feed wiring to the satellite
dish, broadcast TV antenna and solar panels. Wiring for these and other optional accessories is prewired and stored beneath the caps. Each
cap is sealed up with foam, which can easily be removed to retrieve this wiring in the future if desired.
Slideouts and Basement Accessories
Meanwhile, while all of this was going on, the slideouts were being built in a separate area.
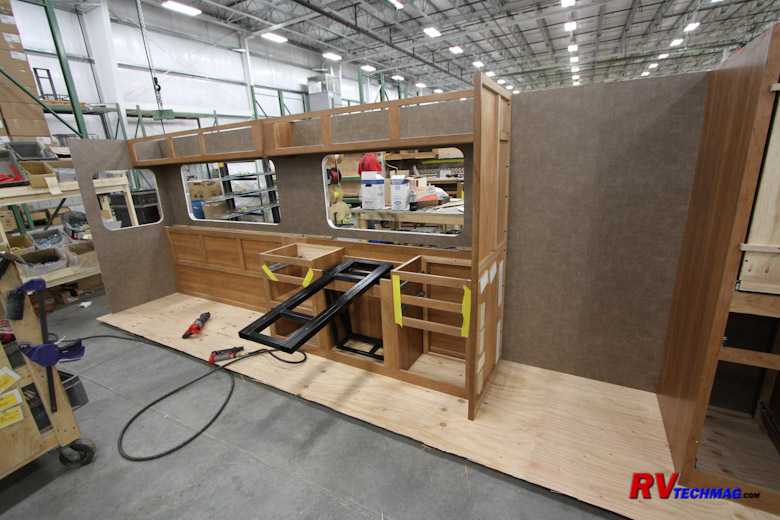
We saw earlier that the exterior slideout walls were removed from the coach and sent to the slideout
construction
area for further work. Each panel is then fastened to a pair of sides and a floor. The interior of the walls is fitted with plywood and
wall coverings are installed. Any cabinetry now begins to be installed at this time.
While the cabinetry is installed all of the electrical wiring is also run. Once the interior of the slideouts is
complete, fiberglass insulation is applied over the outside of the interior panel, which is already covered with Flex Foil. The completed
slideouts are then placed on carts, ready to be installed into the coach at the
appropriate time.
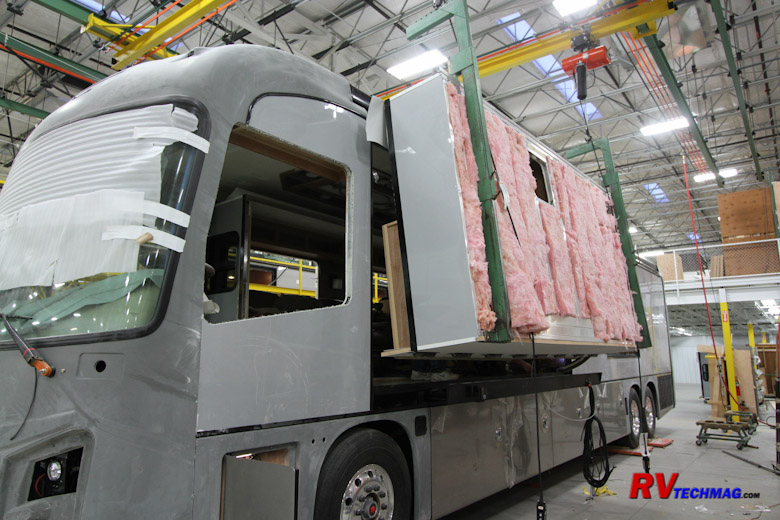
The completed slideout is then mounted to a carrier and hoisted into the coach where it is attached to the heavy
duty rack and pinion slide rail mechanisms. The various electrical connections are them made between the main coach and the slideout.
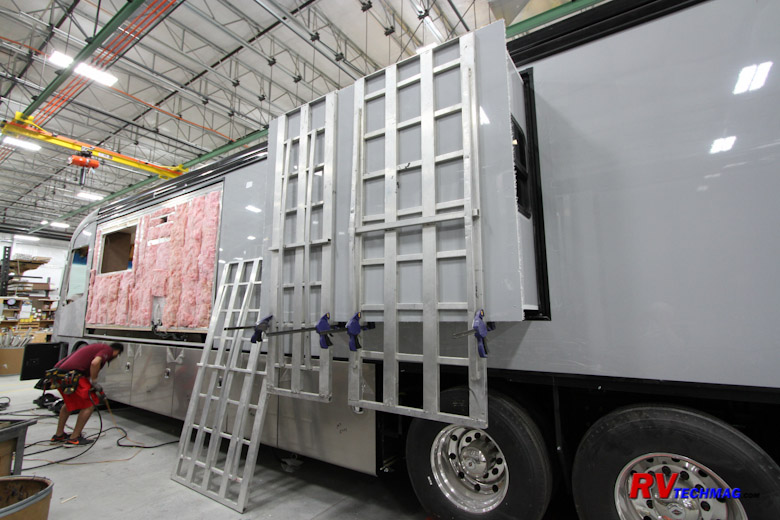
Once the slideouts are installed, the fiberglass panels previously cut out of the large sidewall sheet are
attached to the slideouts. Adhesive is applied and clamps are installed to hold the panels tight while the adhesive sets.
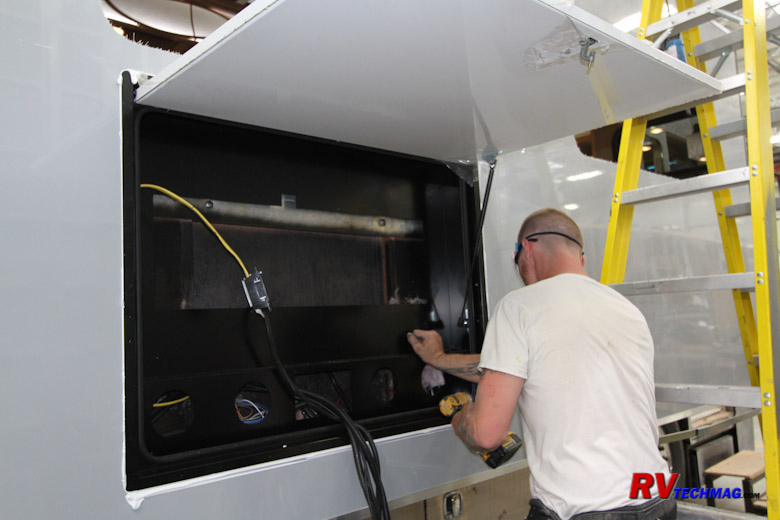
The exterior entertainment system is installed into the main patio side slideout. The 40" LED TV and all
related connections are installed. The optional freezer and slide tray are
also installed.
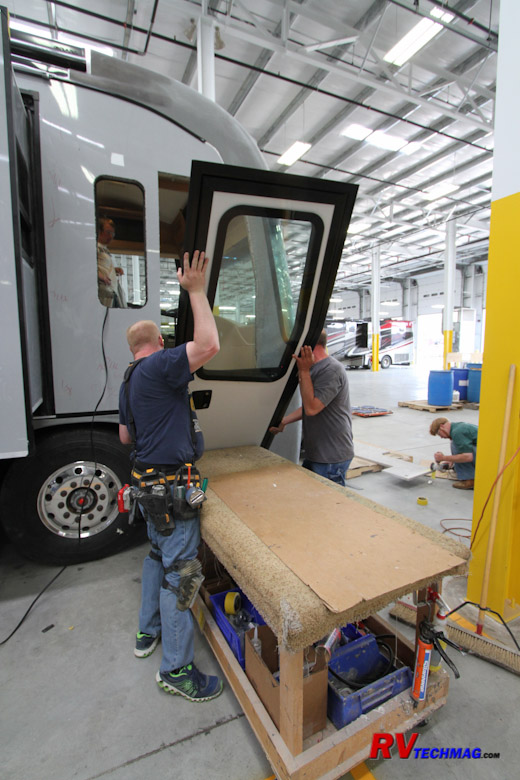
The rest of the basement cargo bay doors and the power lift engine access cover are installed. The
entry door is also installed and electrical connections completed.
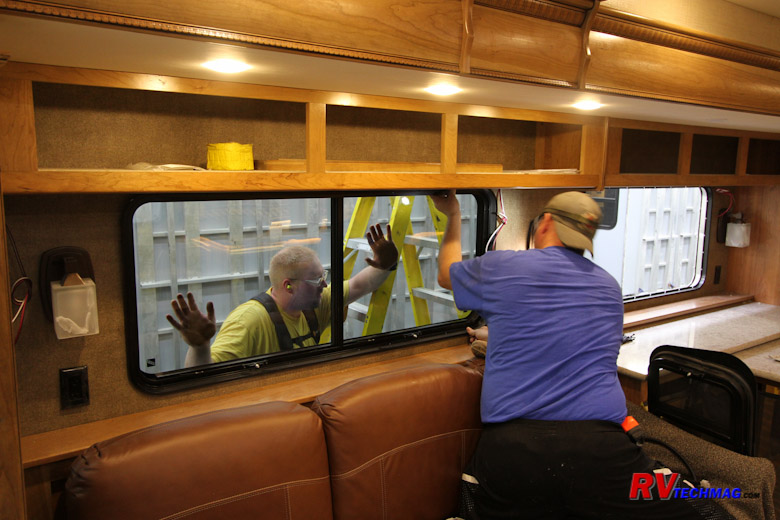
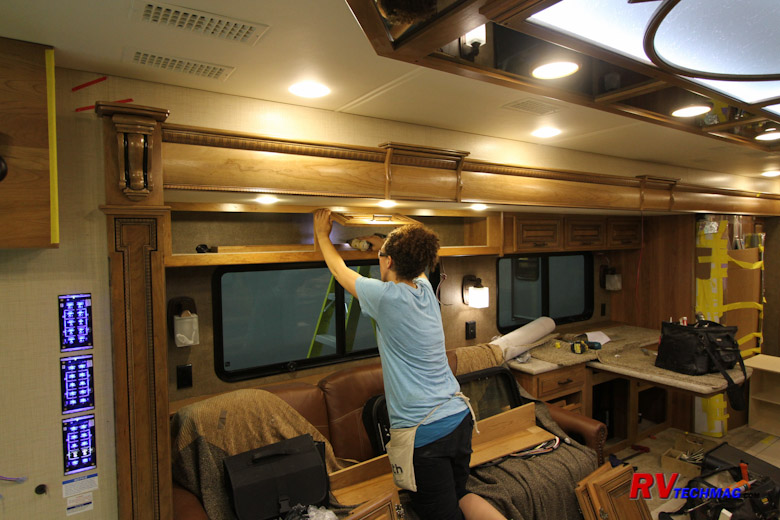
Windows are now installed into the coach sidewalls. Final wiring and plumbing connections are made in the interior
at the same time.
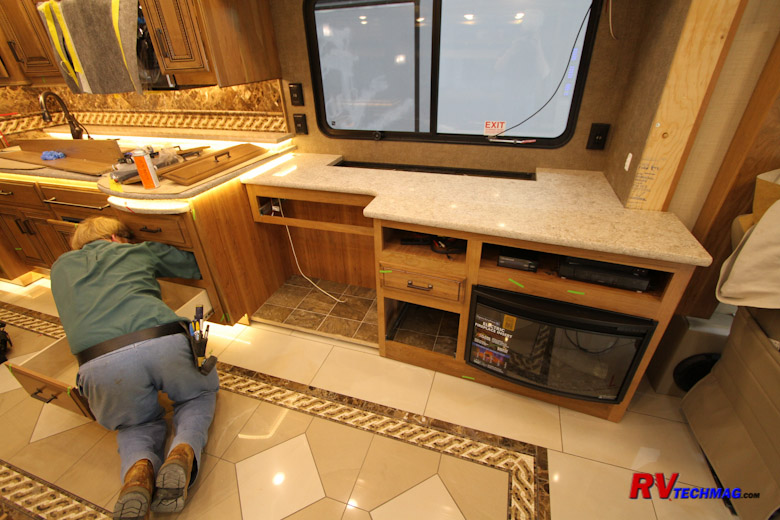
Once the cabinets and appliances have been installed a cart full of cabinet doors and drawer fronts arrives.
These are then installed and adjusted. Quartz countertops remain protected by cardboard until the coach arrives at Final Fit and Finish.
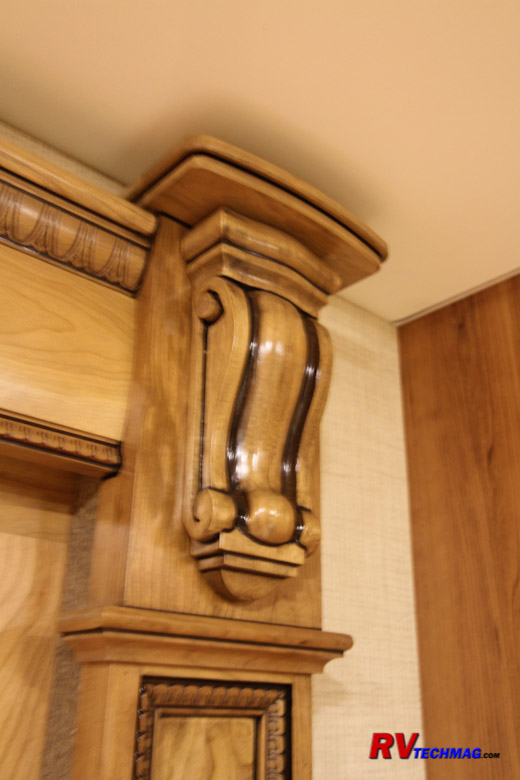
Fine Amish craftsmanship is evident in the millwork throughout the coach, as this trim piece shows.
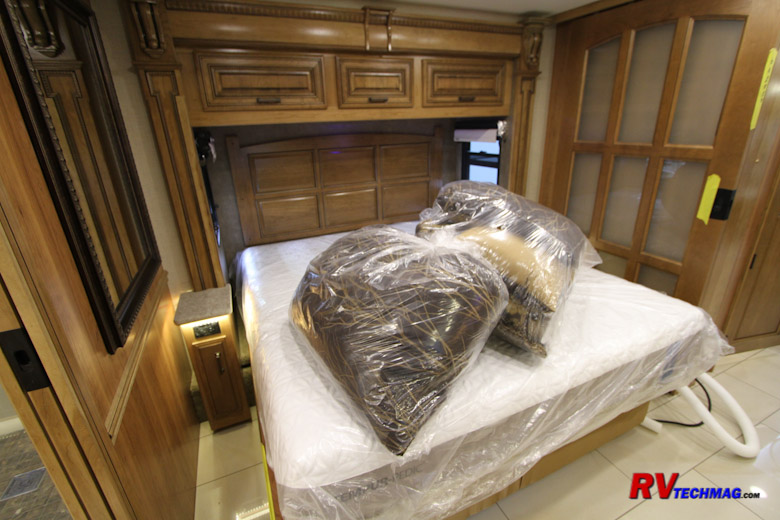
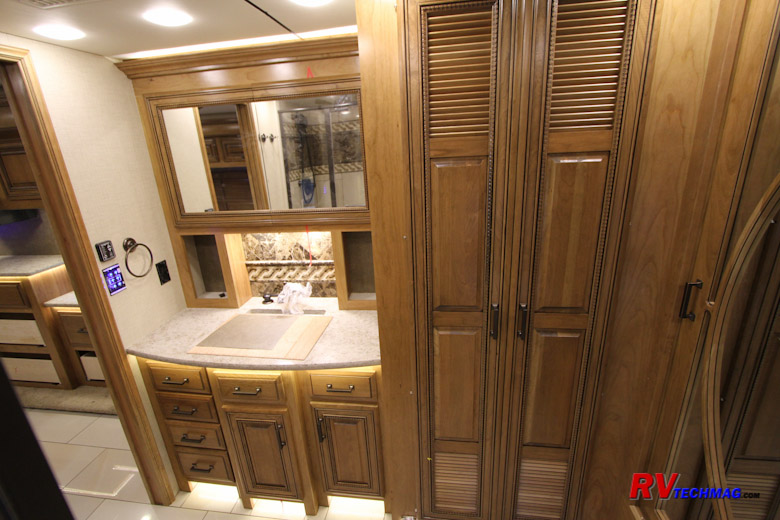
The Tempurpedic Cloud mattress is brought into the coach and the rear bath laundry center is finished off.

Exterior Finishing
Now that the basic build of the coach is complete it's time to dress up the outside.
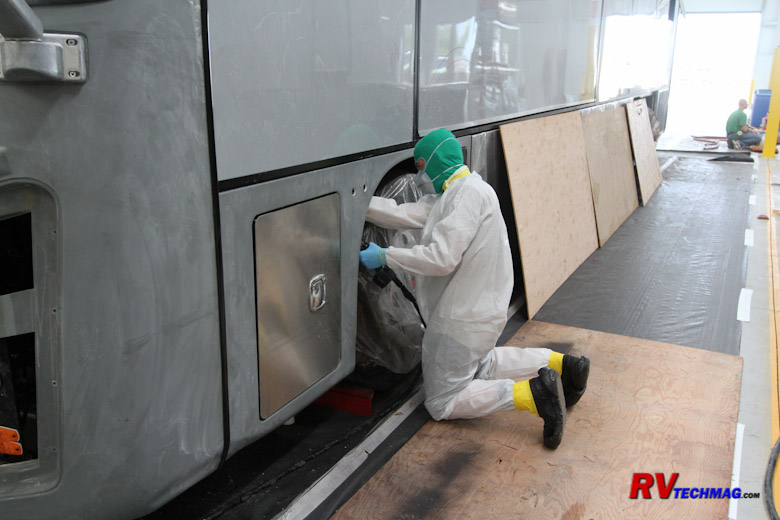
The first step is to park the coach over the undercoating pit. At this point
undercoating will be sprayed
on the undercarriage to seal it off and prevent any rust or
corrosion. Everything that needs to stay clean from the undercoating
is masked off to prevent overspray.

The next step is to take the coach to the paint shop. The coach is fitted with temporary mirrors, tail lights
and headlights so that it can be driven to Entegra's paint facility. Once there the coach is thoroughly cleaned and any areas that
should not receive paint are masked off.

The paint is applied in layers with the finest detail colors sprayed first. These colors are then masked off and
the next layer applied until all of the colors are complete. Once all of the color coats have been applied a razor blade is
painstakingly
used to remove any ridges between colors. Entegra uses Sikkens paint, which is of the highest caliber.
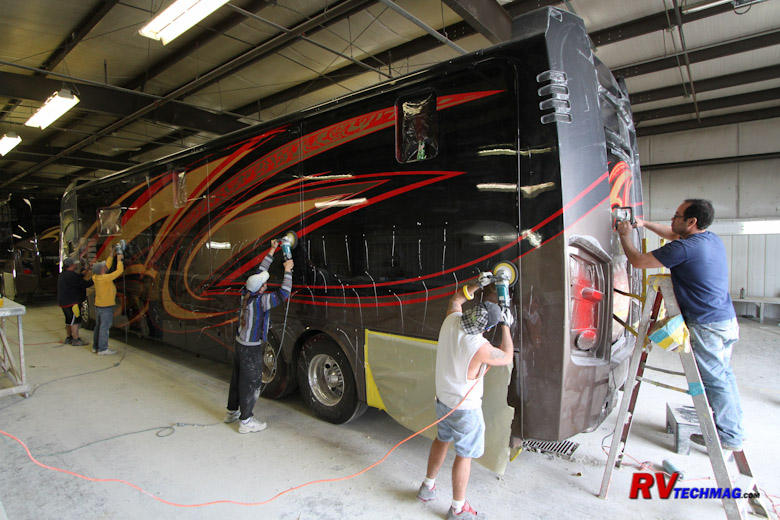
The polyurethane clear coat provides a durable finish and high gloss. Entegra sprays three coats of clear on a
Cornerstone. The coach is then cut and buffed to eliminate any orange peel or artifacts from the paint. Then another two coats of clear are
added for a total of five coats. The end result is a depth of shine that is unparalleled in the industry. Finally, the coach is buffed and
polished to achieve a smooth-as-glass finish that shows off the beautiful paint scheme beneath it.
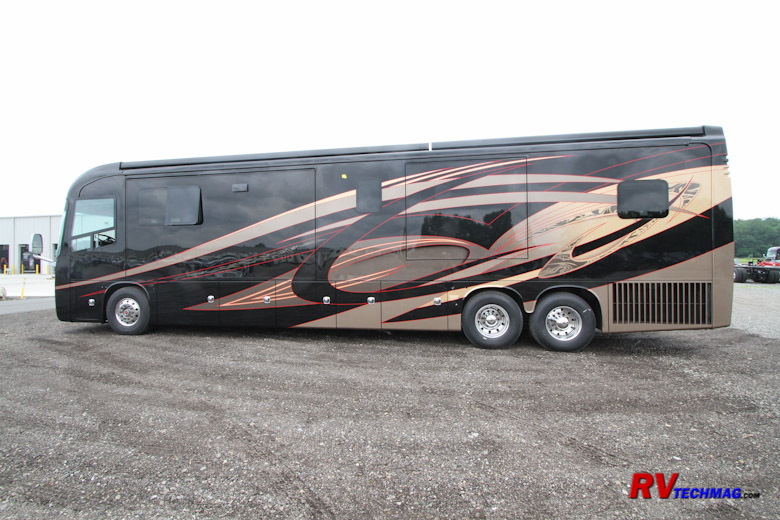
Once finished, the coach is returned from the paint facility to the main plant. It is then scheduled to enter the
Final Fit and Finish area.
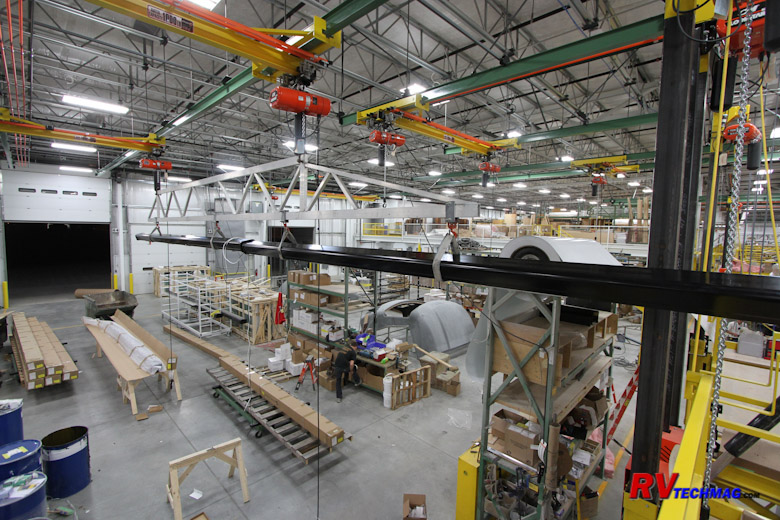
Final Fit and Finish begins with the installation of the awnings. The awnings are prepped and raised with a hoist
and carried to a scaffold area and installed on the coach. The coach then proceeds to other bays where the
temporary mirrors are replaced
and the various lighting and accessories are installed.
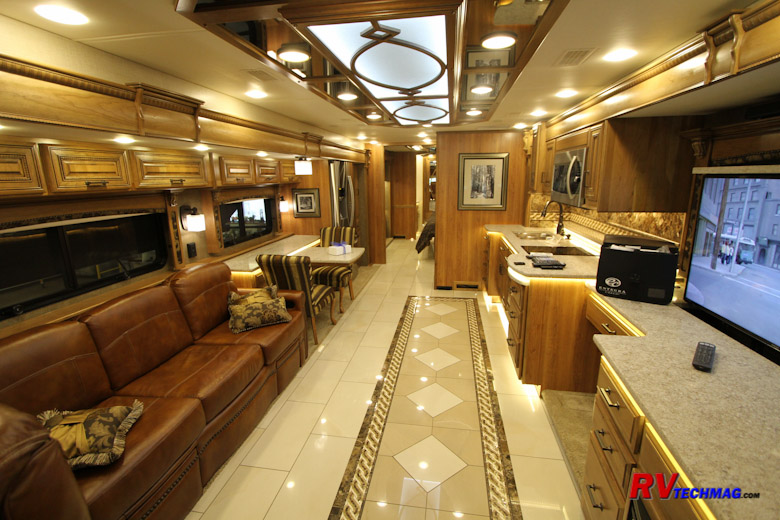
Final Fit and Finish installs every last item and sends the coach over to Quality Control for a final inspection.
Any defects are noted and sent back to be corrected before the coach is allowed to ship. The QC department is autonomous and does not
report to production so there is no pressure to ship until everything is just right.

As a last step the coach is driven onto a state of the art Hunter alignment rack where all six wheels
are checked for proper alignment and adjusted as needed.
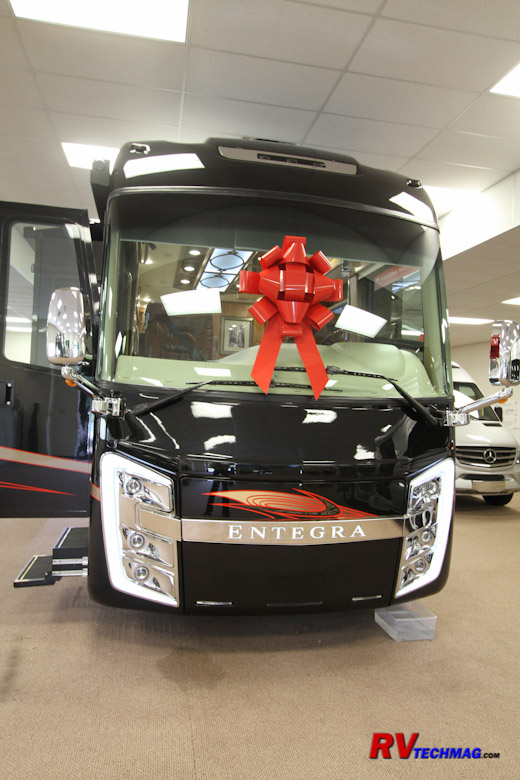
Finally, the coach is shipped to the dealer and I made the trip to National Indoor RV Center to pick it up
and this is what I was greeted with when I walked in the front door.
Final Observations
I've spent the first three weeks of the coach build at Entegra.
I've gotten to know many of the workers there
and spent time with them eating lunch, conversing with them and watching them work. I have to say that the idea of total quality control
is prevalent at Entegra. It's not just a philosophy handed down from management. Each and every worker really wants to do the best they can
and I've observed many instances of a production line worker discovering an area that could use improvement and within minutes the engineering
and production management teams were there checking it out and making immediate improvements. Their work ethic is reflected in the quality of
the work.
Quality Control is another area that was impressive. QC isn't something that is just done when the coach is finished.
Constant inspections are made as the coach travels down the assembly line. Any component shortages or issues with components that are not
performing as designed are noted on a traveler sheet that accompanies the coach. Every task that is performed is signed off as completed
by each worker and any issues are noted. The final inspection is intensive and thorough and nothing is allowed to ship until every last
item is as it should be. The end result is a coach that is ready for a dealer PDI with minimal effort.
For more details on how the finished coach performs be sure to view my review at
This Link.
Sources
Entegra Coach
(800) 517-9137
www.entegracoach.com
National Indoor RV Centers
(469) 277-1330
www.nirvc.com
Return to Home Page
If you enjoyed this article be sure to recommend RVtechMag.com to your friends, like us on Facebook or Twitter
or subscribe to our RSS feed.


|


