|
RV Electrical Tutorial
Chapter 8 - Low Voltage Circuits
Motorhomes are meant to be used when 120 volt shore power is not always available. It would be a real pain if
every time you walked into your motorhome you had to fumble around in the dark to start the generator so that you could turn
some lights on. That's why RVs have 12 volt battery powered electrical systems as well as 120 volt AC electrical systems. The
12 volt system provides power to operate the interior lights and the many other 12 volt electric systems within the coach.
These systems will be connected to the coach battery bank via a 12 volt fuse panel that is located somewhere inside the coach.
A converter or inverter/charger will also be connected so that these batteries can be recharged when necessary.
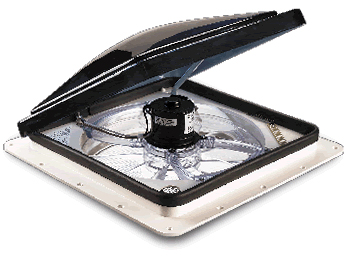
Typical Roof Vent Fans
Powered roof vent fans, such as the one pictures above, are common in today's motorhomes. In addition, you'll
undoubtedly find that you have a tank monitoring system to check the levels of your fresh water, propane tank, and holding tanks.
Your refrigerator and hot water heater are designed to run on either 120 volt AC current or propane. But, you will need 12 volt
power to operate the igniter and the control circuitry for thee. Even the light bulb inside the fridge is powered by 12 volt
power. Basement compartment lighting and power awnings are other examples as is the power steps that allow you to enter your
motorhome.
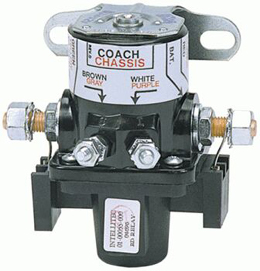
Battery Disconnect Solenoid
If you were to leave your motorhome parked for an extended period of time and shore power was not available,
the various loads on the 12 volt circuits would eventually drain the batteries. RVs have a battery disconnect switch, which is
generally located close to the entrance door. This switch controls a battery disconnect solenoid. This solenoid is a latching
solenoid. In other words you send it power to move it but you do not have to continue feeding it power in order to hold it in
that position. This makes it perfect for an RV because it won't consume any battery power when parked. Pressing the rocker switch
in one direction will shuttle the solenoid to the open position while pressing the rocker switch in the opposite direction will
send the shuttle in the other direction and close the circuit. This allows for an easy way to shut down the 12 volt power to the
coach while you are away. If you are plugged into shore power, this is not necessary.
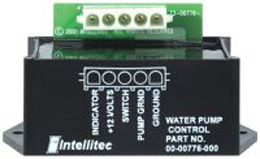
Water Pump Controller
Your fresh water tank needs a water pump in order to pump water to the faucets when you are not connected to a
campground's pressurized water supply. This pump generally has a number of switches located by the various plumbing fixtures so
that you don't have to run to a central panel to turn on the water pump. In order to allow all of these switches to control one
water pump a water pump controller is used. A water pump controller is another latching relay. IT allows a number of switches to
send a small trigger signal to turn the controller's relay on or off. The relay will then take a 15 amp power feed and send it to
the water pump to turn it on. The controller also sends out an "on" signal to all of the indicator lights that are located by the
switches throughout the coach so that the user knows whether the water pump is on or off.
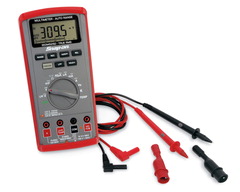
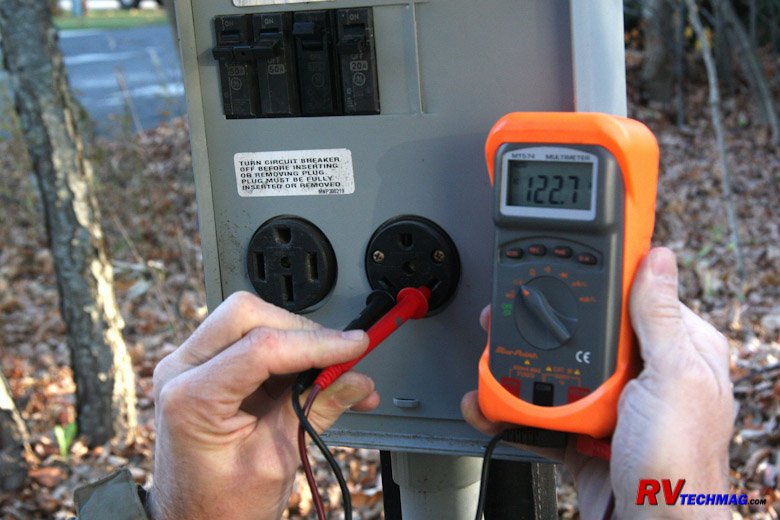
Voltmeter
Sometimes these systems can fail. Big surprise, huh?  When they do it's
time to do some testing to see where the failure is. A voltmeter is a huge help in this area although a test light can also be used
to test low voltage circuits. Personally, if you are a motorhome owner you should have a multi-meter of some sort. It's invaluable
for checking both high voltage circuits, campground pedestals, low voltage circuits, and continuity. When they do it's
time to do some testing to see where the failure is. A voltmeter is a huge help in this area although a test light can also be used
to test low voltage circuits. Personally, if you are a motorhome owner you should have a multi-meter of some sort. It's invaluable
for checking both high voltage circuits, campground pedestals, low voltage circuits, and continuity.
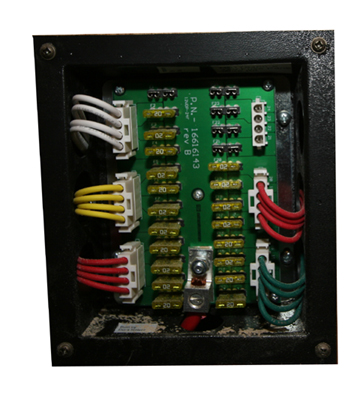
Typical Fuse Panel
The first thing to do is go check for blown fuses. Sometimes you can do this by removing the fuse and holding it up
to the light to determine if the fusible link is blown. Sometimes it's not so easy to see. The way many of these fuse panels are
labeled, or more accurately - "not" labeled. You may have trouble figuring out which fuse does what. The common ATO fuses are blade
type fuses with a plastic housing. There are bare spots on the back of the housing that can be used to test for voltage. If you
have power going into the fuse, but not out of it, you'll know you have a bad fuse. If you have a critical circuit you can also
replace those fuses with ATO style circuit breakers that plug right into place. There are also fuses with LED pilot lights that
will illuminate if the fuse is blown. So, you have lots of options when it comes to fuses.
If it's not a fuse, then you need to look farther. If the fuse does have power leaving it, test for voltage at the
device that isn't working. If you have power coming into the device it's either a bad device (light bulb, fan motor, water pump,
etc) or else you do not have a complete circuit. In that case I'd check for a bad ground. If you do not have power at the device
there is an open circuit between the fuse and the device. The first place to look would be at the switch. Test to see if there is
power coming into the switch and power exiting the switch. If the power is getting to the switch but not leaving it, it's time to
replace the switch.
Wire Gauge Capacity Chart
|
Wire
Gauge
|
Diameter,
in Inches
|
Current
Capacity
|
|
0000
|
.4600
|
600
|
|
000
|
.4096
|
500
|
|
00
|
.3648
|
400
|
|
0
|
.3249
|
320
|
|
1
|
.2893
|
250
|
|
2
|
.2576
|
200
|
|
4
|
.2043
|
125
|
|
5
|
.1819
|
100
|
|
6
|
.1620
|
65-80
|
|
8
|
.1285
|
40-50
|
|
10
|
.1019
|
30-33
|
|
12
|
.0808
|
20-23
|
|
14
|
.0641
|
15-17
|
|
16
|
.0508
|
7.5-10
|
|
18
|
.0403
|
5
|
|
20
|
.0320
|
3.3
|
|
24
|
.0201
|
1.3
|
|
28
|
.0126
|
0.5
|
Above is a wire gauge capacity chart. Wires are just like water pipes in that you can only pump so much stuff through
a given size pipe without losing pressure. If you try to send too many amps through too small of a wire the voltage will drop, the wire
will get hot, your device won't run properly, and you'll probably blow the fuse for that circuit. The above chart serves will give you
a good idea as to what wire gauge you will need to use if you want to add an accessory to your RV. For example, if you want to add a
small fan to your RV that has a motor rated at a 4 amp draw you will need to go with a #18. The 20 gauge wire is only rated for 3.3 amps
while the #18 can safely handle up to 5 amps so you always round up. If you want to install a water pump that pulls 20 amps, you'll need
to use a #12 wire. If you want to add an inverter and its DC battery draw is 400 amps you will need a #00 wire. Keep in mind that you
can always go to a larger wire gauge without any bad results but you can never go smaller. Also, the length of wire will also affect
its
ability to carry current. If you are running long runs of wire you may need to increase the wire gauge to allow for the extra resistance
incurred by the extra lengths. In this case, use the above wire gauge chart conservatively when choosing which wire gauge to use. Going
larger is always a safe bet.
In the next section we'll talk about inverters and inverter/chargers in more detail.
Index
|
